#Overview
Using this addon with Zapier allows you to trigger Zaps when users register on your site, update their profile, or when a tag is applied or removed.
For an example we’ll set up a workflow that triggers an on-site message in Intercom when someone completes a course.
#Setup
Navigate to Settings » WP Fusion and click on the webhooks tab to access the webhooks list. Click “Add New” to create a new webhook.
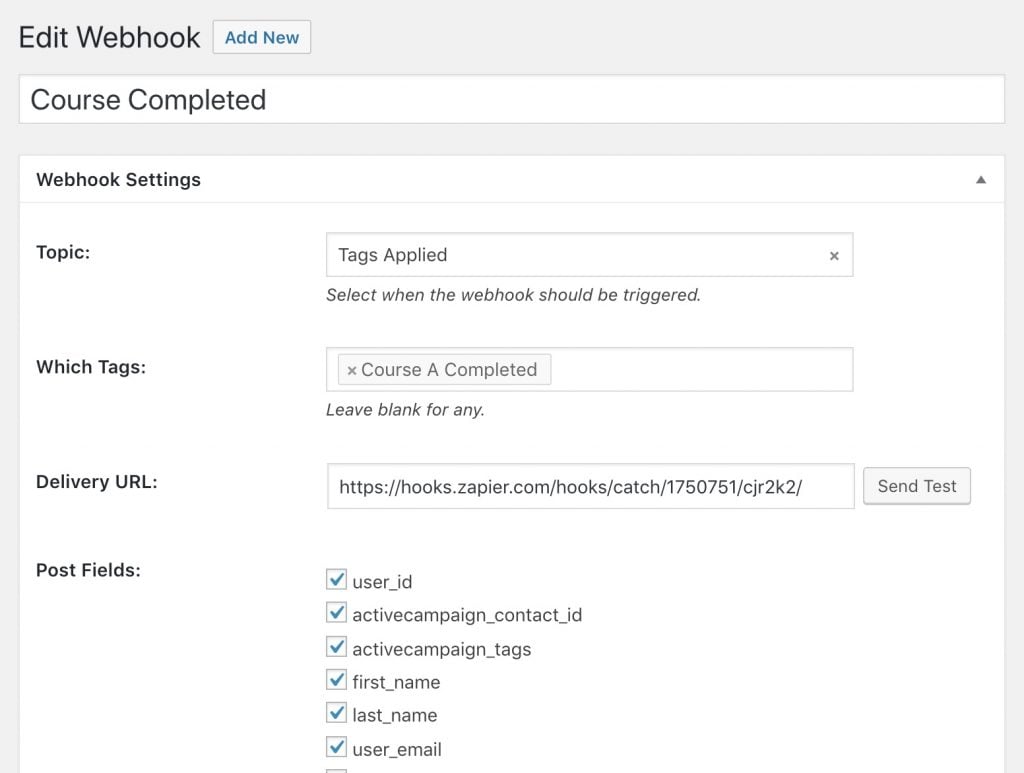
For the trigger select Tags Applied, and in the tag selection box select the tag that will be applied when the course is completed. For the Post Fields you’ll want to enable at least user_email so the user can be identified in Intercom.
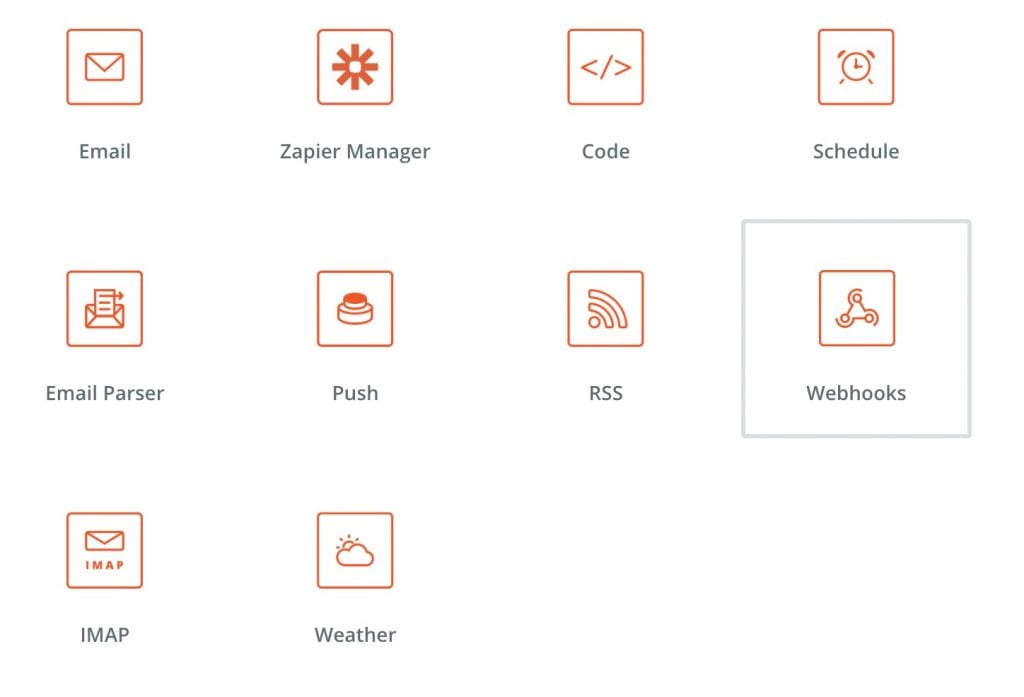
Then head over to Zapier and create a new Zap. For the trigger select Webhooks.

For the trigger type, select Catch Hook, and click Save + Continue.
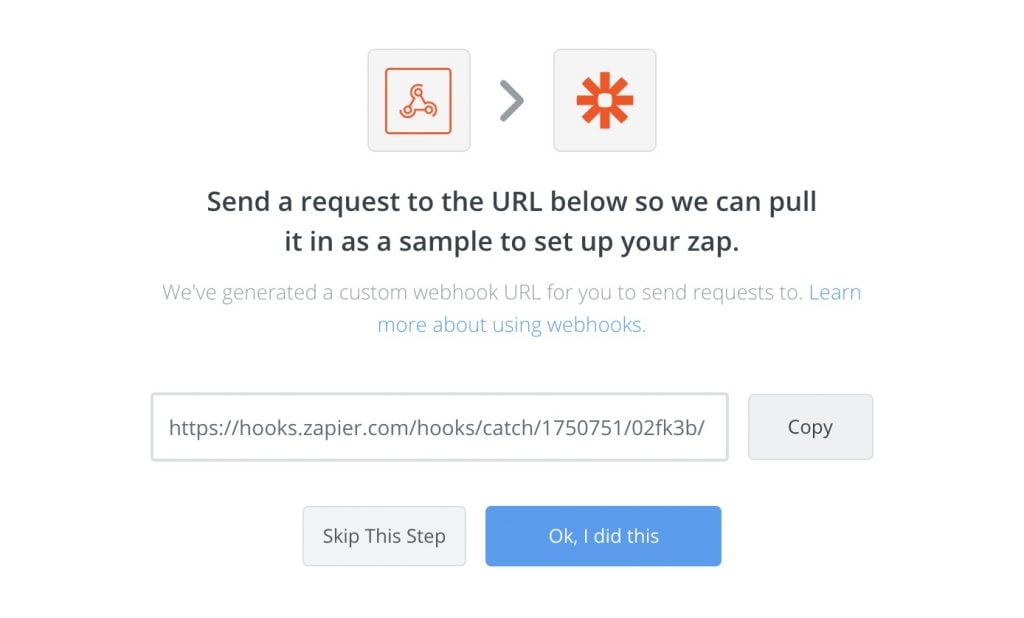
Zapier will give you a unique URL to use for your webhook. Copy this URL into the Delivery URL field in the webhook settings, and click the Send Test button. Then switch back to Zapier and click “Ok, I did this”.
On the next page you should see your incoming webhook listed, and you can expand it to see all of the data that was captured. If everything looks right, proceed to the next step.
#Actions
Now that the data is set up to be captured, you can use that data in any Zapier action. Here we’ve created a “Incoming Message” action in Intercom, which uses the data from the webhook to target the user and personalize the message.
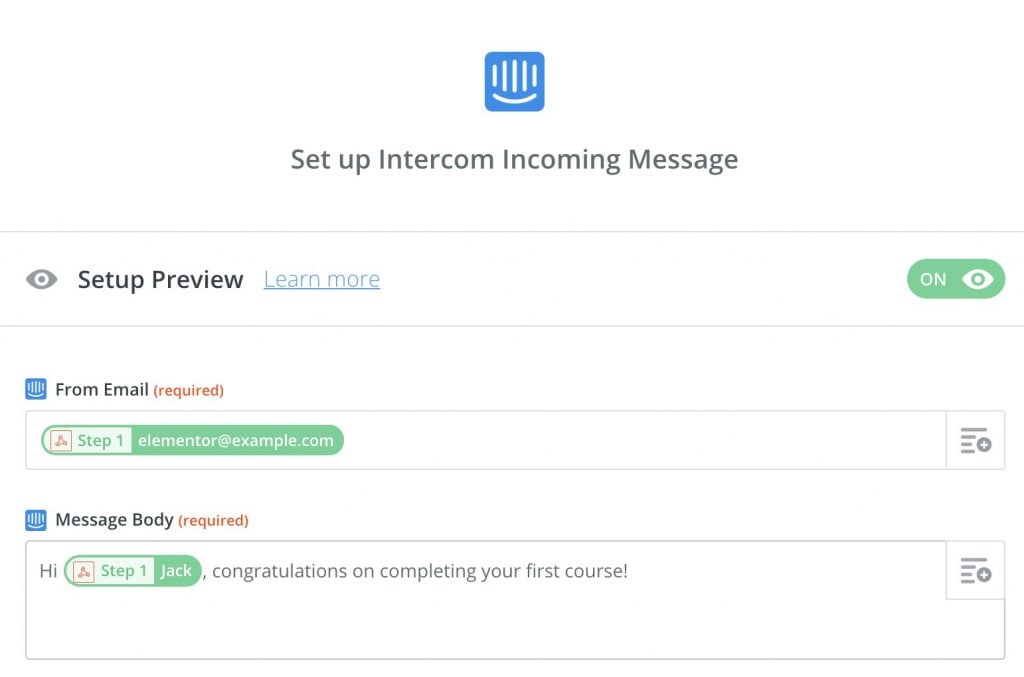
You can use the “Insert A Field” button to insert any dynamic data from the webhook.
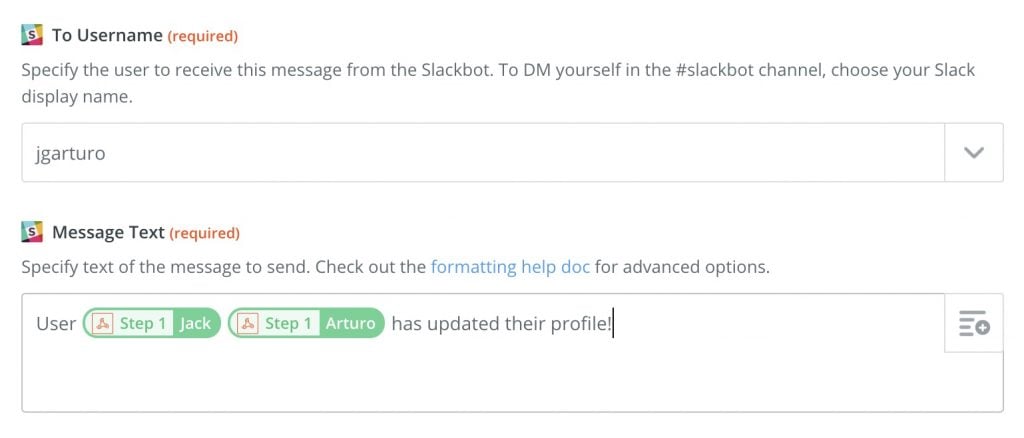
Above is another example, sending a direct message in Slack when a webhook has been received. If you use Slack to support your membership community you could use this to automatically congratulate members in a Slack channel when they reach goals on your website.