As an online store owner, there are several reasons why you might want to connect your WooCommerce store with Mailchimp. A WooCommerce Mailchimp integration allows you to:
- Track your products and orders directly in Mailchimp.
- Sync WooCommerce customer data and automate order processing.
- Gather leads into Mailchimp to automate email campaigns.
- Automate the sales email sequences and the customer onboarding process.
With this in mind, in this article, we’ll show you how to connect WooCommerce to Mailchimp – in two different ways. We’ll explain how you can set it up with the basic, native integration and WP Fusion. This post will be your complete guide to a robust WooCommerce Mailchimp integration.
Buy WP Fusion today to connect WooCommerce to Mailchimp, properly!![]()
Get Automated. Get WP Fusion.
Method 1: Using the native store connection
With the basic, native Mailchimp for WooCommerce integration, you can connect your e-commerce store to Mailchimp to sync store data and send targeted campaigns to existing customers.
For example, you can use it to communicate with customers by sending out product follow-ups, collecting feedback immediately after a purchase, or re-engaging customers who’ve abandoned their shopping cart.
In addition to this, you can benefit from personalization features and e-commerce features. You might generate personalization suggestions based on customer purchase history. Or, you might use abandoned cart emails to automatically follow-up and re-engage customers and recapture lost sales.
The native Mailchimp for WooCommerce integration also lets you place pop-up forms on your website and offers support for double opt-in.
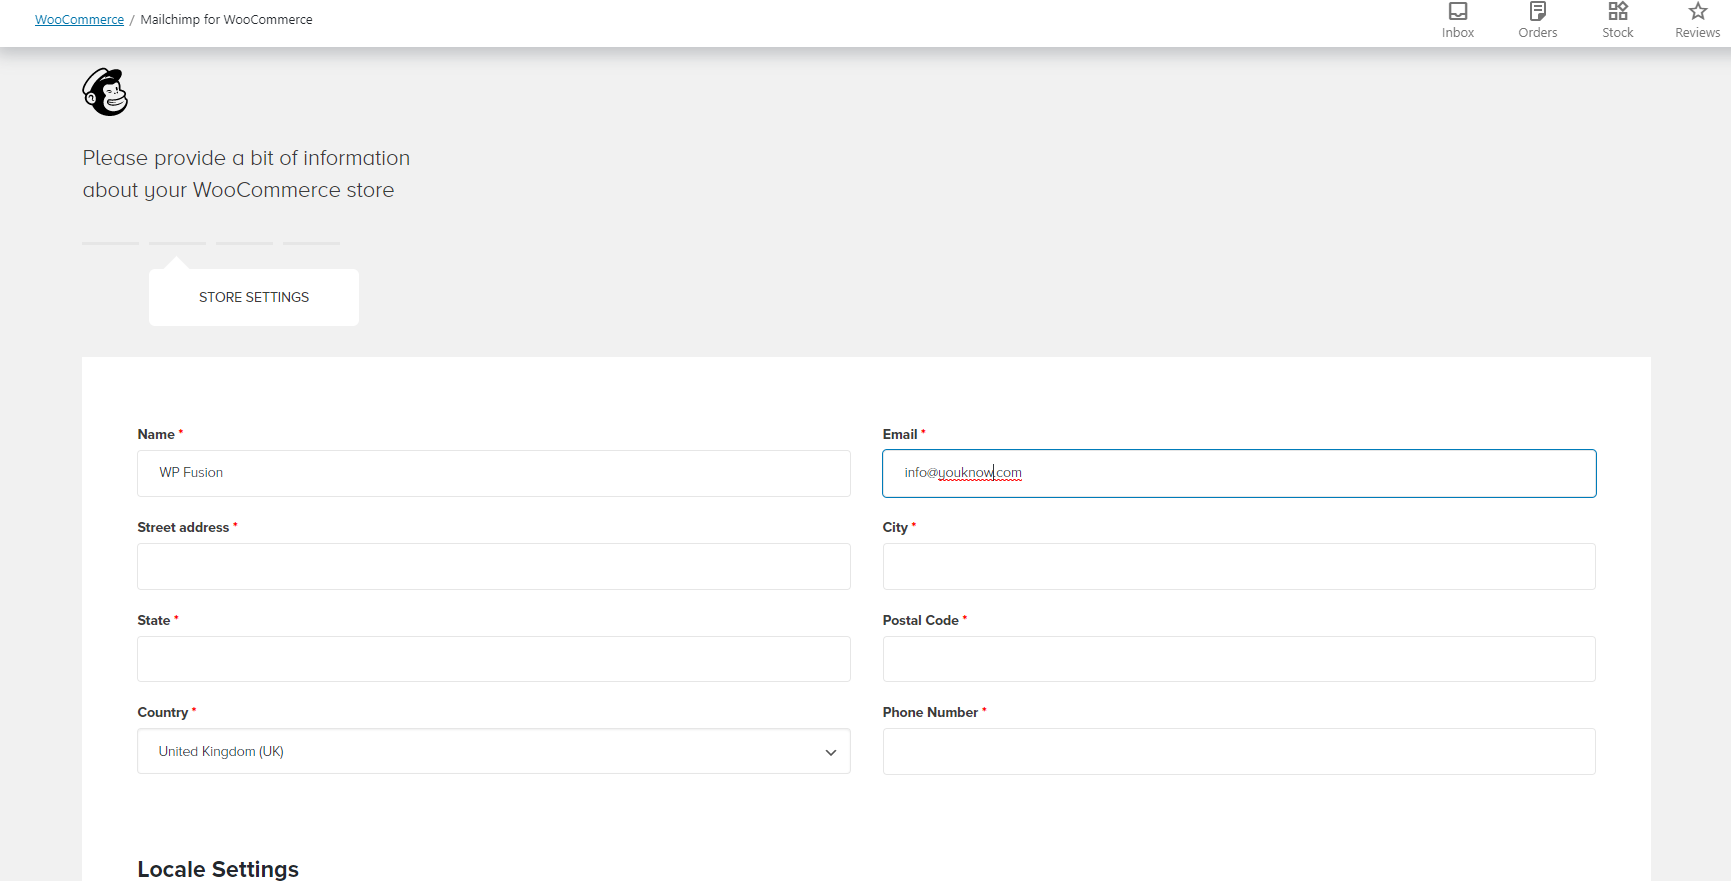
To get started with the native Mailchimp for WooCommerce integration, you need to first install and activate the Mailchimp for WooCommerce plugin to your WordPress website.
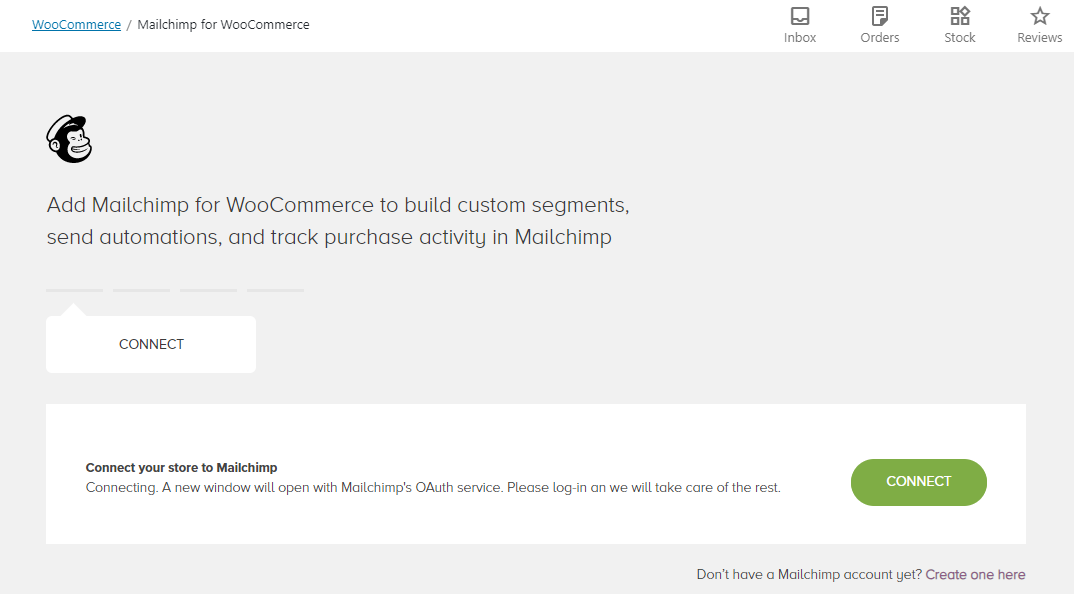
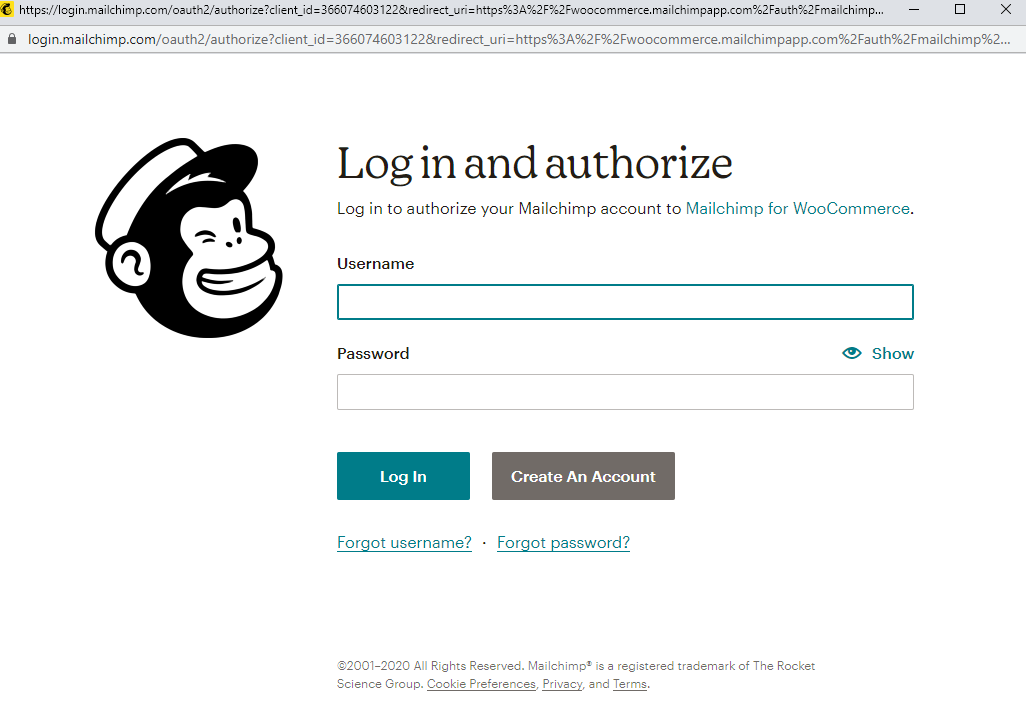
Next, simply connect the WordPress plugin with your Mailchimp account by going into the plugin’s settings page from the WordPress admin panel.
Finally, configure the settings to complete the data sync process.
Once the data sync process is complete, you can do neat things like:
- Send receipts, invoices, and shipping confirmations to customers.
- Add product recommendations to abandoned cart emails to recapture lost sales.
- Add customized pop-up signup forms to your online store to convert website visitors.
- Create purchase-based segments to use with targeted campaigns.
However, the options available to you with the basic WooCommerce Mailchimp integration are pretty limited.
It doesn’t give you any options for customer segmentation, custom alerts, or two-way data sync. For example, if a customer updates their profile on your store, it won’t be updated in Mailchimp. Similarly, if you update a contact in Mailchimp, their data won’t be synced to WordPress.
Method 2: Using WP Fusion
WP Fusion lets you connect your WooCommerce store to Mailchimp in a robust way. You can segment existing and new customers based on different factors including products purchased, coupons used, and lead sources. This lets you generate various interest groups for targeted email campaigns.
In addition to this, the WooCommerce Mailchimp integration lets you follow up with customers about recent orders, alert them when you add new products to the store or new products in their favorite categories or reward them on special occasions. This way, you can send targeted communications to customers and boost conversions.
Buy WP Fusion today to connect WooCommerce to Mailchimp, properly!![]()
Get Automated. Get WP Fusion.
Here’s what you need to do to connect WP Fusion to WooCommerce and Mailchimp:
- Get the WP Fusion plugin and install it on your WordPress website.
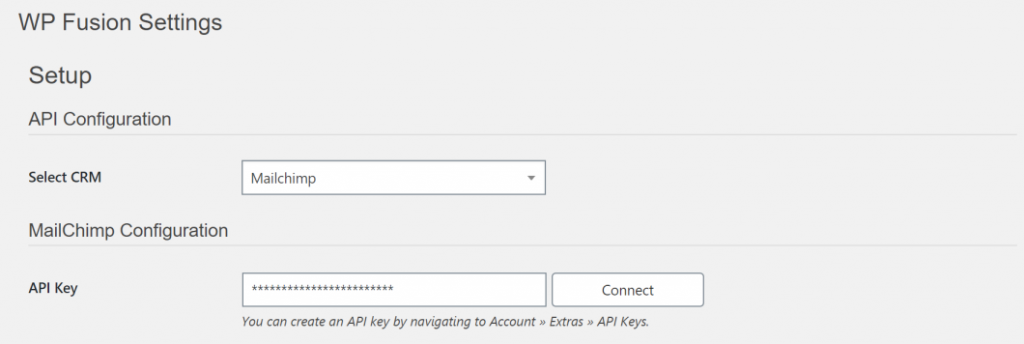
- Once that’s done, select Mailchimp as your CRM and enter the Mailchimp API key. You can get the API key by going into your account settings from the Mailchimp dashboard. Click the Connect button.

- Once that’s done, your WooCommerce customers will start syncing to Mailchimp.
Advanced connections using WP Fusion
If you’re using Mailchimp and WooCommerce, you can leverage these advanced connections with WP Fusion:
#Segment customers
With the WP Fusion WooCommerce Mailchimp integration, you can segment customers simply by tagging them in Mailchimp based on the products they purchase from your WooCommerce store.checkbox
To set this up, open the WooCommerce product up in the Edit product screen.
Next, scroll down to the Product data section and navigate to the WP Fusion tab.
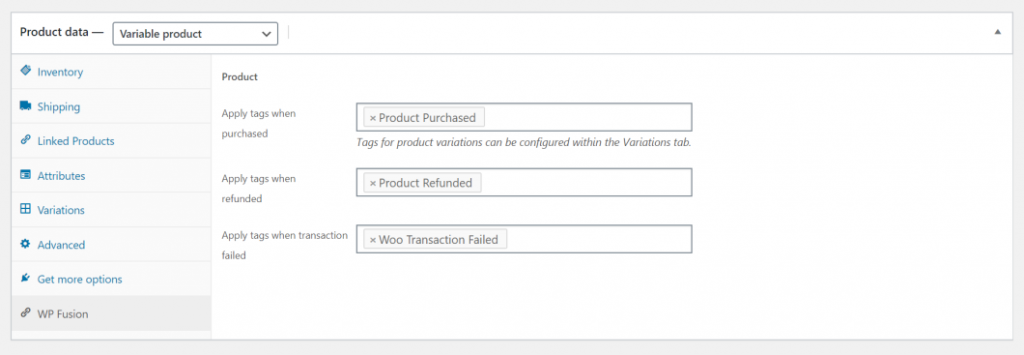
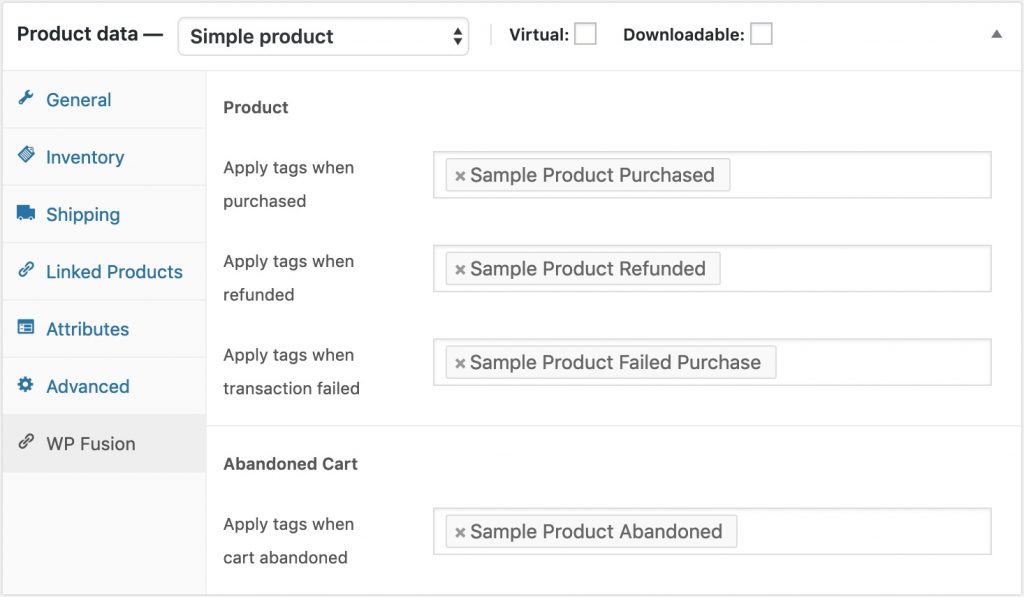
From here, you can select which tag to apply when a certain condition is met. For example, you can choose to apply the Product Purchased tag whenever a customer successfully purchases a product. Or you can apply the Woo Transaction Failed tag whenever a transaction fails.
If you have the Abandoned Cart Addon activated on your online store, you can configure tags to be applied when the product is left in a customer’s abandoned shopping cart.
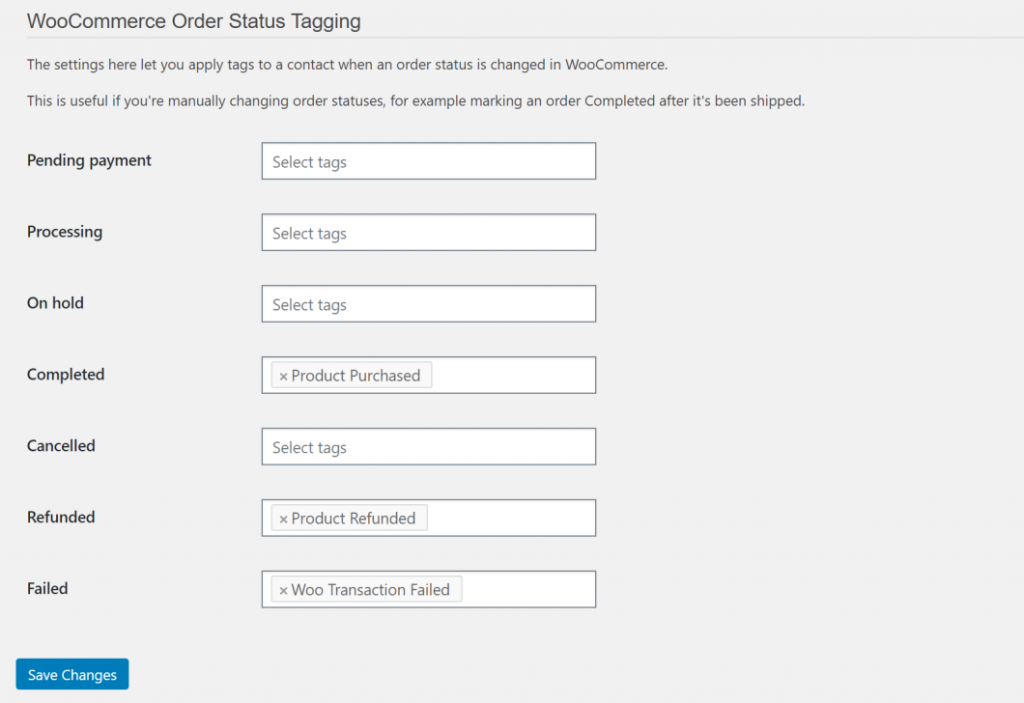
It also lets you apply tags to a contact when an order status is changed in WooCommerce for all of your products. To do this, simply head over to Settings » WP Fusion » Integrations and select the appropriate tags for each field under the WooCommerce Order Status Tagging section.
You can also specify tags to be applied whenever a customer purchases products from a specific WooCommerce product category. Open the category you’d like to apply tags to in the Edit category screen.

Scroll down till you reach the WP Fusion – WooCommerce Settings section and select the Mailchimp tag you’d like to apply.
#Export data
With WP Fusion, you can easily export historical purchase data to Mailchimp in just a few simple steps. All you have to do is set up a background task in WordPress and all of your customers and orders will be exported to Mailchimp.
To do this, head over to Settings » WP Fusion » Advanced. You’ll see various checkboxes under the Batch Operations section. Tick the Export users checkbox under the Batch Operations section.
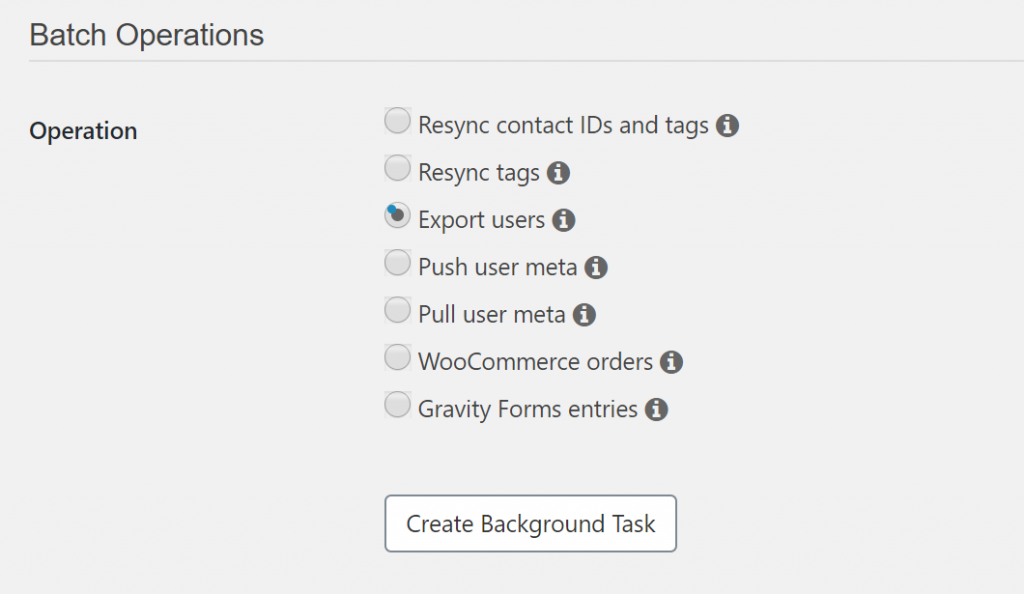
This automatically finds all WordPress users without a matching Mailchimp contact record and exports them as new contacts to your Mailchimp list.
From the same screen, you can use WP Fusion to sync all historical orders to Mailchimp. All you have to do is tick the WooCommerce orders checkbox under the Batch Operations section.
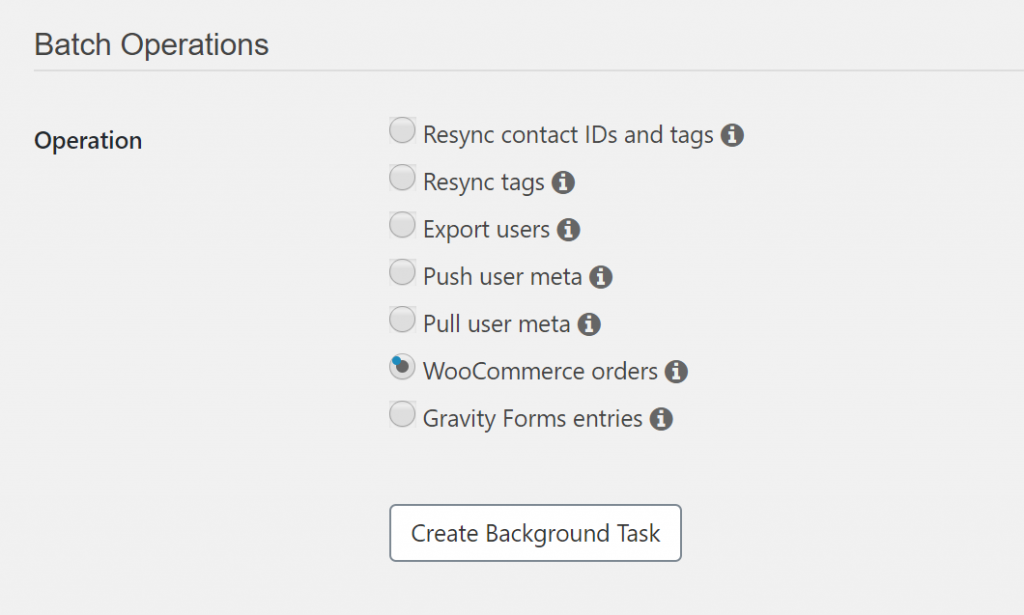
Click the Create Background Task button to proceed.
#Offer coupons and discount codes
If you offer coupons and discounts to WooCommerce customers, you can specify Mailchimp tags to be applied to customers if they use a particular coupon. In addition to this, you can also restrict access to coupons.
You can do this by requiring users to be logged in and to have a specific tag applied to them. Use the Required Tags setting on the Usage Restriction tab in the coupon settings to configure this option.
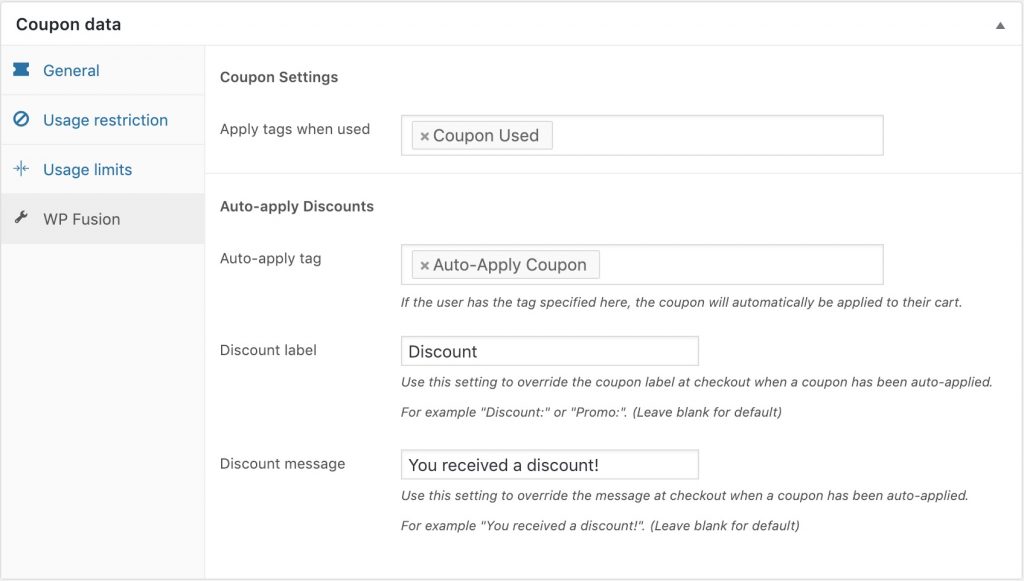
With WP Fusion, you can also auto-apply coupons to customers based on their tags in Mailchimp. Put simply, if the customer has the specified tag(s), the discount will automatically be applied when they add products to their shopping cart and proceed to the checkout page.
#Restrict access to products
WP Fusion lets you restrict customer access to products unless they have a certain tag applied to their account.

To do this, open up the product in the Edit product screen and find the WP Fusion widget in the right sidebar. Tick the Users must be logged in to view this product option and select the required tags as necessary.
It also lets you apply tags and remove tags to logged-in users when they view the product.
Automate your email marketing today!
Mailchimp is one of the most popular email marketing solutions out there. With a WooCommerce Mailchimp integration, you can do neat things like syncing your WooCommerce customer data and automating email sequences to increase customer engagement and, ultimately, boost sales.
WP Fusion essentially gives you the ability to tag WooCommerce customers based on hundreds of triggers. This way, you’re able to build highly segmented Mailchimp lists that let you know exactly how customers are engaging with your online store. It’s far more robust than the native WooCommerce Mailchimp integration and lets you make the most of marketing automation. If you use Mailchimp, WP Fusion’s WooCommerce Mailchimp integration is for you.
Buy WP Fusion today to connect WooCommerce to Mailchimp, properly!![]()
Get Automated. Get WP Fusion.
So, if you’re ready to take your marketing efforts to the next level, get WP Fusion today!