#Block editor
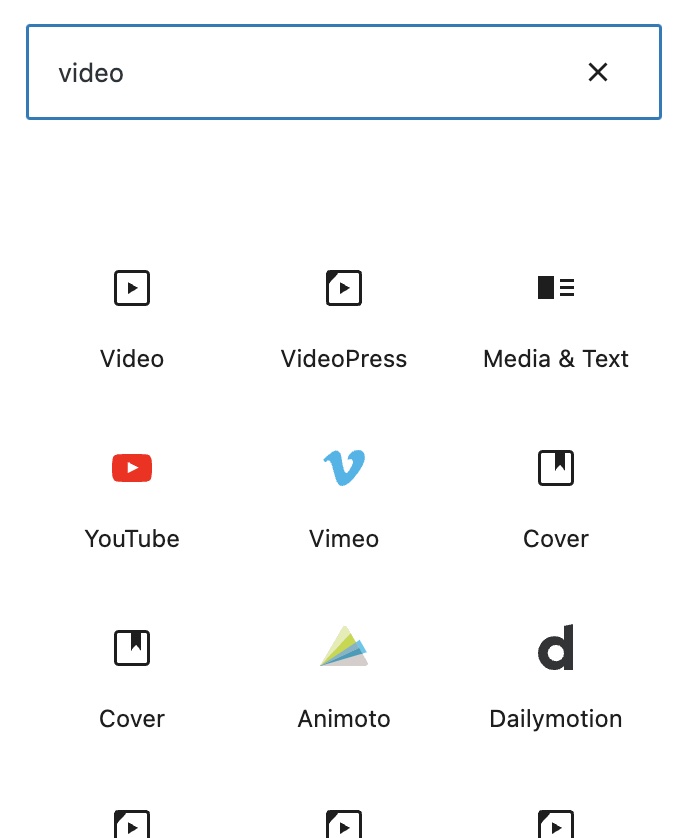
To use the Media Tools integration with the block editor, first add a video to your page. The supported video blocks are Video, YouTube, and Vimeo.
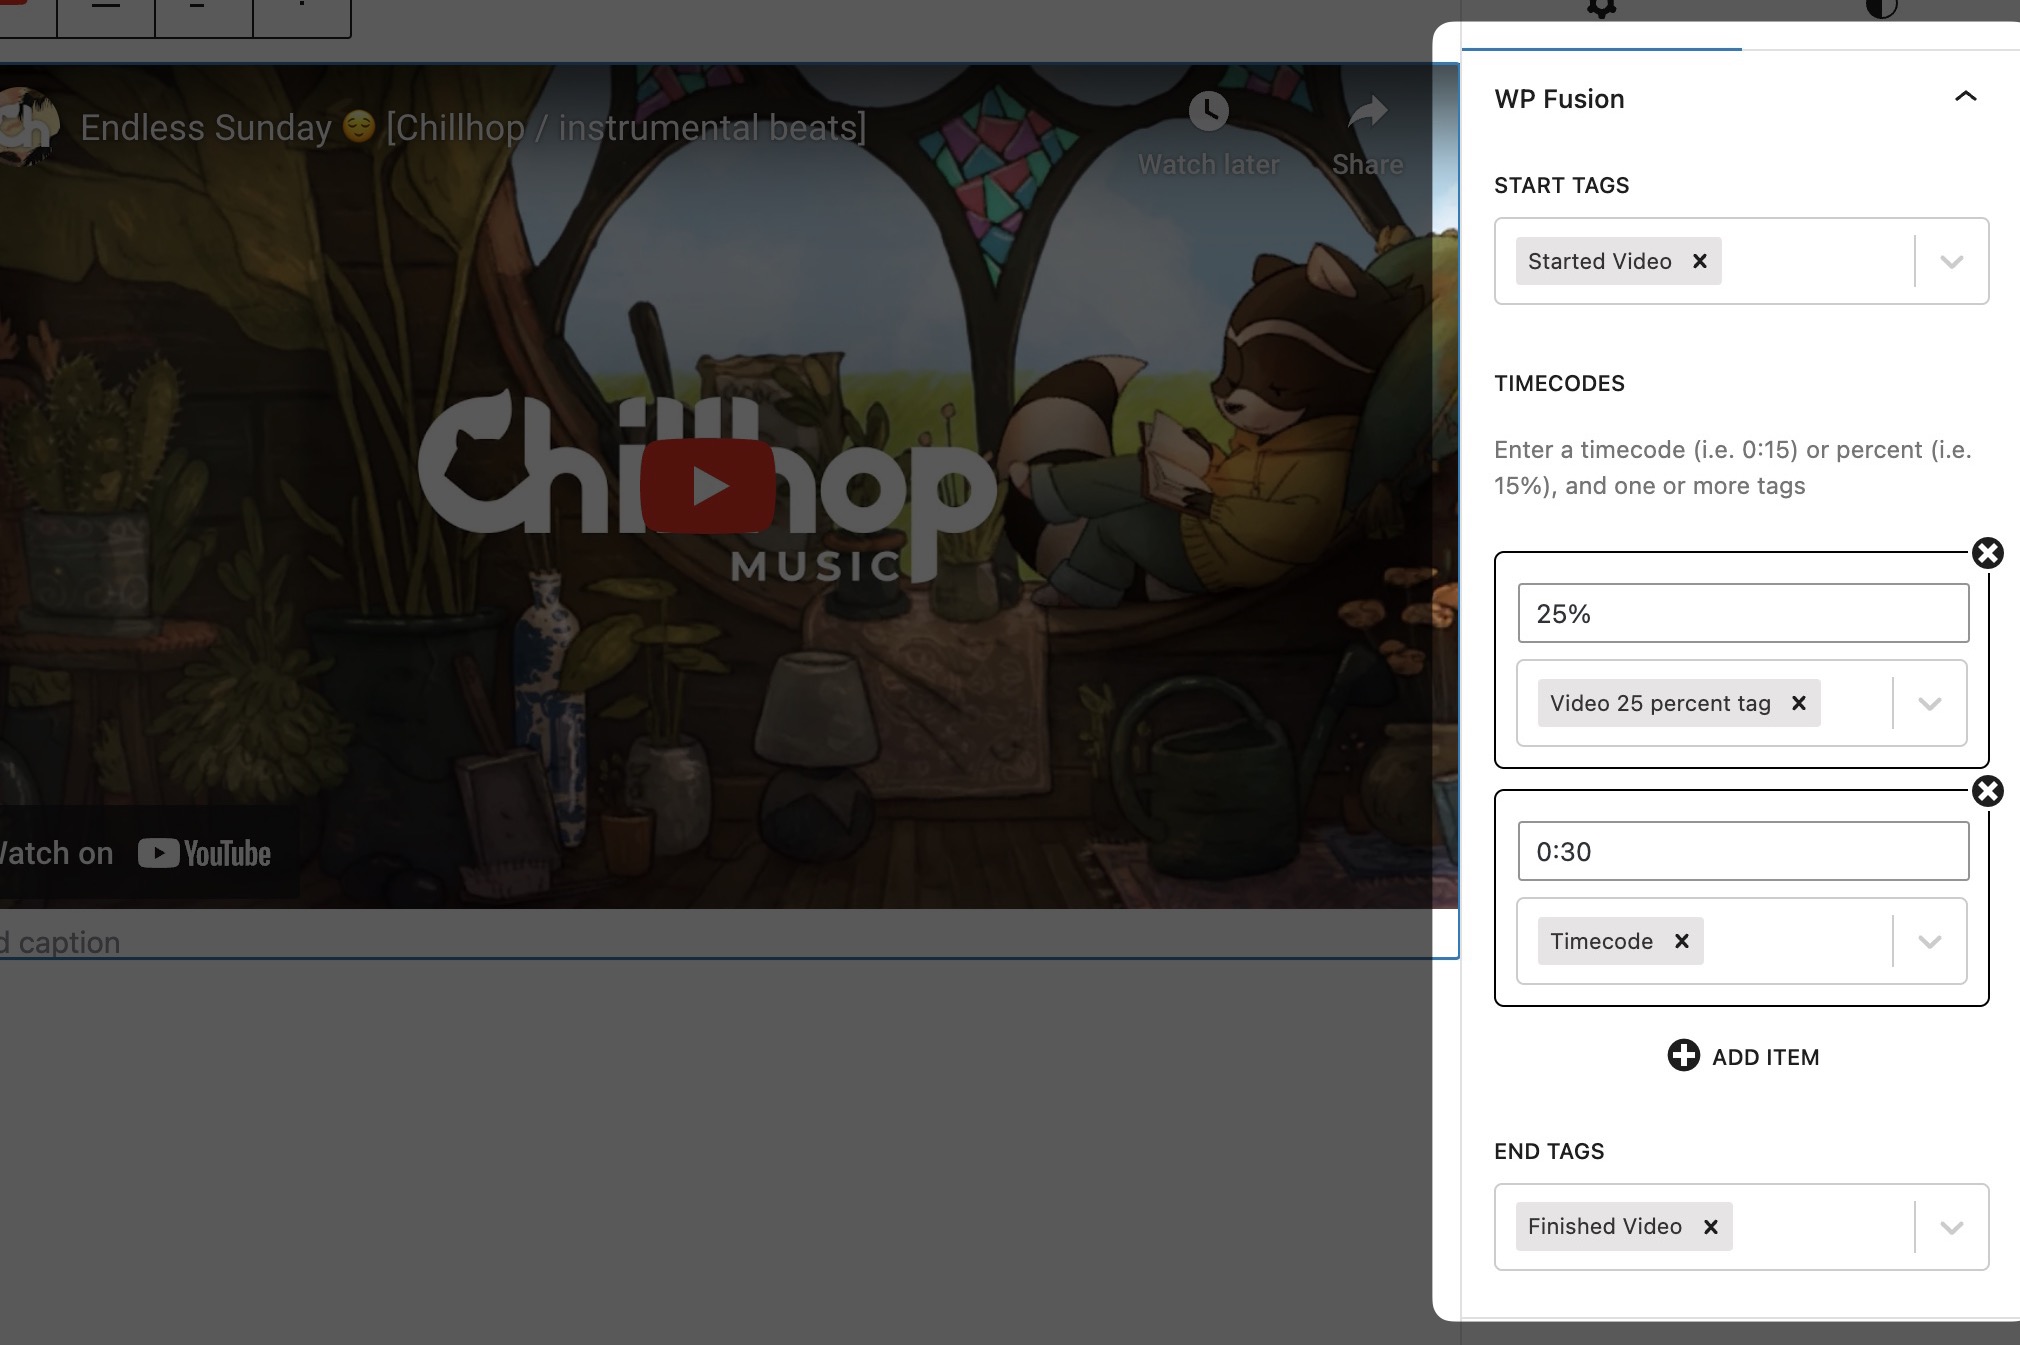
After inserting your video URL, click on the video, and expand the WP Fusion panel to access the WP Fusion settings.
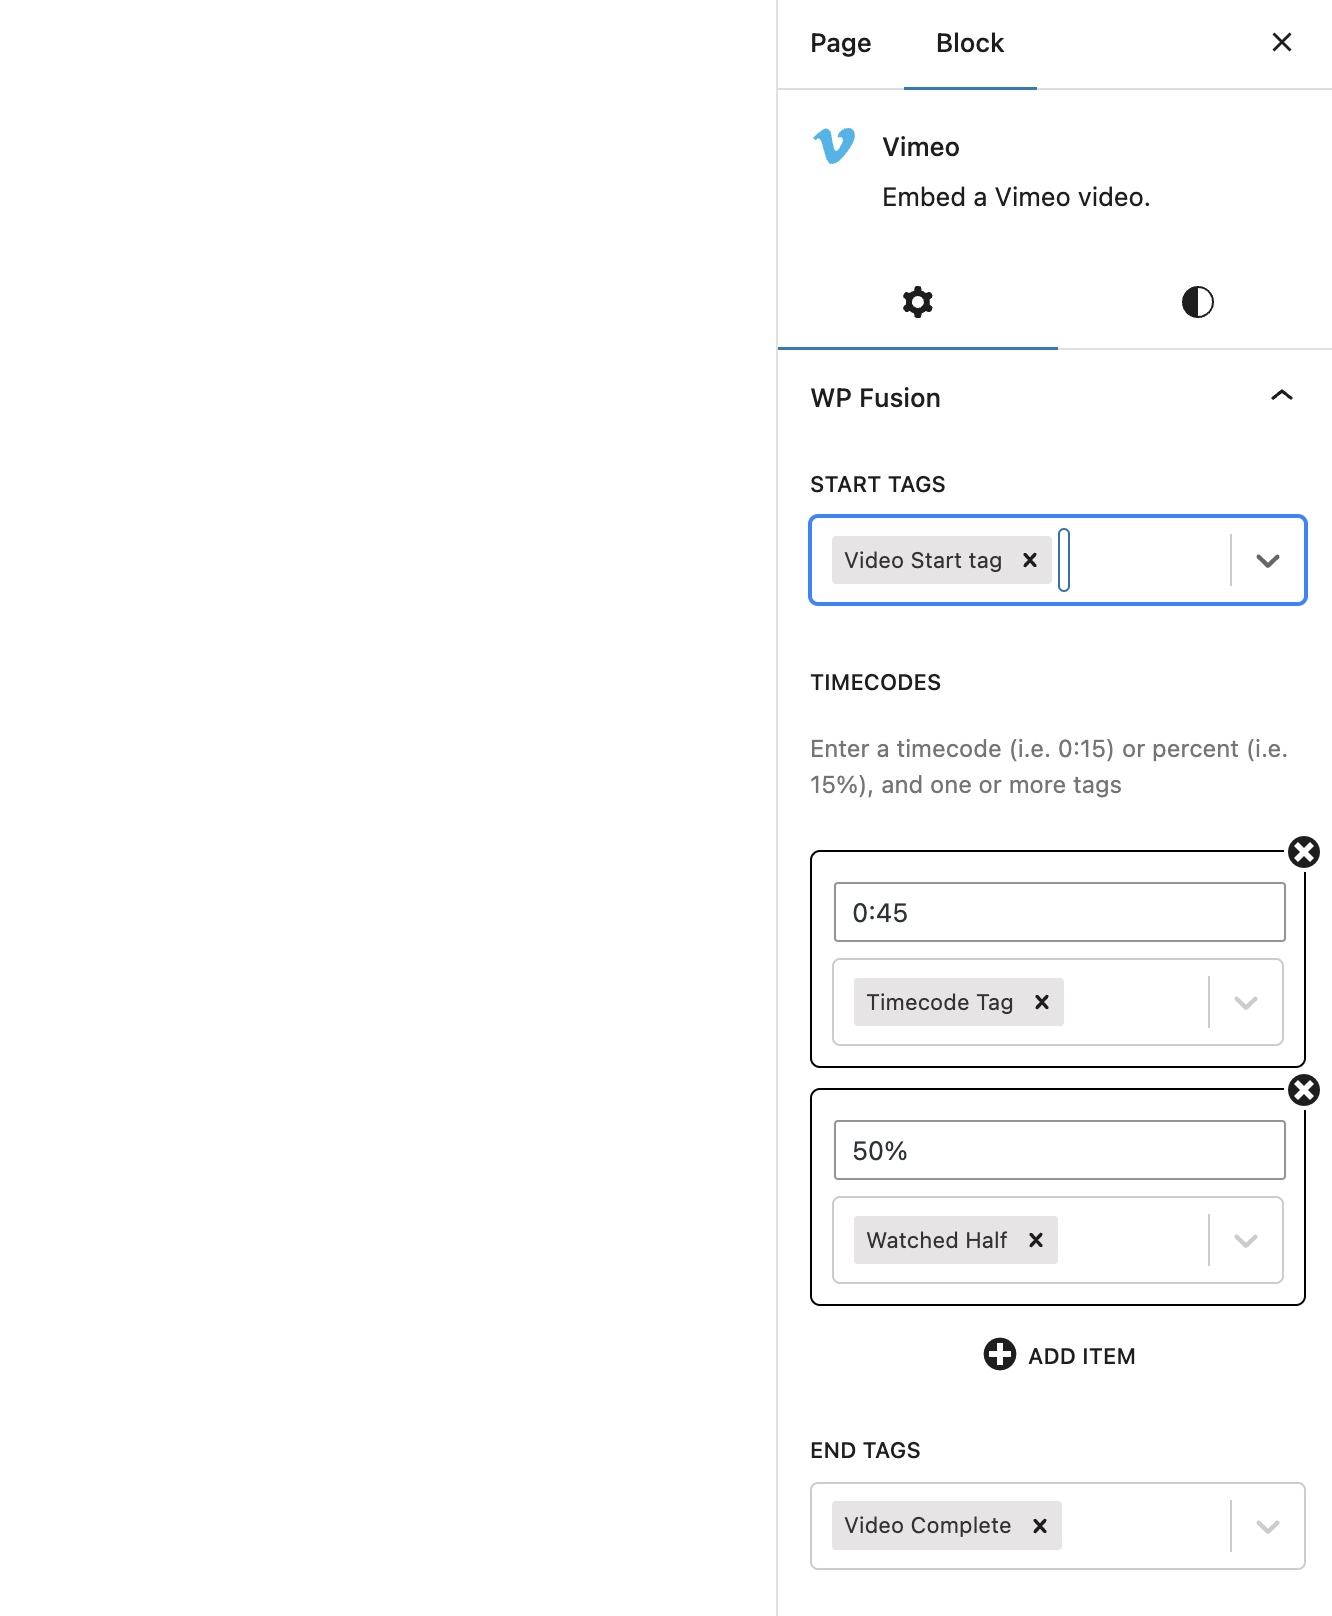
The options are:
- Start tags: These tags will be applied to the user as soon as they click the “Play” button.
- Timecodes: You can enter one or more timecodes, either as a timecode or a percentage. When the player reaches this point, the selected tags will be applied.
- End tags: These tags will be applied to the user once the media file completes playing (reaches 95% progress).
#Classic editor
To set up tracking for media content on your site, first click “Add Media” in the WordPress post editor and upload the audio or video file to your site. After the upload is finished, click “Insert Into Post” to add the player to your post.
You can also add embedded media by going to the Insert from URL tab and including a link to a video hosted elsewhere.
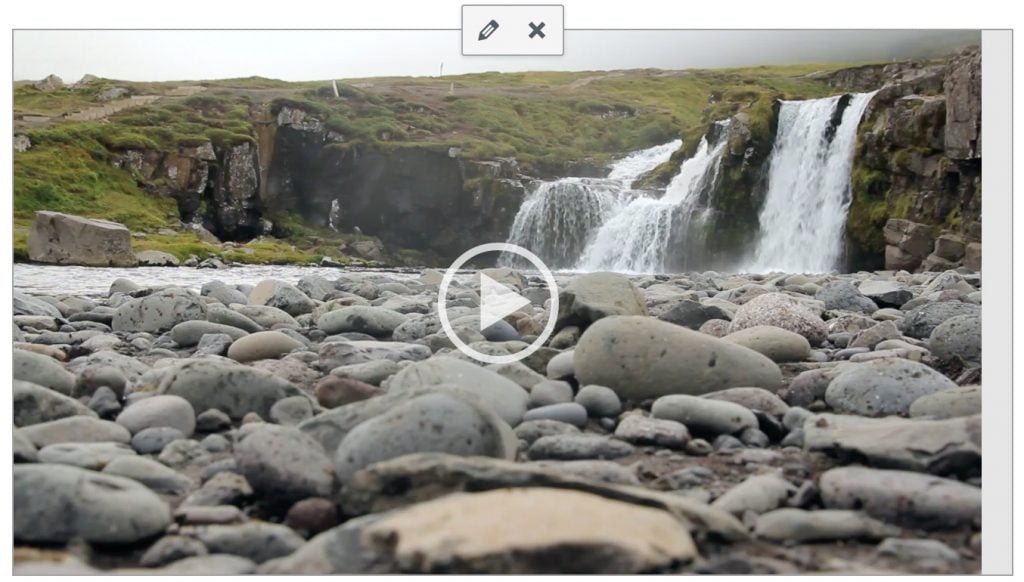
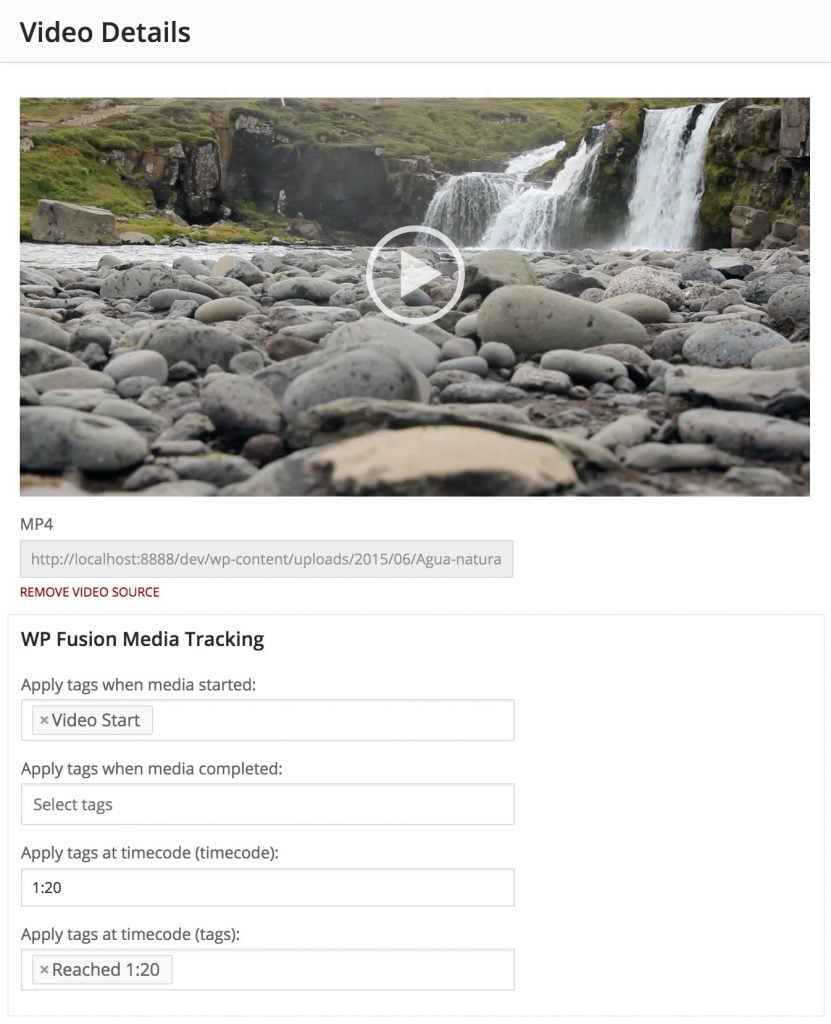
After the media is inserted, you’ll see a preview in the post editor. Click once on the preview and click the pencil icon to open up the media details window.
In the media details window, you’ll see the WP Fusion Media Tracking box appear below the video, with several settings:
- Apply tags when media started: These tags will be applied to the user as soon as they click the “Play” button.
- Apply tags when media completed: These tags will be applied to the user once the media file completes playing.
- Apply tags at timecode (timecode): Enter a timecode at which additional tags (configured in the next field) should be applied. Timecode can either be in seconds (like “45”), or in delineated time notation (like “1:45”, for 1 minute 45 seconds).
- Apply tags at timecode (tags): These tags will be applied when the timecode specified in the field above is reached.
Any of these fields can be left blank to disable that specific trigger.
#Multiple timecodes
For those with more advanced tracking needs, you can track multiple timecodes by editing the shortcode directly. Switch over to the Text tab in the editor, and you’ll see the embed code for your media, something like:
{embed wpf_tags_start="93" wpf_tags_complete="118" wpf_timecode="1:20" wpf_tags_timecode="118"] https://www.youtube.com/watch?v=1234567 [/embed]
Multiple timecodes can be added in the format wpf_timecode_2="mm:ss" wpf_tags_timecode_2="123,456" where the tags for the second property are a comma separated list of tag IDs to be applied (Infusionsoft and Ontraport) or tag names for other CRMs.
For example, to apply tags at 1:20, 1:40, and 2:40, your shortcode would look something like the following:
{embed wpf_timecode="1:20" wpf_tags_timecode="118" wpf_timecode_2="1:40" wpf_tags_timecode_2="119" wpf_timecode_3="2:40" wpf_tags_timecode_3="120"]]https://www.youtube.com/watch?v=1234567[/embed]
#Spotlightr (formerly vooPlayer)
WP Fusion doesn’t support vooPlayer’s “vooPlayer Shortcode” popup, but you can still configure media tracking by editing the shortcode it generates. After insering a video, you’ll see a shortcode like:
[vooplayer type="video" id="OTU3MzM="]
You can configure tags to be applied by editing the shortcode attributes. The parameters are:
- wpf_tags_start: Comma separated list of tags to apply when the video begins to play
- wpf_timecode: A timecode at which to apply specific tags
- wpf_tags_timecode: The tags to apply at the timecode specified with wpf_timecode
- wpf_tags_complete: The tags to apply when the video is finished
For example:
[vooplayer type="video" id="OTU3MzM=" wpf_tags_start="VooStart" wpf_tags_complete="VooComplete" wpf_timecode="1:20" wpf_tags_timecode="Voo120"]
#(Advanced) iFrame tracking
It’s preferable to use an embed shortcode (or the Elementor or Presto Player integrations) with the Media Tools addon, since this allows WP Fusion to detect which videos (and which types of videos) are being tracked, and thus the required tracking scripts are only loaded on those specific pages.
But there are some cases where you may want to set up WP Fusion’s media tracking directly on an <iframe> embed code.
To do that, first enable the setting Load Scripts Everywhere at Settings » WP Fusion » Addons, and then select which players you will be using.
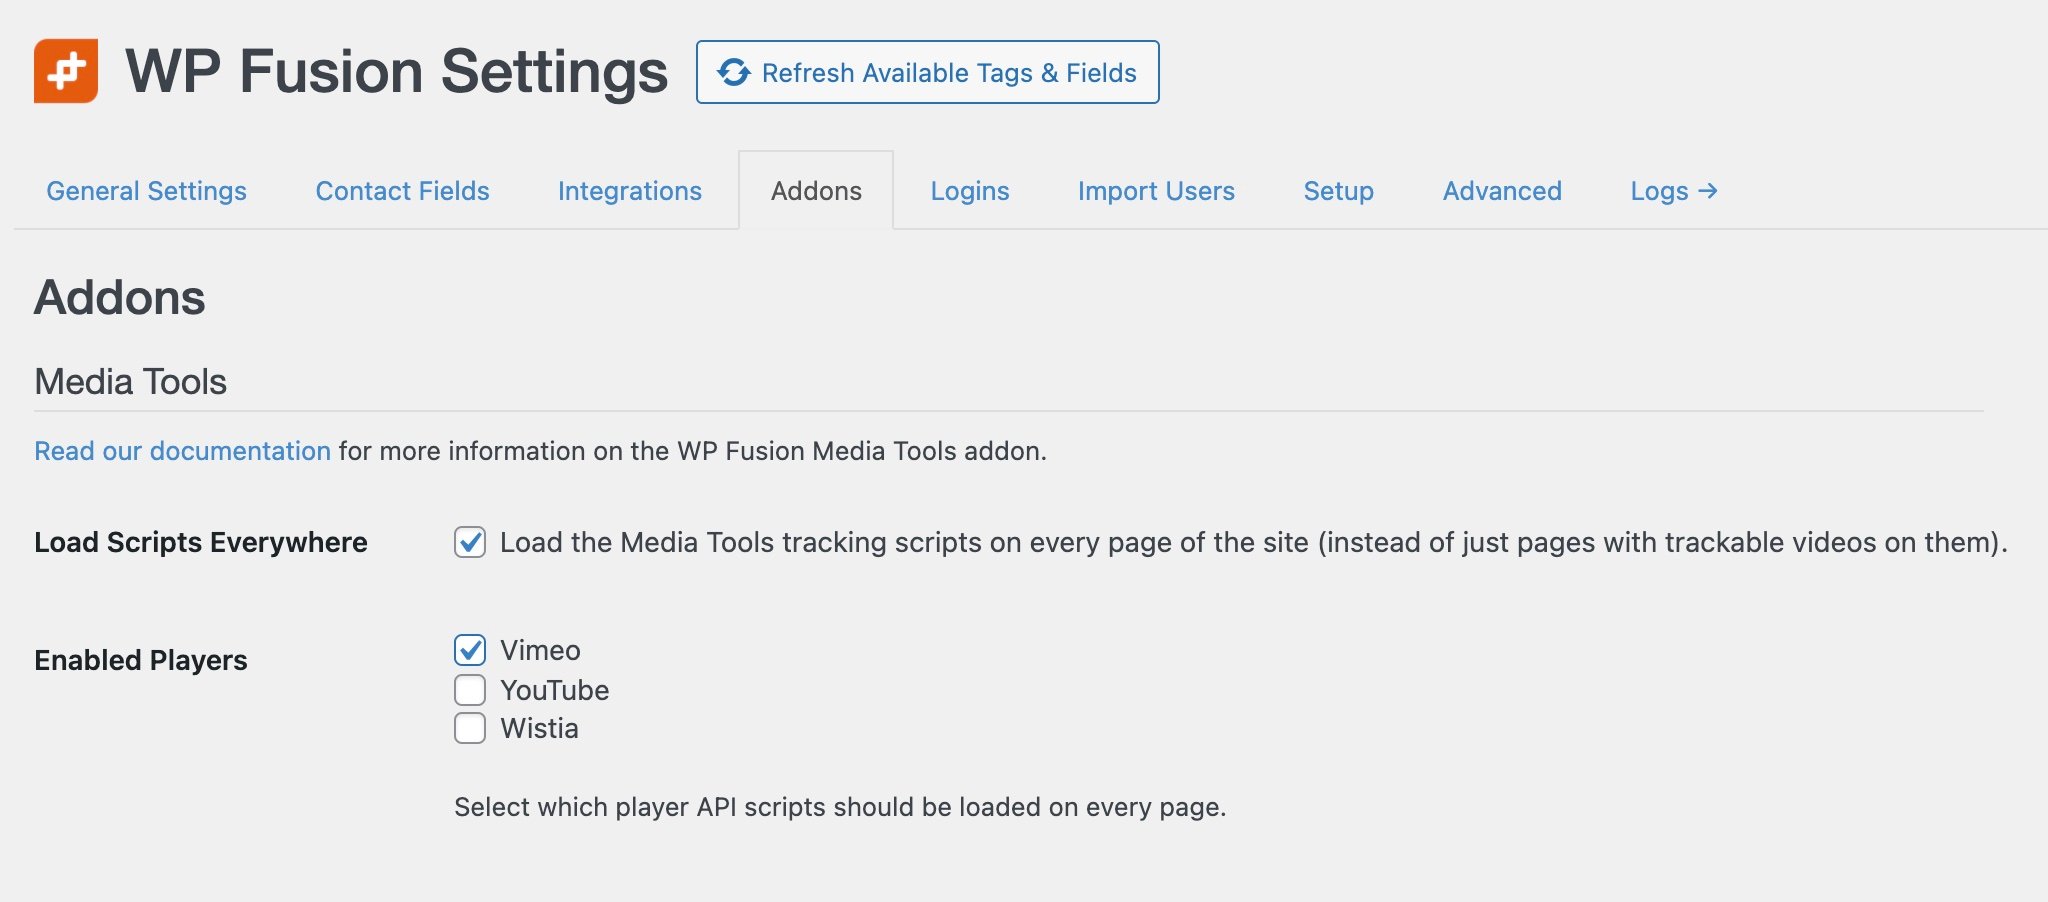
This will enqueue WP Fusion’s tracking script, as well as the video player APIs for any selected players, on every page of your site.
Then, you can add data attributes directly to the <iframe> of any of the supported players to enable tracking on that player.
For example:
<iframe id="player_1" data-player_type="vimeo" data-wpf_tags_start="Started Video" data-wpf_tags_complete="Video Complete, Video ID 1 Complete" src="https://player.vimeo.com/video/56282283" width="640" height="480" frameborder="0" allow="autoplay; fullscreen; picture-in-picture" allowfullscreen></iframe>
The parameters are:
- id: (required) Every iFrame must have a unique ID to be tracked correctly
- data-player_type: (required) The type of player, either
youtube,vimeo, orwistia - data-wpf_tags_start: Comma separated list of tags to apply when the video begins to play
- data-wpf_timecode: A timecode at which to apply specific tags
- data-wpf_tags_timecode: The tags to apply at the timecode specified with wpf_timecode
- data-wpf_tags_complete: The tags to apply when the video is finished
You can also use multiple timecodes, following the example documented above.