At WP Fusion, we have worked with nearly every CRM and marketing automation tool out there.
We can safely say that Groundhogg is one of the best CRM and automation tools due to its robust feature set, user-friendly interface, and seamless integration with WordPress.
One of the few CRMs specifically designed for WordPress websites, Groundhogg allows you to manage contacts, launch marketing campaigns, and track and analyze engagement efficiently.
In this article, we dive deeper into the features that make Groundhogg a valuable asset for any WordPress-based business.
We will also demonstrate how to set up Groundhogg on a WordPress website and explore the powerful 🧡 Groundhogg-WP Fusion integration 🧡 that allows seamless data synchronization and advanced automation between Groundhogg and various third-party platforms.
Let’s get started.
Get Automated. Get WP Fusion.
Buy WP Fusion today, and connect Groundhogg with WordPress!
Get WP Fusion#✨ Groundhogg Features
#Dashboard
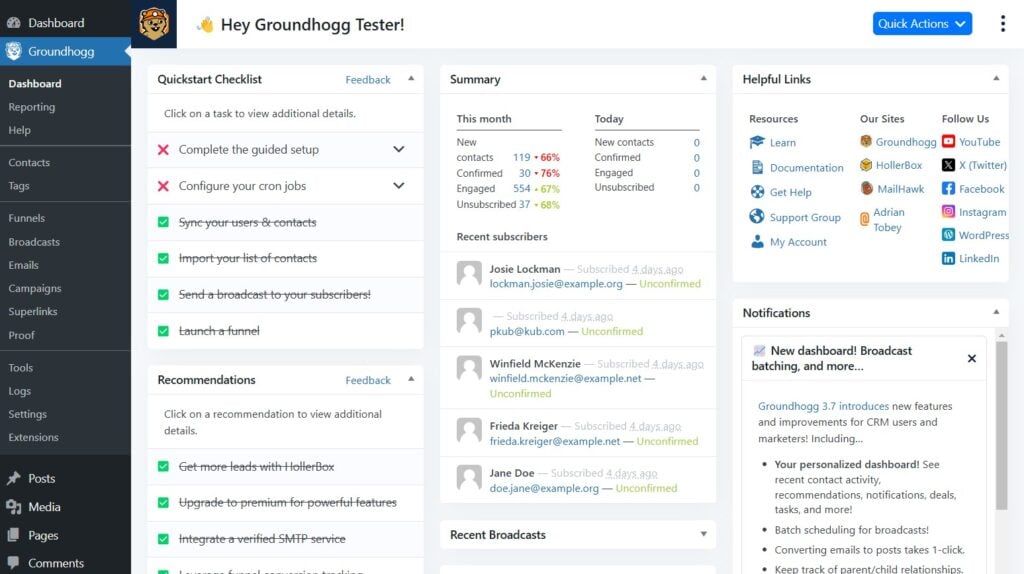
The Groundhogg dashboard is a central hub for managing your CRM and marketing automation tasks. It streamlines essential tasks and provides valuable insights at a glance.
The dashboard features recommended actions to optimize the plugin setup, such as syncing users and contacts, adding a signature, launching funnels, and integrating SMTP services, among other things.
Users can view a summary of new contacts, confirmed, engaged, and unsubscribed contacts for both the current month and today.
Additionally, the dashboard provides helpful links to Groundhogg’s documentation, support groups, and social media channels.
A dedicated section for recent news keeps users informed about new feature launches and updates about the latest developments in Groundhogg.
#Reporting

Groundhogg offers a comprehensive reporting system that allows you to analyze their marketing and customer relationship management efforts.
The Reporting page includes various tabs such as Overview, Contacts, Emails, Funnels, Broadcasts, Forms, Customer, and WooCommerce, each providing valuable insights.
In the Overview tab, you can view metrics over different time frames, including new and confirmed contacts, engagement rates, and top-performing funnels.
The Contacts tab details subscriber statuses, reasons for unsubscribing, and engagement metrics by country.
The Emails tab tracks email performance, including open rates and click-through rates, while the Funnels tab lists funnel performance metrics like conversions and engagement.
Additionally, the WooCommerce tab integrates sales data, showing revenue generated from various marketing efforts.
#Contacts

The Contacts page in Groundhogg offers a comprehensive view of all your contacts, displaying crucial information such as email status (confirmed, pending, or unsubscribed), first and last names, usernames, phone numbers, and the date each contact was created.
Contacts have been categorized into various statuses, including confirmed, unsubscribed, bounced, and spam, providing clarity on engagement levels.
One of the standout features is the powerful filtering system that allows you to refine their contact lists based on multiple criteria, such as tags, metadata, location, user roles, and specific activities like pages visited or emails opened.
#Tags
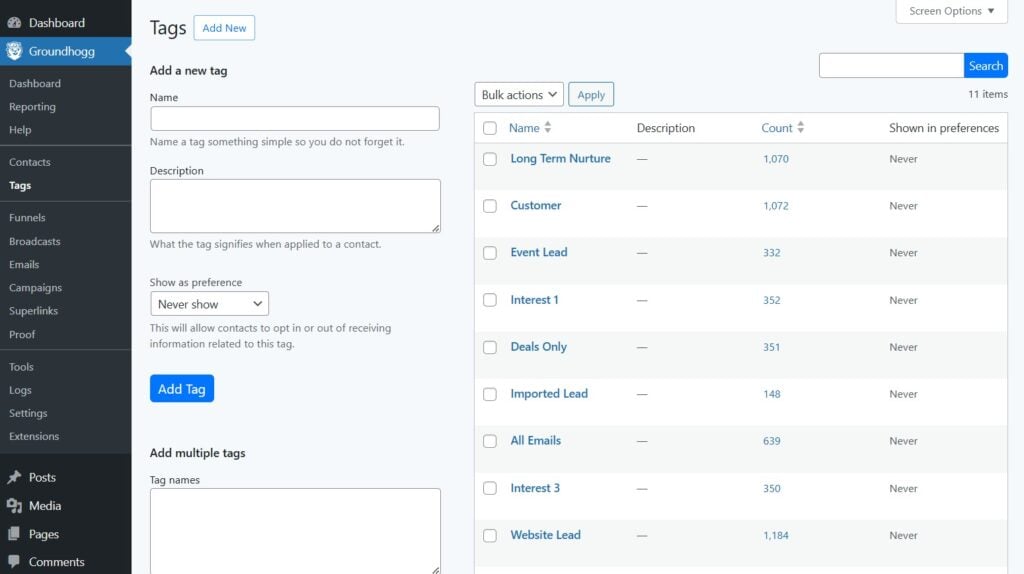
The Tags page allows you to create and manage tags for their contacts. The tagging system allows for the organization and segmentation of contacts, which is useful for launching marketing campaigns.
You can choose to display tags based on preferences, selecting options such as never show, if tagged, or always show to customize how tags appear.
Each tag is listed with its description, the number of contacts associated with it, and a “Shown in Preference” column, providing clear visibility into how tags are utilized within the contact database.
#Funnels

Funnels are designed to guide contacts through a series of actions to nurture leads and drive conversions.
For instance, a simple funnel may start with an opt-in form to capture email addresses, followed by a series of automated emails that provide valuable content, build trust, and eventually lead to a sales pitch.
The Funnel page in Groundhogg is organized into three sections: active, inactive, and archived funnels. Inactive funnels are not currently in use but can be reactivated if needed, and archived funnels are complete or are no longer relevant but are kept as a record and future reference.
You can easily create new funnels by clicking the Add New button, which leads to a selection of over 15 ready-made funnel templates. You also have the option to start a new funnel from scratch or import existing funnels from your local computer.
#Broadcast
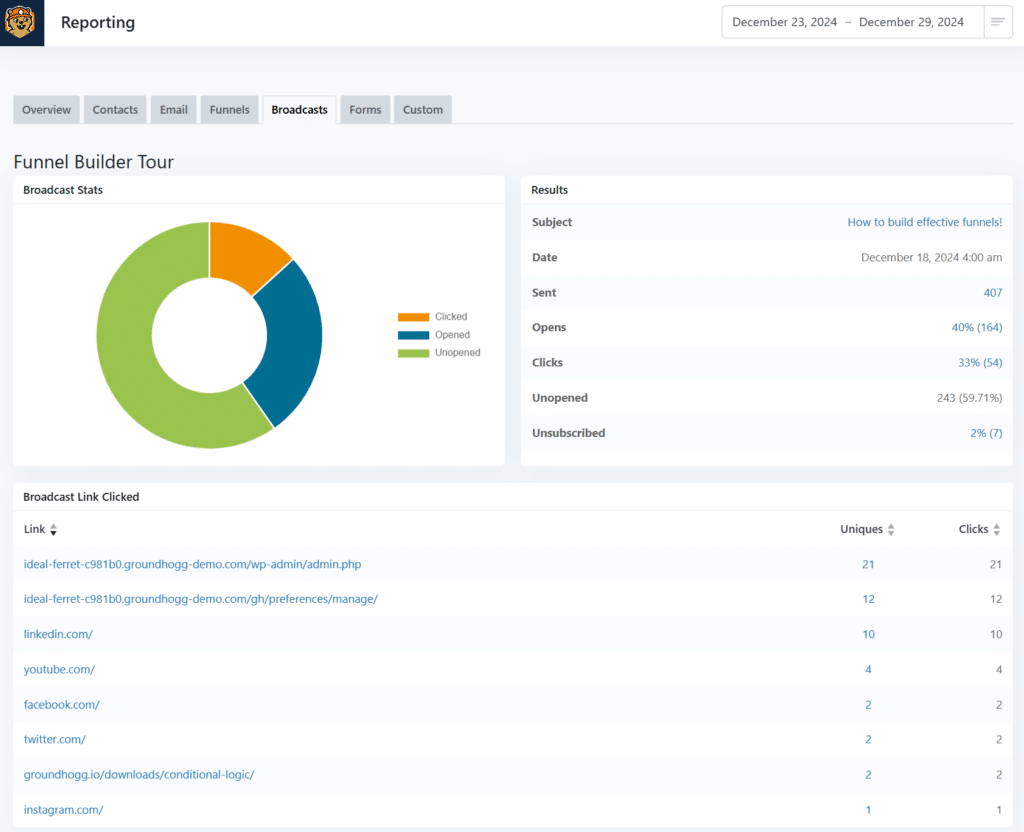
Broadcasts are used to send out a single email to a large list of contacts all at once. The Broadcast page in Groundhogg displays essential information such as the broadcast name, send date, campaign tags, and key statistics like the number of emails sent, opened, and clicked.
Broadcasts are categorized into five statuses: pending, scheduled, sending, sent, and canceled, providing clarity on each broadcast’s progress.

To create a new broadcast, click the Schedule Email Broadcast button, and you will be guided through a straightforward process. This includes adding an email address, selecting or creating a campaign, segmenting contacts based on tags, setting the desired send time, and reviewing all details before confirming and scheduling the broadcast.
#Emails

The Emails page provides a comprehensive overview of all email communications, categorized into various types: all, active, templates, drafts, marketing, transactional, block editor, and HTML. This makes it easy to manage and track different types of emails.
You can view emails listed with essential details such as titles, subjects, sender information, campaign tags, associated funnels, authors, and last updated dates.
Level Up Your CRM Automation Game!
Combine Groundhogg and WP Fusion to streamline your marketing, track customer data, and drive better results. See it in action today!
Get Groundhogg#Campaigns

Campaigns are organizational tools that help users manage and categorize their funnels, broadcasts, and emails.
For example, a Welcome Series campaign can have a series of automated emails designed to onboard new subscribers, and a Holiday Promo campaign can have broadcasts and funnels focused on special offers and discount codes.
In Groundhogg, each campaign can be set to private or made public, allowing for flexibility in visibility and accessibility.
The Campaigns page displays details of existing campaigns, including their names, descriptions, visibility status, and associated assets.
#Superlinks
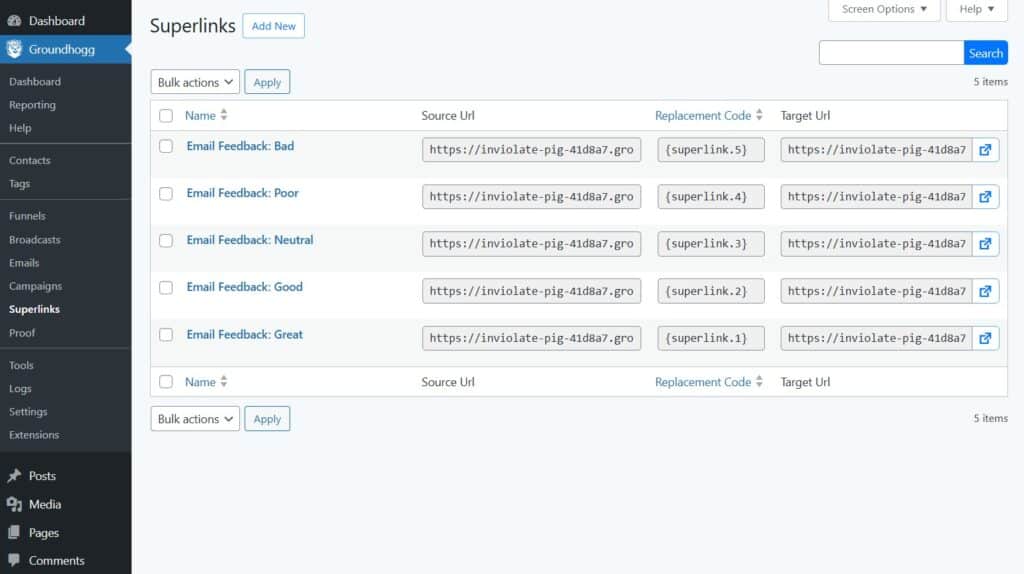
Groundhogg’s Advanced Features addon includes a powerful feature called Superlinks. Superlinks are specialized links that enhance automation by allowing actions to be taken when a contact clicks them. It allows you to automatically update a contact’s tags and meta fields when they click a specific link.
This is particularly useful in tracking user behavior and segmenting your contacts.
Each Superlink consists of
- A Source URL, which is the link that users click
- A Target URL, which is the destination where users are redirected after clicking
- And a Replacement Code, which can be used to embed the Source URL in various locations
Users can create Superlinks by navigating to the Superlinks page and clicking the Add New button, where they can specify the link’s details and associated actions, such as adding or removing tags from contacts.
#Proof

In Groundhogg, Proof refers to a feature that showcases real-time user activity to enhance credibility and encourage conversions on your website. By displaying notifications about actions taken by previous users, such as sign-ups or purchases, proof creates a sense of urgency and trust among potential customers.
You can add new proofs by navigating to the Proof page and setting display rules, which involves adding URLs of posts and pages where you want the proof to appear.
You can also define benchmarks that trigger the display of the Proof when certain conditions are met.
Additionally, customize the message shown in the proof popup, specify a time range for tracking contacts, and choose how often the popup appears.
Options for orientation (left/right) and mobile visibility ensure that the Proof is effectively presented across different devices.
#Tools

The Tools page is a dashboard that provides a range of utilities to manage and optimize your plugin installation.
From this page, you can download system information for support requests, rollback plugin updates, enable safe mode for debugging, and reset the Groundhogg installation from scratch.
Additionally, the toolset allows for easy import and export of contact data and syncing WooCommerce users and orders.
You can also set up Cron, which is crucial for automating scheduled tasks, such as sending emails or updating contact records at designated intervals.
The REST API Key Playground enables developers to test and interact with Groundhogg’s API. This feature is particularly useful when connecting Groundhogg with third-party services.
#Logs

The Logs page in Groundhogg is a vital tool for monitoring and managing various activities within the CRM and marketing automation system.
It is organized into four main tabs: Events, Emails, Background Tasks, and Manage.
The Events tab provides a detailed overview of contact interactions, funnel progress, and step orders, categorized into statuses such as Waiting, Paused, In Progress, Complete, Skipped, Cancelled, and Failed.
The Emails tab displays essential information about sent communications, including subject lines, recipients, and delivery status, categorized into All, Sent, Failed, WordPress, Transactional, and Marketing emails.
The Background Tasks tab helps users monitor ongoing processes with categories for Pending, In Progress, Done, and Cancelled tasks.
Finally, the Manage section offers options to purge historical logs and restore missing funnel events.
#Settings

The Settings section in Groundhogg provides essential configuration features such as adding addresses, linking to privacy policies and terms and conditions pages, and enabling GDPR features, options to disable unnecessary cookies, etc.
Email-related settings allow customization of the default “from” name and email, footer positioning, and custom footer text, along with tracking URL exclusions, unsubscribe options, and a lot more.
Additionally, you have options to manage integrations with WordPress, WooCommerce, Google reCAPTCHA, and Groundhogg plugin licenses.
You also have options for managing and adjusting settings related to interface preferences, performance metrics, site activity tracking, WP Cron management, and event notifications.
#Extensions
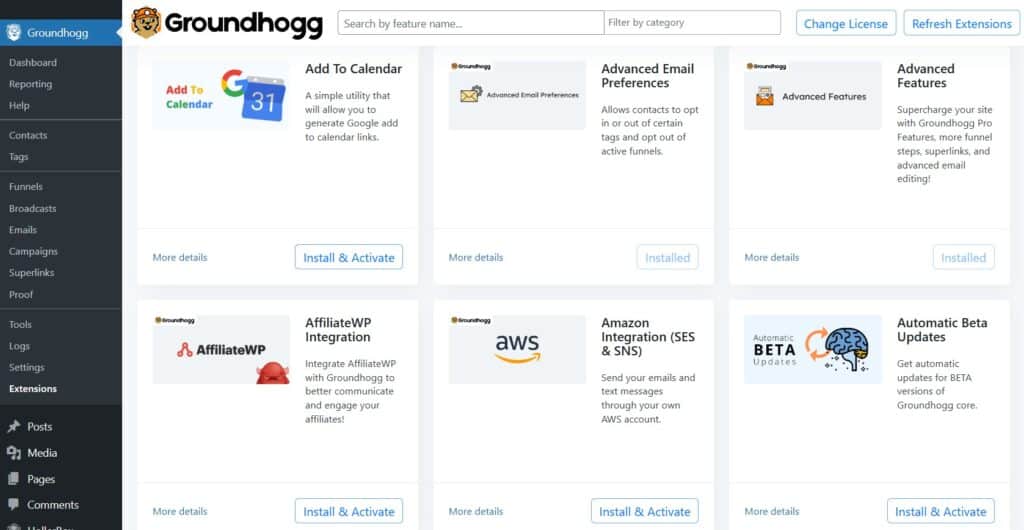
Under Extensions, you will find plugins that can be installed as an add-on to Groundhogg. Extensions include several popular plugins such as Meta Conversions API, MemberPress, GiveWP, HelpScout, and BuddyBoss, among others.
Boost Your CRM Power with WP Fusion + Groundhogg!
Discover how WP Fusion supercharges Groundhogg, syncing your WordPress site with powerful CRM automation.
Get Groundhogg#💰 Groundhogg Pricing
Groundhogg has four pricing tiers. The Basic plan costs $20, Plus plan costs $40, Pro and Agency costs $50 and $100, respectively, per month.
The Basic plan includes a single website license and is ideal for simple blogs and small publishers. The Plus plan can be used on up to 3 websites. It includes a booking calendar, birthday automation, backup and restore features, and a social proof popup and is ideal for solopreneurs and sales teams.
Pro and Agency plans offer licenses for 5 and 25 websites. They include all the basic and plus plan features, along with advanced features like white labeling, access to clients, and integrations with popular plugins such as WooCommerce, Zapier, MemberPress, etc.
All the plans include unlimited contacts, installation services, a 14-day money-back guarantee, onboarding calls, and support.
Sign up for the $1 demo account for a 14-day trial of the higher plans without commitment.
Learn more about the pricing plans.
#💻 How to Install & Set Up Groundhogg in WordPress or WooCommerce
Setting up Groundhogg on your WordPress or WooCommerce website is straightforward but time-consuming. We recommend setting some time aside to explore the following configuration steps:
#Step 1: Install & Activate Groundhogg
From your Groundhogg account, download the Groundhogg plugin on your local computer.
Then, upload, install, and activate the Groundhogg plugin on your WordPress website.
You will immediately see an installation wizard where you’ll be asked to fill in your business details like name, address, phone number, links to your privacy policy and terms and conditions, your Groundhogg license key, and suggestions to install some of Groundhogg recommended plugins (free or premium) and that’s it.
#Step 2: Cron Job Set Up
This is an important step. Cron jobs ensure that everything on Groundhogg is scheduled on time, emails are sent, broadcasts are scheduled, and funnels and campaigns are properly carried out.
Misconfiguration of cron jobs can lead to performance issues.
To set up a cron job, open your WordPress dashboard and go to Groundhogg → Tools → Cron Setup, then hit the Get Started and Install Automatically buttons.

If the installation fails, you will need to take a manual installation route, but since the manual installation is risky, we recommend contacting Groundhogg support.
If the installation goes smoothly, hit the Next button, and you will be asked to create external cron jobs. The easiest to do this is to go to cron-job.org and add your cron job links.

When it’s done, hit the Verify Setup button, and that’s it.

Need help? Check out these resources:
#Step 3: Other Configurations

Navigate to Groundhogg → Dashboard.
Here, you will find a series of recommendations, such as adding contacts, integrating an SMTP service, and creating email signatures. While you don’t need to complete all these steps, setting up the features that align with your specific needs is a good idea.
If you are unsure about which recommendations to follow and which ones to avoid, start by adding new contacts or creating a popup form to collect subscriber information.
Need help? Check out these help documentations from Groundhogg.
#(Optional) Using WP Fusion
Groundhogg integrates with numerous plugins and services, but 🧡 WP Fusion 🧡 takes this integration to the next level by offering a powerful solution for connecting Groundhogg across multiple websites and subdomains remotely. This is particularly useful because Groundhogg doesn’t natively support running the CRM on subdomains or connecting multiple sites.
Consider a scenario where you run an online store alongside an educational platform. By implementing WP Fusion to connect these sites to a centralized Groundhogg dashboard, you can automate workflows such as sending course enrollment confirmations or follow-up emails after purchases without any manual intervention. The integration with WP Fusion will also ensure that all customer interactions—whether they occur on your main site or across various subdomains—are synchronized seamlessly. Learn more: Running a “headless CRM” with WP Fusion connected to Groundhogg on a subdomain
Beyond the basic integration, WP Fusion offers even more powerful features to boost your marketing and customer management efforts. Here are some key capabilities that demonstrate the true potential of this integration:
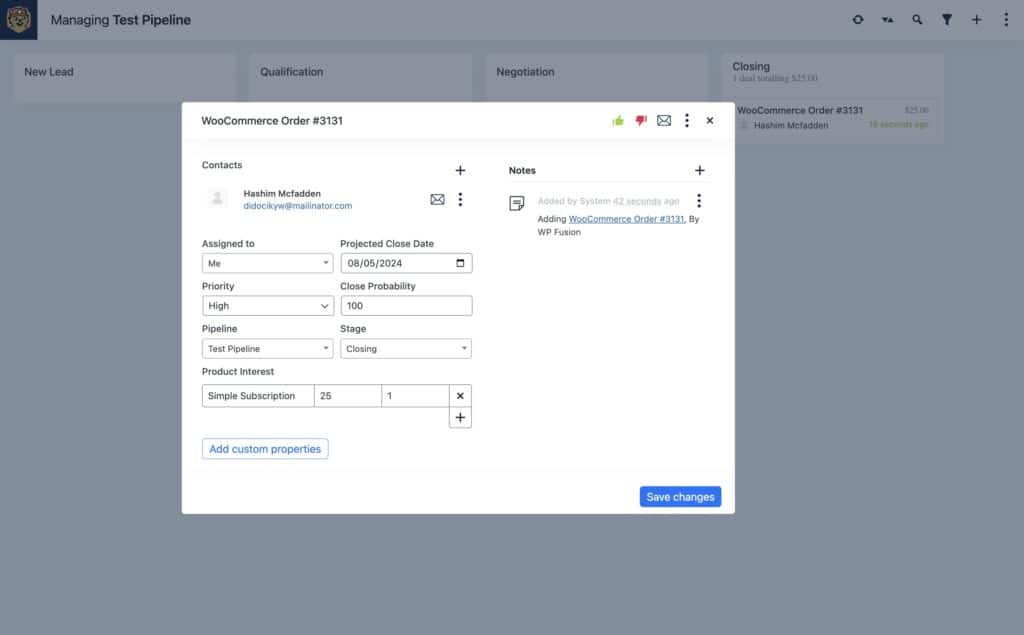
WP Fusion’s Enhanced Ecommerce allows businesses to track sales data from various WordPress e-commerce platforms, such as WooCommerce and Easy Digital Downloads, directly in Groundhogg as deals. This integration creates a new deal for each transaction, associating it with the customer’s contact record and enabling detailed sales tracking and automation through Groundhogg’s CRM capabilities.
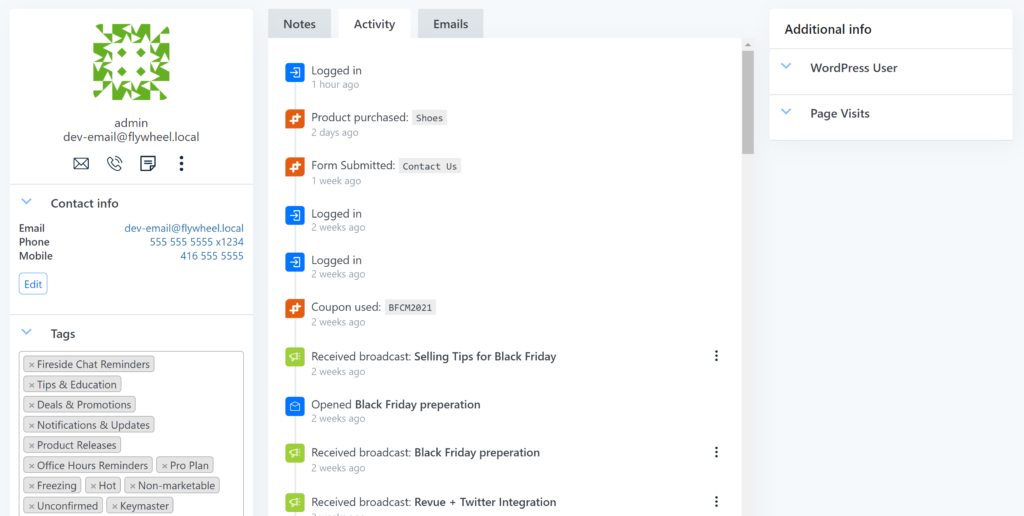
Event Tracking enables the logging of specific user activities from supported plugins into Groundhogg via WP Fusion. When an event occurs, such as a purchase or form submission, it is recorded and linked to the corresponding contact’s activity timeline. This feature provides valuable insights into customer behavior and allows businesses to trigger personalized marketing.
Webhooks facilitate real-time data synchronization between Groundhogg and WP Fusion across different sites. By setting up webhooks, you can automate actions like importing contacts as WordPress users or update user metadata based on triggers in Groundhogg. This functionality ensures that CRM data remains consistent and up-to-date.

#🧐 Conclusion
Groundhogg stands out as one of the most powerful and user-friendly CRM and marketing automation tools specifically designed for WordPress websites.
Its robust feature set, intuitive interface, and seamless integration with WordPress make it an invaluable asset for many businesses.
From the comprehensive dashboard and detailed reporting to advanced features like funnels, broadcasts, and superlinks, Groundhogg offers a wide range of tools to help you manage and grow your business.
Moreover, its integration with 🧡 WP Fusion 🧡 further extends Groundhogg’s capabilities and allows you to connect with a variety of third-party platforms and services.
That’s it for this one, folks! If you have any questions about Groundhogg, let us know in a comment below.


