
Whether you run an online course, membership site, podcast, or marketing campaign, knowing who plays your media, how much they watch, and where they drop off can help you optimize engagement and conversions.
While tools like Google Analytics and Media Tracker plugin offer some media tracking capabilities, they have significant limitations. Many lack detailed engagement metrics, don’t allow for CRM integrations, and fail to provide automation triggers for follow-ups.
We added the 🧡 Media Tools feature in WP Fusion 🧡 to allow users to track media engagement data directly inside WordPress. You can tag users based on their interactions and send this data to your CRM for personalized automations.
In this guide, we will take a quick dive into the benefits of tracking audio and video engagement metrics and walk you through the steps of setting up advanced media analytics in WordPress using WP Fusion.
By the end, you’ll have a complete setup for tracking audio and video views, tagging engaged users, and automating actions based on real user behavior.
Let’s get started.
#🤔 Why Track Audio & Video Engagement in WordPress?
Audio and video content plays a huge role in keeping visitors engaged, but without proper tracking, you have no way of knowing how users interact with your media.
Are they watching your videos all the way through? Do they drop off after a few seconds? Are they skipping key parts?
Tracking audio and video engagement gives you data-driven insights to improve content strategy, boost user retention, and maximize conversions. Here’s why it matters:
1. Understand User Behavior: Engagement tracking helps you see who is consuming your content, how much they watch, and where they lose interest. This data allows you to fine-tune your media strategy and create more engaging content.
2. Measure Content Effectiveness: Not all videos or podcasts perform the same. Tracking engagement helps you identify which content resonates most with your audience, so you can double down on what works.
3. Boost Conversions & Sales: For marketing videos, tracking lets you see how many users watch until the call-to-action (CTA). If drop-off rates are high, you can adjust placement, tweak messaging, or test new formats to improve conversions.
4. Personalize Marketing & Automations: By sending media engagement data to your CRM, you can create highly targeted automations. For example:
- Send reminders to users who started a video but didn’t finish
- Offer bonuses to users who watched 90% of a webinar
- Retarget disengaged users with email or ad campaigns
5. Improve Course & Membership Content: Tracking engagement is essential if you run online courses or a membership site. You can identify users who complete lessons, tag those who stop midway, and trigger automated follow-ups to re-engage them.
Now that we understand why tracking media engagement is crucial, let’s look at how WP Fusion’s Media Tools can help you gather these valuable insights from your WordPress site.
#🖼️ What is WP Fusion’s Media Tools?
WP Fusion’s Media Tools enhances your WordPress site’s media tracking capabilities by monitoring user interactions with embedded audio and video content.
It applies specific tags within your CRM system based on user actions, such as when a video is played, completed, or when certain timecodes are reached.
This functionality enables you to gain deeper insights into user engagement and tailor your marketing strategies accordingly.
A notable feature of the Media Tools add-on is its ability to restrict access to specific pages or content until users have engaged with particular media elements. For instance, you can set conditions that require users to watch a video entirely or up to a certain percentage before accessing subsequent content.
This is particularly beneficial for educational platforms using Learning Management Systems (LMS) like LifterLMS or LearnDash, as it ensures that learners consume necessary materials before progressing.
The add-on supports a variety of popular video players, including:
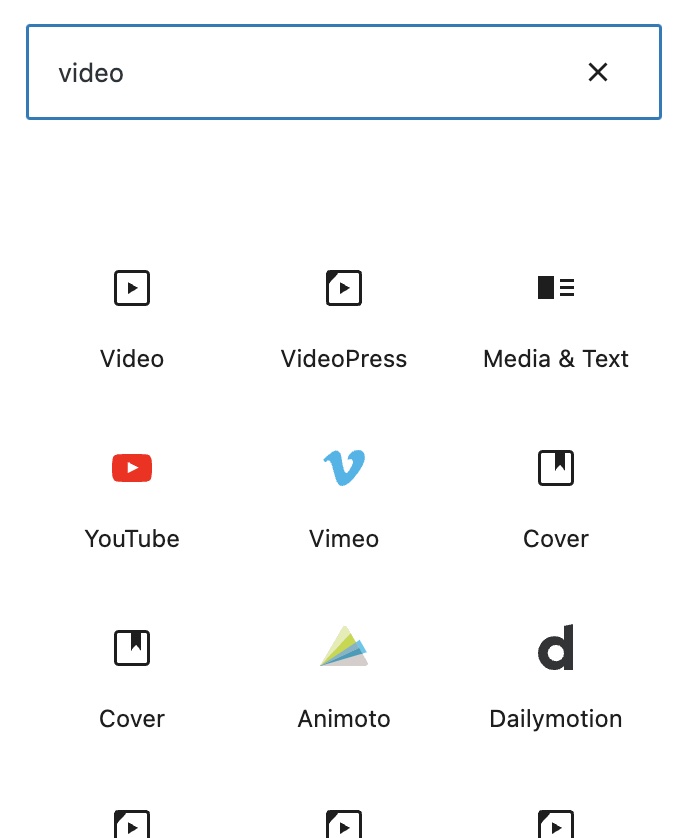
✅ The Video, YouTube, and Vimeo blocks in the WordPress block editor
✅ Bunny Stream
✅ Elementor
✅ FV Player
✅ Presto Player
By integrating seamlessly with these players, WP Fusion’s Media Tools ensures comprehensive tracking and engagement analysis across different media formats on your site.
#🛠️ How to Set Up Audio & Video Analytics in WordPress
We’ll walk you through setting up audio and video analytics in WordPress using WP Fusion.
#Step 1: Install & Activate WP Fusion + Media Tools Plugins
Before enabling media tracking, you’ll need to install WP Fusion and its Media Tools add-on.
The premium WP Fusion plugin has four plans. You need to purchase the Plus or Professional plans to be able to use the Media Tools features.
After purchasing, download the plugin on your local computer from your WP Fusion account or the welcome email.
Then go to your WordPress dashboard, navigate to Plugins → Add New and upload the WP Fusion plugin file. Install and activate the plugin.
The Media Tools add-on is a separate plugin. You must download, install, and activate that on your WordPress site in the same way you installed WP Fusion before moving on to the next step.
#Step 2: Connect WP Fusion to Your CRM
Connecting WP Fusion to your CRM system is essential for tracking user engagement with your media content. This connection allows the tags you set up to be applied to users in your CRM when they interact with your videos or audio files.
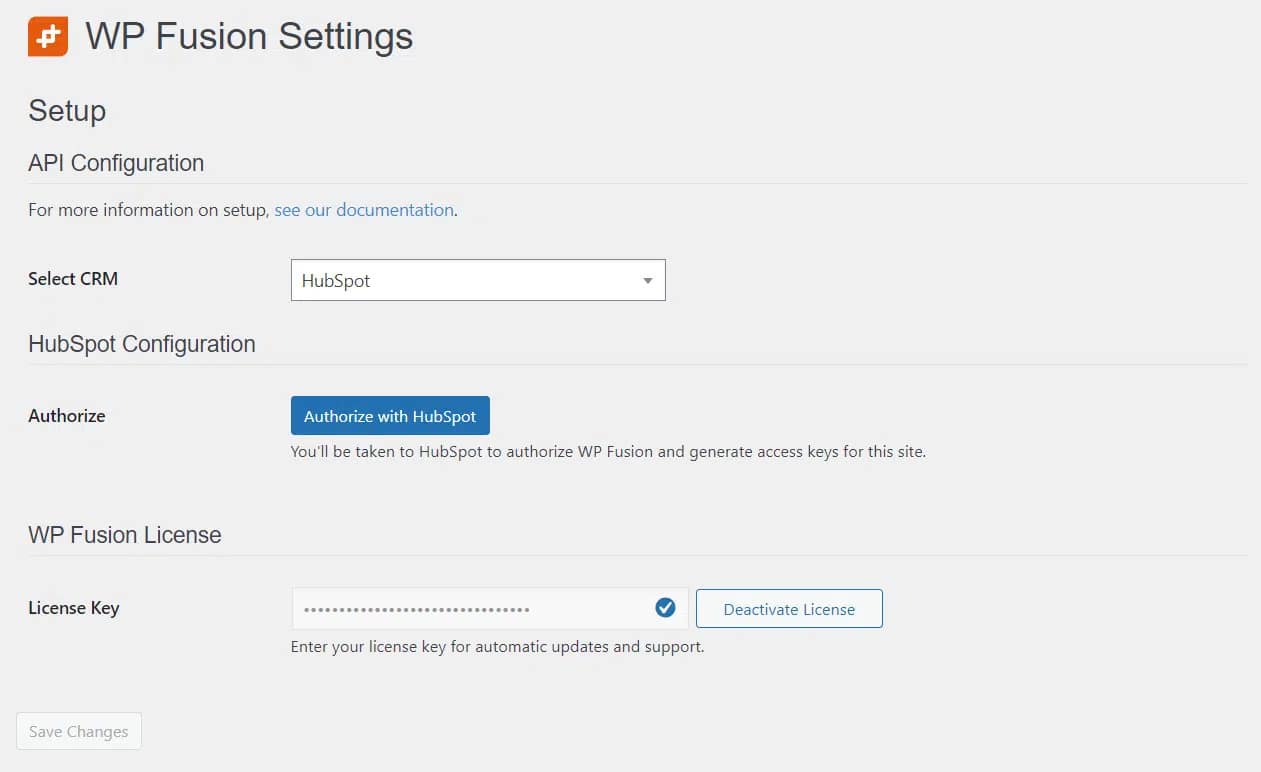
To connect WP Fusion to your CRM navigate to Settings → WP Fusion in your WordPress dashboard.
Under the General Settings tab, select your CRM from the dropdown list. Enter your API key (found in your CRM account) and click Connect and don’t forget to save your settings.
#Step 3: Embed a Video & Add Tags
#On Gutenberg Editor
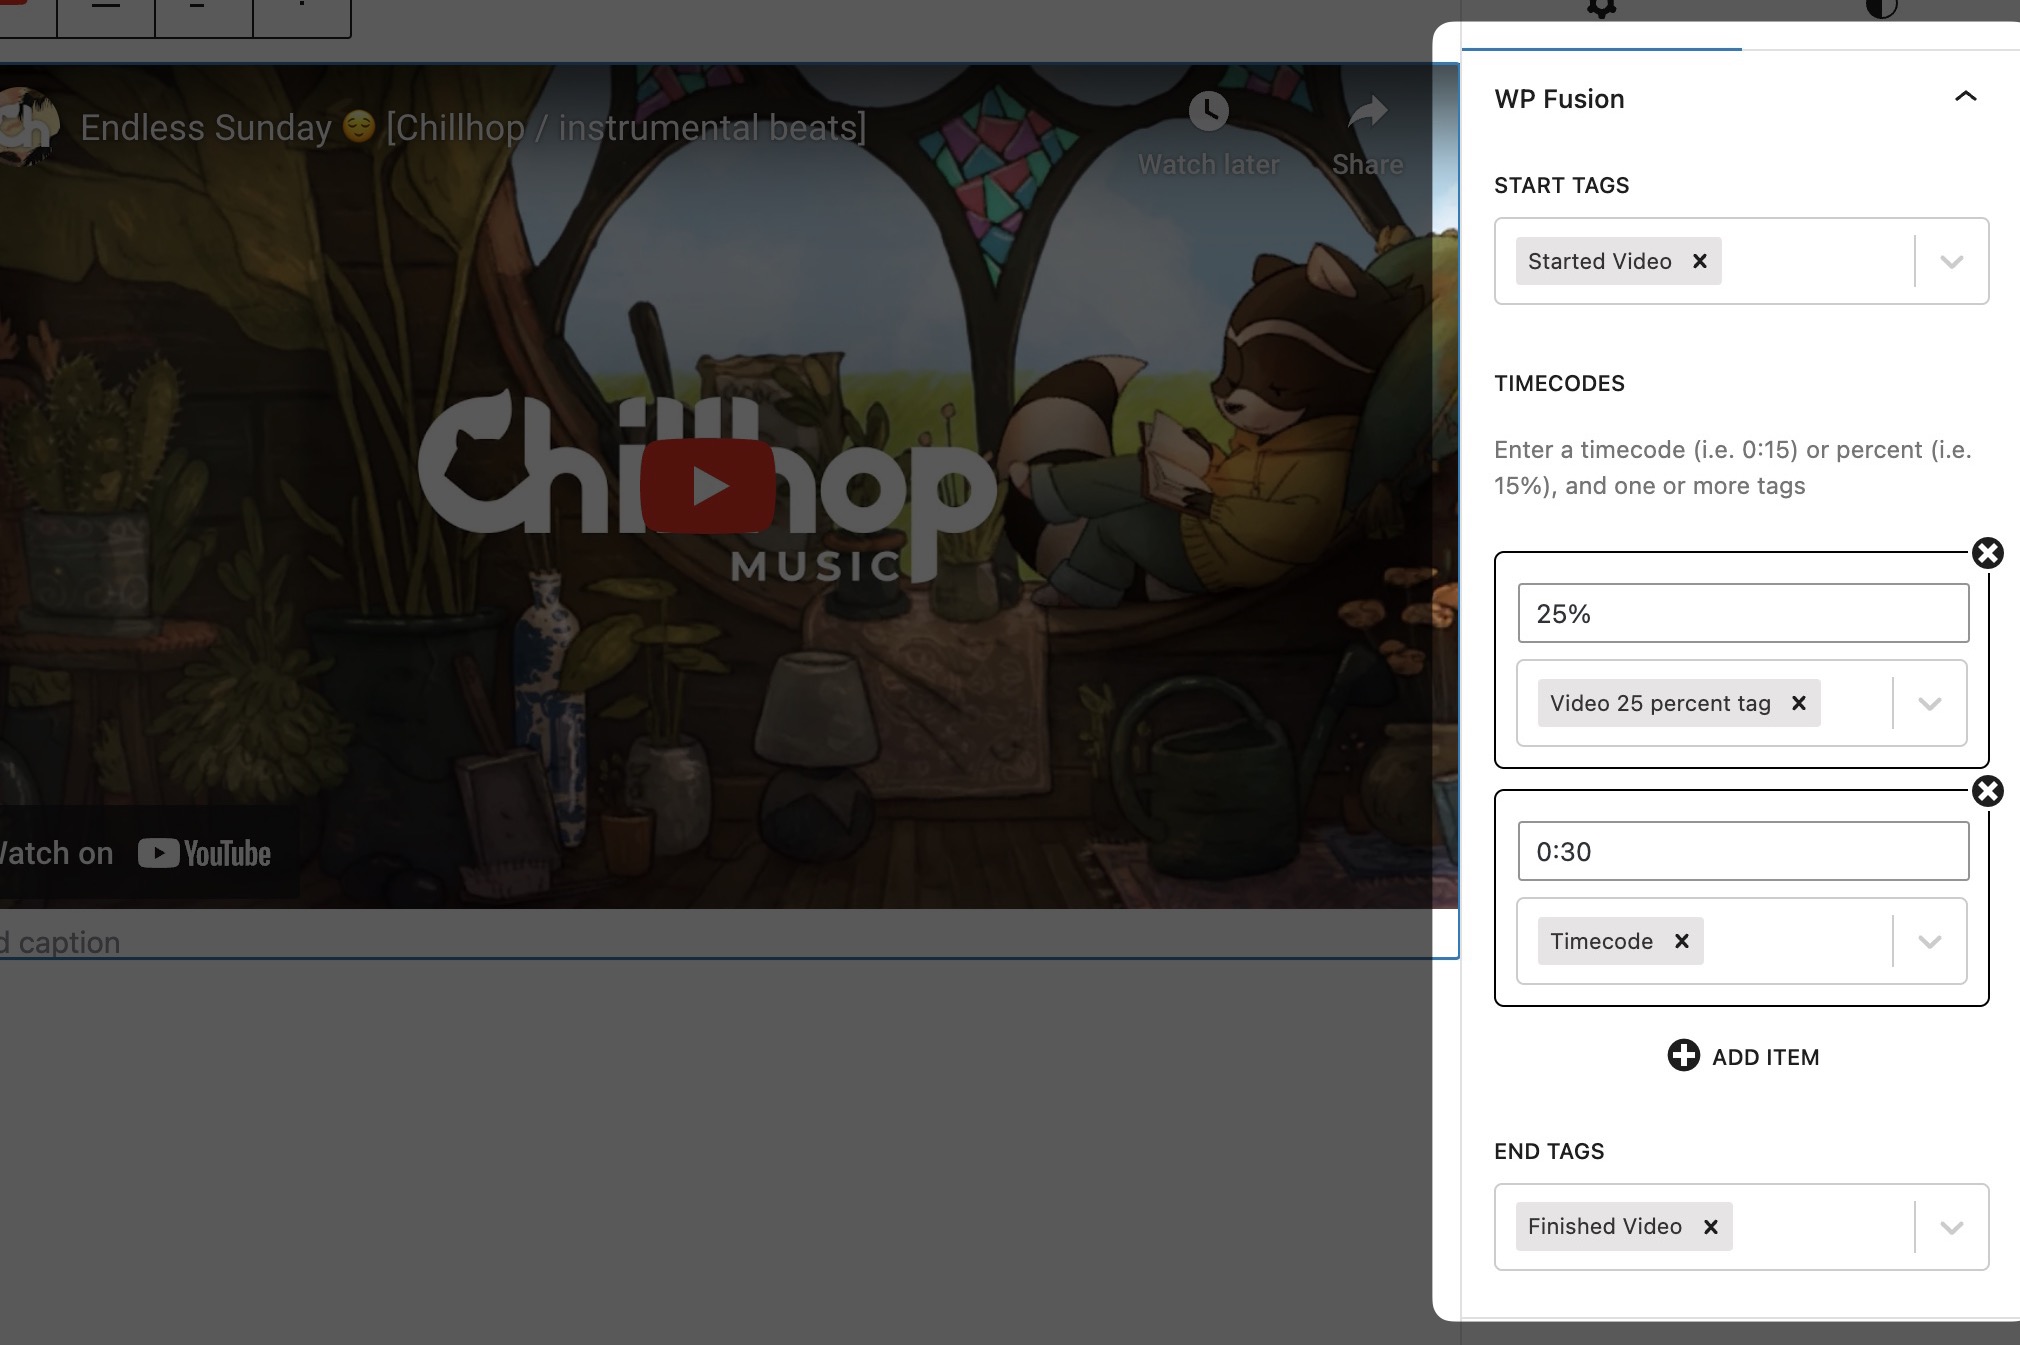
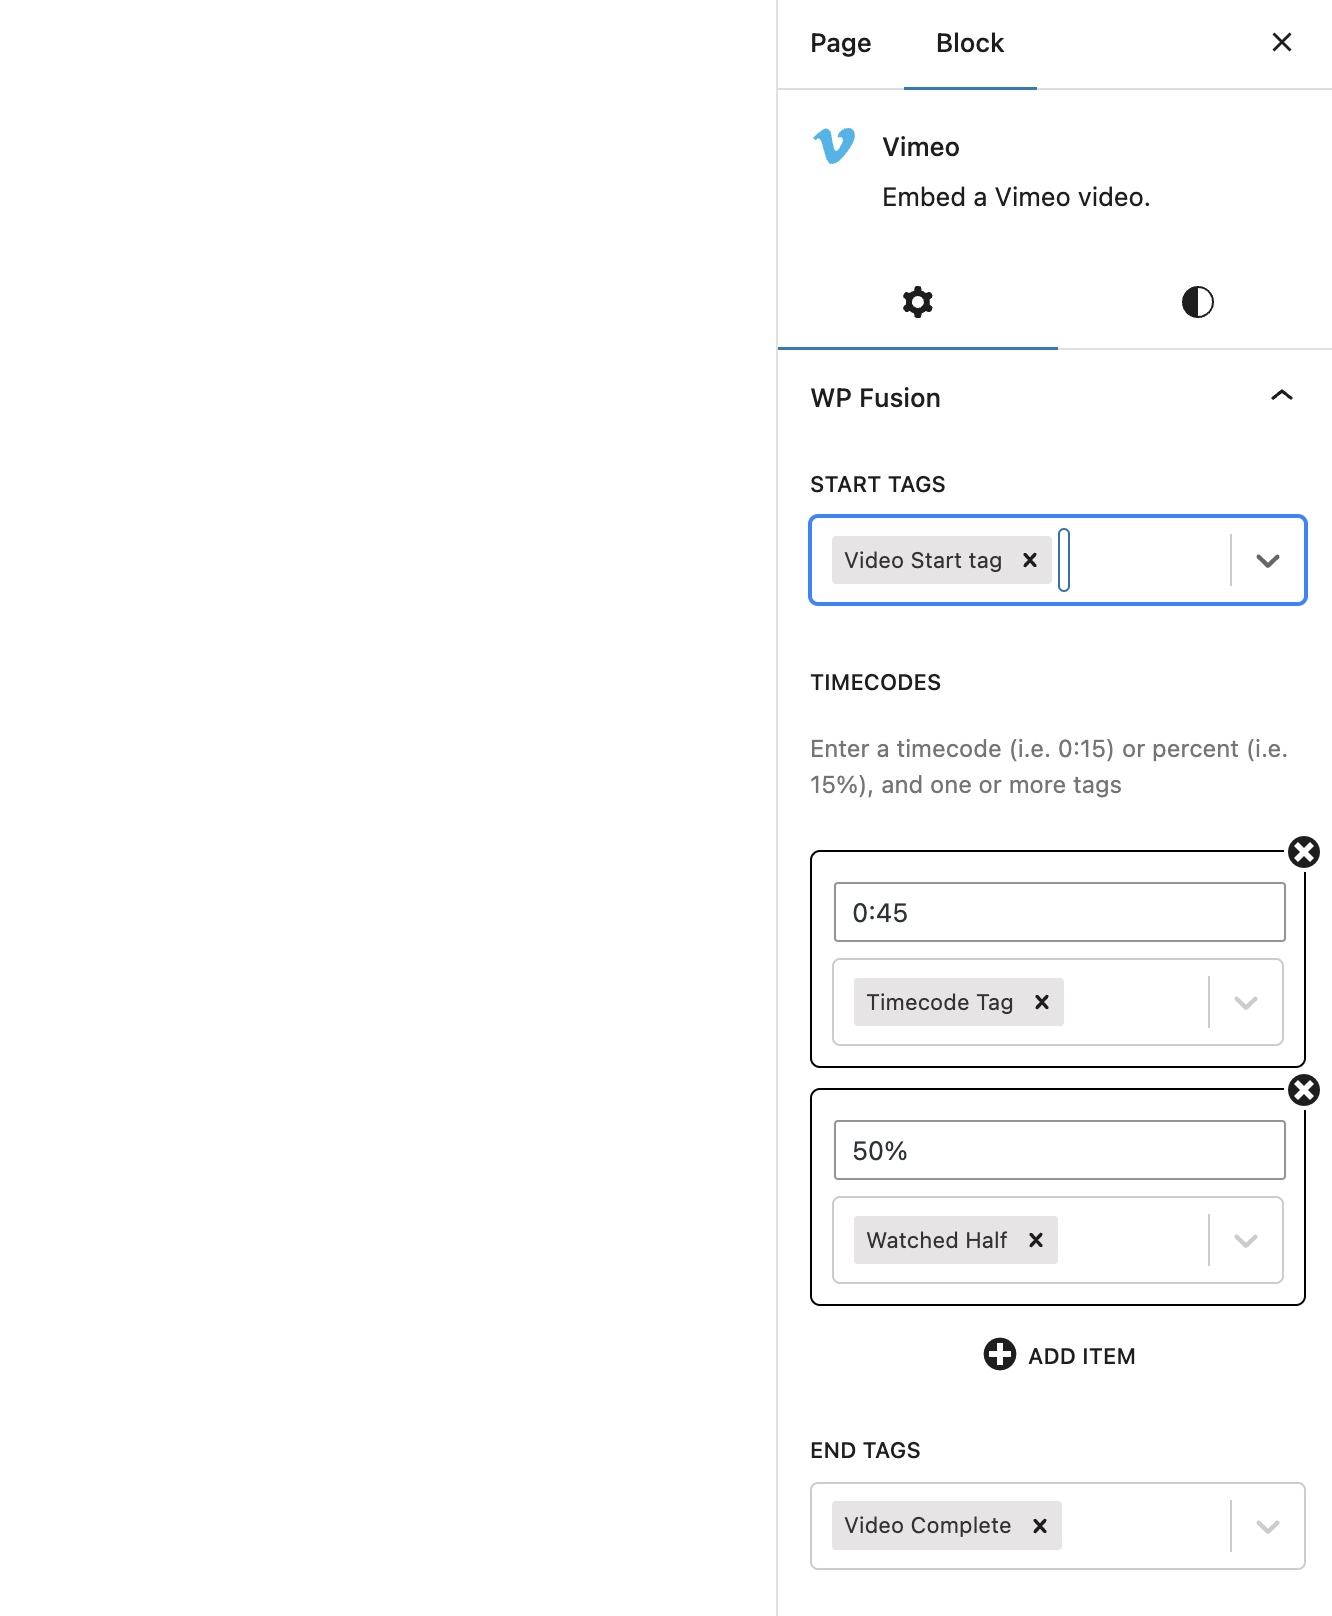
Using the Gutenberg Block Editor, add a video block to your post or page, enter the video URL (YouTube, Vimeo, or self-hosted video), click on the video to access WP Fusion settings in the right panel, and configure the following tracking options:
✅ Start tags – Tags applied when playback starts
✅ Timecodes – Tags applied at specific timestamps
✅ End tags – Tags applied when the video reaches 95% completion
#On Classic Editor
If you’re using the Classic Editor, setting up media tracking follows a slightly different process.
First, click Add Media in the post editor and upload your audio or video file. Once the upload is complete, click Insert Into Post to embed the media player.
Alternatively, you can embed a video from an external source by selecting the Insert from URL tab and pasting the video link.
After the media is inserted, open the media details window. Below the video, you’ll find the WP Fusion Media Tracking settings, where you can configure the start tags, timecodes, and end tags.
Simply enter the relevant tags for each field, leaving any unused fields blank.

For more assistance, look at this help doc:
#Step 4: Set Up Automations
In your CRM, create automation workflows triggered by these tags. Set up email sequences, score adjustments, or other actions based on media engagement and create segmented lists of users based on their engagement levels.
For example, you can use Media Tools to unlock content when users reach specific video milestones.
This is especially useful for LMS where you might need to verify students have watched required training videos before accessing quizzes or new lessons.
Simply create content restriction rules that require specific “video completed” tags, which are automatically applied when users watch videos to the designated percentage.
Look at this tutorial on setting up LifterLMS with Presto Player to ensure students complete their course before moving on to the next course.
#Step 5: Test Your Setup
Before going live, test the tracking setup to ensure it works correctly. Play the video as a test user, verify that engagement tags are applied correctly, and adjust settings as needed.
#Conclusion
Tracking audio and video engagement in WordPress is no longer optional. It’s essential for understanding user behavior, improving content strategy, and maximizing conversions.
With 🧡 WP Fusion’s Media Tools add-on 🧡, you can track media interactions, apply CRM tags, and automate engagement-based follow-ups to keep your audience engaged.
By following this guide, you now have a complete setup for monitoring video and audio consumption, identifying key engagement trends, and leveraging data-driven insights to optimize your content.
Whether running an online course, membership site, or marketing campaign, advanced media analytics will help you refine your approach and boost results.
Give WP Fusion’s Media Tools a try today!