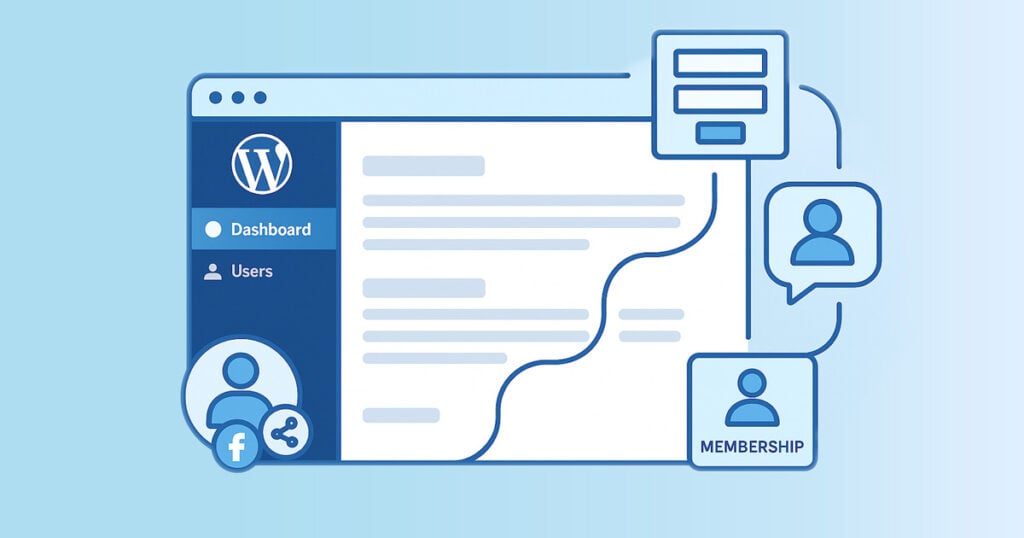
If you’re new to establishing your online presence with your website, having user registration capabilities is a step forward in the right direction.
In this post, we’ll go over what user registration is and its benefits, and how you can enable it on your website using no plugins or with the plugins User Meta, Ultimate Member, MemberPress, and Paid Memberships Pro.
After learning how to set up user registration with these methods, we’ll also cover how you can create a welcome email that is automatically sent to new users when they register with your website. We’ll create this automation using ActiveCampaign and, of course, WP Fusion 🥳
#User Registration and Its Benefits
User registration simply refers to the ability for those who use your website to have an account with your website.
You know when you log in to Netflix, and you have to type in your username and password? that’s what user registration looks like on the front-end of a website. This post will go over how to set up user registration for your website on the back-end.

What are the benefits of having user registration capacities on your website, you might ask. Again, think about the accounts that you have with different websites.
You might have an account that you log into for work – this involves user registration. Maybe you have an account with a clothing brand you like, or with a company that sells any product that you prefer to buy online.
There are guest checkout options for websites, but if you a product and buy it again, it is often easier if you have an account.
This would be the same experience for users of your website. There are certain advantages with being a registered user and it can make the user experience easier and more fluid.
Being able to register as a user on a website creates a more personalised experience for users, as they can manage their own account (like save preferences and look at their order history) and also improves customer service as user registration allows for streamlining help and issue resolution.
Registered user can also have access to exclusive features, premium content, or discounts (this part is up to you).

As a website owner, by having user registration available, you can build a community, control content if applicable and gain loyalty from and retention of your users.
User registration also allows website owners to gain insight into their users, as it provides valuable data on user behavior, preferences, and engagement. This then increases website owners’ marketing opportunities (WP Fusion plays a role in this part 😉).
If you’re a small business or organization and want to set up user registration for people who work for you, you can also assign user roles for those users.
User registration often involves promoting a digital or physical product that you would would sell on your website, but not always.
Someone might enable user registration for organizing a free event or to save progress on something; for example, on an educational platform where a user is in an online course.
With all of this in mind, you can see that user registration is the springboard for a lot of possibilities!
#Questions to Consider
The most important thing in deciding how to enable user registration or what plugin to use comes down to knowing what you want or need your website to do. We’ll go into more detail on this throughout the post, but here are some important questions to consider as we dive in:
- What kind of scale is my website/business model?
- What level of skill do have with software and how much time am I open in investing to learn something new?
- Does my business model include courses, subscriptions, or gated content?
We’ll come back to these questions throughout the post, but thinking about them now will help you decide what route to take when setting up user registration for your website 🎉
Let’s jump into your different options!
#Different Ways to Set Up User Registration
We’re going to go over four different methods of setting up user registration. First, I’ll explain how this works without using any plugins. Then, I’ll go over how to set up user registration using the plugins MemberHero, Ultimate Member, and MemberPress. Lastly, I’ll give a quick review on how Paid Memberships Pro compares with MemberPress, just in case you’re trying to decide between these two membership plugins.
Each of these options has its advantages and disadvantages. You can check out our comparison table at the end of this post. In this table, we also recommend which plugin we think is suitable to different kinds of website owners 👍
#No Plugins
Using no plugins is fairly straightforward, but still requires some steps.
First, you’ll need to enable user registration in WordPress. Do to this, you’ll navigate to Settings > General in WordPress.
Once you’re in settings, you’ll locate Membership and then check the box next to Anyone can register.
Then, you’ll want to make sure that the New User Default Role is set to Subscriber.

Be sure to save your changes once you’re done!
Next, we’ll all the registration link to the site’s menu. Navigate to Appearance > Menus.
Under Custom Links, add the link to your site’s registration form, it will look like this: https://yoursite.com/wp-login.php?action=register.
Now you’ll choose where on your menu you want it to appear. And then be sure to save changes.

Now you’ll want to check the front-end of your website. I suggest doing this by opening an incognito page to look at your website. This will allow you to see your website as your users would see it.

Check your front-end and make sure the link works.
And you’re done! You just created your user registration without using plugins!
#User Meta
User Meta is a comprehensive user registration and profile management plugin that provides extensive customization options for front-end user interactions. It offers a robust solution for creating custom registration forms, login pages, and user profiles without requiring users to access the WordPress admin area.
First, you’ll need to install the User Meta plugin. You can find it on the WordPress.org plugin directory or install it directly from your WordPress admin.
To install from your WordPress dashboard, navigate to Plugins > Add New and search for “User Meta”.
After installation and activation, you’ll find User Meta in your WordPress admin sidebar. Navigate to User Meta > Forms to begin creating your registration form.
User Meta comes with pre-built forms that you can customize, or you can create entirely new forms from scratch. To create a registration form, click Add New Form and select “Registration” as the form type.
The form builder offers a drag-and-drop interface with over 35 field types including:
- Text fields (single line and multi-line)
- Email and password fields
- Dropdown selects and radio buttons
- Checkboxes and checkbox groups
- Date pickers and file uploads
- Address and phone number fields
- Custom HTML and divider elements
User Meta integrates seamlessly with WP Fusion, automatically syncing new user registrations and profile updates to your connected CRM. When users register through a User Meta form, their information is immediately synchronized with your CRM, and any configured tags are applied.
To display your registration form, User Meta provides multiple options:
- Use the provided shortcode on any page or post
- Add the User Meta widget to your sidebar
- Use the Gutenberg block in the block editor
- Create dedicated registration and login pages
After creating your form, copy the shortcode and paste it into a new page. Navigate to Pages > Add New, create your registration page, paste the shortcode, and publish the page.
Don’t forget to add your new registration page to your site’s navigation menu by going to Appearance > Menus.
User Meta also provides advanced features like:
- Email verification and notifications
- reCAPTCHA integration to prevent spam
- Role-based registration forms
- Custom user profile pages
- Password reset functionality
- User dashboard and account management
The plugin works excellently with WP Fusion, providing reliable data synchronization and supporting complex field mapping scenarios. User Meta’s extensive field types and customization options make it an ideal choice for sites requiring detailed user information collection.
For detailed information about the WP Fusion integration with User Meta, including field mapping and tag application setup, see our comprehensive User Meta documentation.
You can jump to our comparison table if you want to see how User Meta compares against other user registration options.
Now let’s jump into how to use another free plugin: Ultimate Member.
#Ultimate Member
First of all, Ultimate Member is definitely a step-up from the two other user registration options we’ve covered so far.
It has both a free and paid version, but even the free version has many more functions for setting up user registration. If you want to find out more about Ultimate Member, you can take a peek at their website.
Here’s a rundown of the pricing options:

Now we’re going to go over how to create a user registration page with the free version of Ultimate Member.
You’ll first need to install the plugin. You can navigate to Plugins>Add Plugin and search for Ultimate Member in the search box. Then you’ll select Install Now.

After you’ve installed and activated the plugin, you might get some notifications on your plugin page.
You might be asked to allow Ultimate Member to automatically create some pages for the user registration interface. You’ll want to select Create Pages if you get this prompt.

By allowing Ultimate Member to automatically create these pages, you don’t have to copy and paste the shortcode that will be created when you make a form (like you had to do with the MemberHero setup).
You can skip this step of automatically creating pages, but I don’t recommend it. This a prime example of how Ultimate Member makes the setup of user registration easy.
You can now head over to Pages on your WordPress dashboard and take a look at the pages Ultimate Member created for you
You can also navigate to the Ultimate Member settings and then General>Pages to view the pages in the Ultimate Member plugin.

At some point, you might be directed to the Ultimate Member settings, and on this page you can make changes to basic user settings, but you don’t have to.
There’s an introductory video that goes over how to set up these basic user settings in a lot of detail, but I’m just going to cover the most important stuff.
Once you’re in the General settings, uou can then select Users.

From here you can set the user registration role, which I recommend to set to default, because then it will default to the role that you have in your website’s settings.

You can also adjust the password settings like Enable strong passwords and Enable password show/hide icon on password field.

I always like to have the password visible as a user so I selected that setting to activate it.
Another good tip is to select Yes for the Avoid indexing profile by search engines option.

This is for privacy reasons. This makes sure your user’s profile pages aren’t displayed in Google searches. You’re selecting Yes to hide your user’s profile from robots 🤖
Once you’re done, be sure to Save Changes.
If you’d like some more information about Access, Uploads, and Emails, you can check out the introductory video I mentioned earlier.
Although Ultimate Member is not a membership plugin, you do have some options to restrict content. This is helpful if you want some posts to only be accessible to users who make an account on your website.
But I recommend leaving all access settings as they are when you’re just getting started.

If you do make any changes to these settings after taking a look at the introductory video, just be sure to always Save Changes at the end!
Now you’ll navigate to Ultimate Member>Forms and select the Default Registration form.

Then you’ll be able to see the default options for user registration. If you want to customize this form, you’ll navigate to the left-hand sidebar, and select Customize this form.

I highly recommend to navigate to Show secondary button and select yes. Then, you should type Login as the text for the secondary button. We’ll come back to this later.

Now we can play around with what fields you’d like to add to the Default Registration form.

There are a lot of options here, so don’t worry if it feels a little overwhelming. Just try selecting one and exploring your options.

For example, you could try selecting the Dropdown field.

As you play around with options, note that the little black question mark can explain some of the options.

For example, note that Title and Label are different, and the little black question mark explains what they are and how to use them.

When you’re done creating the new field for your registration form, be sure to select Add at the bottom.

You can also move and drag the fields into a different order if you like.

When you’re done adding all the fields you’d like to add to the Default Registration form, you’ll select Update in the upper right-hand corner.

Note that underneath the Update button, there is a shortcode. This shortcode is available in case you want to create your own pages, which is similar to the process in the MemberHero uer registration setup.
![a wordpress dashboard screen showing a section with a shortcode [ultimatemember form id=486] highlighted in red, next to a panel labeled login form—ideal for showcasing seamless user registration wordpress integration.](https://wpfusion.com/wp-content/uploads/2025/05/28a-short-code-ultiamte-member-USE.png)
After you’ve updated your registration form, you’ll want to navigate to Pages.
Now you’ll be able to see some more of the magic that happened when Ultimate Member automatically created the pages for us.
Once you’ve navigated to pages, you’ll want to select the page titled Register – UM Register.

When you select this page, you’ll notice that the shortcode here is the same shortcode on the Default Registration page.
![a wordpress page editor displays a register page with the shortcode [ultimatemember form id=486] highlighted and pointed out by a red arrow. the right sidebar shows user registration options and publish settings.](https://wpfusion.com/wp-content/uploads/2025/05/28b-Register-Page-in-Ultimate-Member-alreadyautomatically-has-the-shortcode-woooo-1.png)
This is the beauty of Ultimate Member creating the pages automatically for you – it syncs the forms with the pages, so you don’t have to!
Now you’ll want to navigate to Appearance>Menus. Then you’ll add the Register – UM Register page to your Menu Bar.

Once you’ve added the Register – UM Register to your menu, you’ll notice it appears at the bottom, but you can drag it wherever you would like it to appear on your menu.

Now you can check your registration page by looking at your website in (drumroll!) an incognito tab. It should look pretty much like this:

You’re pretty much set up for user registration, but now you’ll have to make the Login page available on your landing page so that users can easily login once they’ve registered with your website.
Luckily, this is really easy.
Ultimate Member has already created a Default Login form for you and – yes! – has synced it with the Login page that they automatically created for you too.


Now you just have to add the Login – UM Login page to your menu.
You’ll again navigate to Appearance>Menu and then add the Login – UM Login page to your menu and choose where you’d like it to appear on your menu bar.

Be sure to Save Menu once you’re done.
Then you’ll open your website in an incognito page to view the login page. It should look like this:

So clean and tidy! Ultimate Member really sets things up nicely 💁🏻♀️
Clearly, the big advantage with Ultimate Member is that all of these awesome features we just used are free. And, it’s pretty easy and intuitive to use as well.
But let’s move on to setting up user registration with MemberPress, where you can do a lot more than just user registration 🕺🏻
#MemberPress
MemberPress is a step above the rest of the plugins we’ve worked with so far. It has the ability to create full memberships,
MemberPress has much more to offer than just user registration, and if you want to learn more, you can head over to their website to take a look at all of the plugins’ features.
If you scroll all the way down to the bottom of their website, you’ll be able to see all of their Case Studies, which are pretty impressive.

The big downside to MemberPress is that there isn’t a free version. But if you’re thinking of going big and taking advantage of all of MemberPress’ features, the cost can be worth it.
Here’s a breakdown of the pricing:

Right now (June 2025), MemberPress is having a big sale and all of their memberships are 50% off. They might also have sales around Black Friday or Christmas if you’re looking to save.
Just a heads up, I’ll technically be using the Pro version as I go through the steps of setting up user registration, but all of the features we’ll be working with are also included in the Basic membership, too.
Once you’ve installed and activated the plugin, you’ll be prompted with a Get Started page.


Next, you’ll need to Activate the License and you’ll be prompted to login in to your MemberPress account.

Once you’ve activated the license, you’ll move on to the other setup options. Select Continue in the bottom right-hand corner to proceed.

There will be some prompts that aren’t relevant to user registration that you can Skip for now.

For example, there is a prompt for content protection. This is awesome if you’ve already got content you want to protect, and in that case, go for it!
But you can also come back to it later as you develop your website more.
When you’re done with (or skipped through) the setup, select Finish in the lower right-hand corner.

If you feel like you need more detail on the MemberPress setup, there are some videos that go into a lot of detail, and some short introductory videos, too.
After installing the plugin and going through the basic setup, you’ll need to create a membership.
You can create a membership in the process of the setup, but I’m going to show you how to create a membership the regular way.
When thinking about what kind of membership you want to create, it’s important to understand how memberships can be used in MemberPress.
Usually, MemberPress is used for people to sell memberships that are reoccurring on a monthly or yearly basis. These memberships often include access to certain digital content (think of a streaming site like Netflix or an online newspaper like The New York Times).
However, you can also sell physical products with a subscription. HelloFresh is a good example of this.
Or, a business could send a monthly package of sample beauty products or maybe various dog toys to a customer (because some dogs destroy their toys on a weekly basis 🐶. If this isn’t your dog, lucky you).
There is also the option to use Membership to sell individual products, which could be digital or physical as well.
Individual product memberships may seem a little counterintuitive because we usually think of recurring payments when we think of memberships. However, these kinds of memberships could include selling an E-book, and it would include a one-time payment for access to that E-book.
For more information on what kind of memberships you can create, check out MemberPress’s documentation. I especially recommend their documentation on MemberPress Memberships and Groups.
Okay, back to creating a membership!
First, you’ll add a new membership on the memberships page.

Then you’ll give your member a name and a short description of what users will be getting access to.
You’ll also set up the Price, Billing Type, and Interval. I just chose $29.99, recurring, and monthly, but you can check out more options for this step in this video.


For the trial period, I set it to a 7-day trial, and selected Allow Only One Trial.

I left Limit Payment Cycles unchecked, but again, you can find out more about this function in this video.
Once you’ve gone through these basic steps in creating a membership, you’ll want to Publish your membership.

You’ll notice after publising that a permalink has been added to the membership for registration.

So now you’ll head to Appearance>Menus.

On the menu page, you’ll select Memberships.

Sometimes users aren’t able to see Memberships here. If this happens to you, navigate to Screen Options in the upper right-hand corner and check the Memberships box there.

Next, you’ll select the membership you just created. In this case, it’s called Premium Membership, because that is what I called the membership I just made. Then you’ll click Add to Menu.

You’ll see that it shows up at the bottom of your menu.

You can choose where you’d like this appear on your menu.
You can also change the link text to something like Register or Sign Up if you want. And you’ll see that the original name, Premium Membership, will be listed at the bottom.

Last but not least, be sure to Save Menu!
Then you’ll open your website in a incognito window.

And you should see your Registration page on the main menu bar, like so:

When you click the Register here! text, your registration page will come up, and it should look like this:

And voila! Your registration page is complete!
If you want to compare MemberPress directly with the other options, check out this comparison table at the end of our post.
#Paid Memberships Pro
While we’re not going to go through a whole work-up on how to set user registration in Paid Memberships Pro, I do want to give you a run-down of this plugin’s features and compare it to MemberPress.
First and foremost, Paid Memberships Pro is great because it has a fully-functioning free version of the plugin.

This is a boon if you’re unsure if a membership plugin is right for you (as opposed to Ultimate Member, which is considered a user registration plugin).
The free version includes everything you need to get your membership site up and running, so Paid Memberships Pro is a good option for those on a budget, or if you want to hold off on paying for a membership plugin for now.
Paid Memberships Pro is also known for it’s many add-ons and the extensive customization that comes with them.
Another upside to Paid Memberships Pro is that it is compatible with more payment processors than MemberPress.
Paid Memberships Pro offers integration with PayPal, Stripe, Authorize.net, and Braintree, whereas MemberPress’s standard plan is only compatible with PayPal and Stripe.
Also, I found Paid Memberships Pro’s membership level options easier to navigate than in MemberPress.

Both Paid Memberships Pro and MemberPress offer content dripping, content restriction options and course builders, although MemberPress’s course builder matches that of other Learning Management System plugins.
Paid Memberships Pro’s course builder is a good place to start, but if you’re building a lot of courses and using Paid Memberships Pro, it’s probably best to integrate with an LMS plugin like LearnDash or LifterLMS.
On Paid Memberships Pro’s website you can check out all of their features, and if you still have some questions about how Paid Memberships Pro compares with MemberPress, this review might be the answer to your questions.
Last but not least, if you would like to understand more about setting up user registration with Paid Memberships Pro, you can check out their posts on setting up user registration and a login page, and on user fields.
#How Does WP Fusion Fit in to All This?
At this point, you might be wondering how WP Fusion fits into all this. Good question!
In essence, WP Fusion will allow you to sync user registrations with your CRM so that you can improve your email marketing.
This means that a user will have a tag applied to them when they register with your website, and then you can use this tag when creating an automation.
For example, you can apply a tag to users when they register an account with your website, and then use this tag to create an automation that automatically sends new users a welcome email.
Or, you could use this same tag to offer newly registered users a discount on content or a product. If you’re unsure about how to use tags, we have a great article for that.
Now we’re going to go over you how to use WP Fusion to automatically send a welcome email to a new user that registers with your website using ActiveCampaign as our CRM. Strap in!
#Integrating WP Fusion with ActiveCampaign
If you need any help activating the WP Fusion plugin, we have documentation to support you with that 👍
Next, you’ll need to connect WP Fusion with ActiveCampaign, or your preferred CRM. We have documentation to integrate WP Fusion and ActiveCampaign if you need support with that too 😎
Since we’ll be creating an email campaign next, one important thing to know is that you have to add a physical address to your ActiveCampaign account in order to send emails.
This became a problem for me at the end, so if you’re new to ActiveCampaign, or trying out the 14-day free trial, be sure to add a physical address to your account now so it doesn’t trip you up later.
To do this, navigate to Settings>Addresses>Add Address on ActiveCampaign.
Next, you’ll want to create a tag. To do this, first navigate to Contacts.

Next, you’ll navigate to Tags>Add Tag.

Then you’ll be prompted to create your tag. Since this email will be send to users who just registered, a good tag name might be New Registered User.

You should then be able to see the tag you created in your Tags list.

Next, we’re going to create the email that will be sent to these newly registered users. So you’ll need to navigate to Emails.

Then you’ll want to select Create a Campaign.

Then you’ll be prompted to name your email campaign. I chose Welcome Email to New Users.

Then you’ll give some more details for users who read your email. You’ll choose your Subject Line and Preheader. Next, select Create with email designer.

You’ll be prompted to choose a template to create your email. Choose which ever one you like. I chose Send a New Signup Checklist.

You’ll be asked if you want to edit this template with AI. I’d suggest using the email designer if you’re just getting started.

Next you’ll design your email! Have some fun with this. You can learn more about how to design an email on ActiveCampaign through this tutorial and ActiveCampaign’s overview article.

Once you’re done designing your email, you’ll select Next in the upper righthand corner.

Then you’ll be taken back to the email details and you can select Save and exit.

Now let’s navigate to Automations on the left sidebar.

Next, you’ll select Create an Automation.

Then you’ll want to select Start from Scratch and Continue.

Once you’re in the automation, you’ll click Add a start trigger.

Then you’ll be asked what kind of trigger you want to add, and you’ll select Tag is added.

Now you’re going to add the you created earlier. You’ll select New Registered User and then select Save.

Next you’ll be taken back to the automation and we’re going to add them email we created to the automation. So first, you’ll select the plus sign (+) in the automation.

You’ll be prompted to Add an action and you want to select Send an email.

Then you’ll select Start from an existing email.

Now you’ll go ahead and select the email you just created: Welcome Email to New Users and click Create.

And then Save!

You’ve completed your automation! 🥳

Make sure your automation is toggled on to Active!

Next, you’ll want to navigate to WP Fusion in your WordPress dashboard. Once you’re there, we’re going to navigate to General Settings>Assign Tags.
This will make sure that when someone signs up for a membership on your website the welcome email will get sent to them.
And, the best part is, it doesn’t matter which method you choose for user registration. Assigning the tag here in WP Fusion will work with all of the four options we went over 🥳

Last but not least, be sure to scroll down to the bottom of the page and Save Changes.

#Wrapping up
To be sure that your automation is working properly, go ahead and open your website in an icognito window and do a test registration. Then you can be certain that your automation and user registration method work together.
If you went through all of these methods to figure out which would suit you best, you probably learned a lot today. Even if you just went through one of the methods you still did a fair bit of reading. Go you! 💁🏻♀️
If you have any questions or think there are some holes in the instructions please let us know in the comments below. The best way for us to improve is with your feedback.
Below is our much anticipated comparison chart, and then the glossary.
| Plugin | Price | Reccommendation |
| No plugin | Free | We recommend this for new users who are just getting started with WordPress and/or their small business. Using no plugins is super easy and a good place to start when you’re fresh-faced and totally new to this. |
| User Meta | Free | User Meta is the next step up. Maybe you want to have a little more info about your users and want to start to integrate your user registration with some basic marketing strategies. If you’re still in early stages of building your website and business, but want some slightly more advanced features, this is a good plugin for you. |
| Ultimate Member | $296 to $348 / yr | Maybe you’re at a point where you’ve been working with WordPress for a while, want to monetize your business more, and scale your marketing at a higher level. If this is where you’re at, trying the free version of Ultimate Member sounds like a great option for you. |
| MemberPress | $359 to $799 / yr | MemberPress is a fully-functional membership plugin, so it goes way beyond user registration needs. We recommend this plugin for those who want the capacities for user registration, plus some more features. For example, if you want to monetize your business through memberships in addition to enabling user registration, then you might choose MemberPress. |
| Paid Memberships Pro | Free to $597 / yr | If you want to figure out if a full membership plugin is right for you without jumping in and paying for it, Paid Memberships Pro is the perfect option. The free version allows you to check out how to set up user registration for your website and explore all the other features the plugin has to offer, like creating courses, content dripping, and many other integrations. |
#Glossary
Automation – An automation is the automatic syncing and management of user data between a WordPress site and a CRM or marketing platform, enabling personalized interactions without manual effort.
Back-end – The back-end of a website is the server-side part that handles data processing, storage, and application logic, ensuring the front-end functions correctly.
Front-end – The front-end of a website is the user-facing part that includes the design, layout, and interactive elements that users see and interact with in their browsers.
Gated Content – Online material that users can access only after providing information, such as filling out a form or subscribing. For example, an article that you can only read if you have a subscription to that online magazine is gated content.
Tag – A keyword or label assigned to categorize, organize, or make it easier to find through search or filtering. In the context of WP Fusion, tags are assigned to users in order to organize them to improve your marketing.
User Roles – In WordPress, user roles define the set of permissions and capabilities assigned to each user, determining what actions they can perform on a website.


1 thought on “Four User Registration Options in WordPress and How to Integrate them with WP Fusion”
Article is outdated. There’s no menu management system in WordPress anymore that would allow to add register link to the navigation.