In this post we’re going to be looking at all the ways you can use WP Fusion with Elementor to deeply integrate your website with your CRM or marketing automation system.
We’ll be covering:
- How to capture leads with Elementor Pro Forms
- How to personalize site content based on a user’s tags in your CRM
- How to show and hide popups based on tags
- How to track engagement with Elementor videos
- and then at the end we’ll throw these techniques together into some cool demos
(Click any of the links above to jump to the relevant sections)
#The basics – capturing leads
The Forms element in Elementor Pro already supports a handful of integrations with popular CRMs— like ActiveCampaign, Drip, and MailChimp.
But let’s face it, the Elementor team is focused on building a kicka** page builder, not learning the ins and outs of dozens of marketing automation systems and their various APIs.
That’s where WP Fusion comes in. With WP Fusion active, Elementor Forms can be used with any one of our 29 (and counting) supported CRMs.
#For example
For example, let’s say we want to create a lead form in Elementor that creates new contacts in Mautic when the form is submitted.
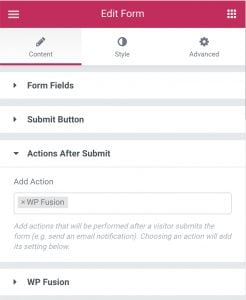
Once you’ve installed WP Fusion and connected it to Mautic, you’ll see a new WP Fusion option in the Actions After Submit dropdown.
Open the WP Fusion section, and you can configure what tags should be applied in Mautic when the form is submitted.
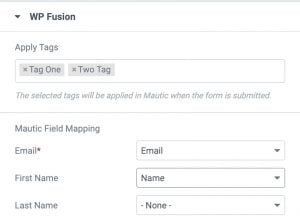
Beneath that you’ll see a field mapping list. In the left column are all your available fields in Mautic, and in the right column are dropdowns with all of the fields on your form.
Now, when the form is submitted, a new contact will be created and tagged in Mautic!
#Showing and hiding elements based on tags
This section is particularly applicable for people running membership sites, or delivering online courses.
When a user is logged into your site, WP Fusion is aware of their tags in your CRM, and these tags can be used to show and hide elements based on tags. Some possible uses for this are:
- If someone is registered to attend a webinar, show the webinar details on top of their student dashboard.
- If someone has completed Course One, show a prompt to get them to sign up for Course Two.
- If someone has a Bronze Level membership, show a message about the benefits of Gold Level membership.
- If someone has signed up for your affiliate program, display their affiliate stats.
The access control settings for any element can be configured from the Advanced tab:
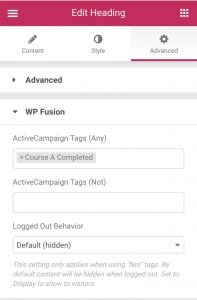
For more information on the settings, see our Elementor documentation.
#An example
In this video we’re using the GiveWP donation plugin to collect donations, and adding new contacts to the NationBuilder platform.
On the donation confirmation page, we use Elementor and WP Fusion to conditionally show a donation confirmation message based on the amount donated.
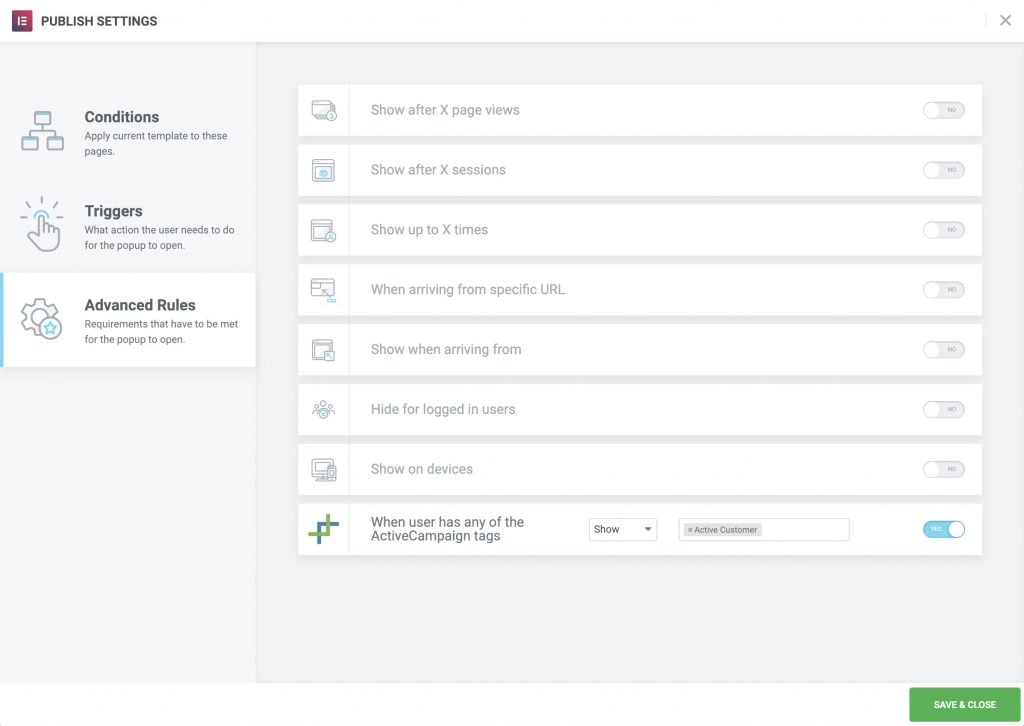
#Popups
In the same way you can show and hide elements on a page, WP Fusion also lets you control the display of popups in Elementor using a user’s tags in your CRM.
This can be configured from the Advanced Rules tab while editing the Publish Settings for any popup.
#Examples
This unlocks a ton of options for making your site more interactive and engaging. Some ideas:
- After someone completes their first course, display a popup with a form asking for feedback on the course content.
- If a member has been in your community for one month, show a popup congratulating them.
- If a customer attempts to leave your site and still has products in their cart (using our Abandoned Cart Tracking), show a popup with a coupon code.
- If a customer has purchased a product, display a popup with information on related products or accessories.
#Media tracking
This won’t apply to everyone, but it can be very powerful when used with an LMS system (like LifterLMS or LearnDash).
WP Fusion’s Media Tools addon has an integration with Elementor’s video element to let you tag people based on engagement with your videos.

When used with an LMS, this means you can require someone to watch a video to the end before progressing to the next lesson.
If they go to the next lesson without finishing the video, a message can be displayed saying “Please go back and finish the video to proceed.”
#Putting it all together
These are all great tools on their own, but they really shine when used together, and with WP Fusion’s other plugin integrations. Let’s look at some more advanced strategies.
#Require opt-in to view “Premium” content
In this video we’ve created a category of posts called “Premium Articles”. When a visitor attempts to view a post in the Premium Articles category, a popup will be shown asking them to opt in to your mailing list. Once they’ve opted in, they’ll be able to access all posts in that category.
#Give a discount in WooCommerce for filling out a form
In this video we’ve created a popup with an opt-in form on it. When the customer submits the form, we use WP Fusion’s auto-applied discounts in WooCommerce to unlock a 10% discount on your store.
This is especially powerful when used in conjunction with WP Fusion’s Abandoned Cart tracking. Once the popup has been submitted, you can track all of the products a person adds to their cart.
If they don’t complete checkout within a certain period of time, you can send automated emails to them asking them to come back and complete their purchase.
This has many benefits over traditional abandoned cart tracking, which normally requires the prospective customer to get to the checkout screen and type in their email address on the checkout form before they can be marketed to.
With this strategy you collect their email up front, and can then follow up with them even if they never make it to the checkout page.
#In summary
I hope this has given you a sense of some of the things that are possible by connecting Elementor to your marketing automation system, with WP Fusion.
Keep in mind that we also support 55 (and counting) other WordPress plugins, and all of them have their own ways of tagging your users, customers, and prospects.
Those tags can then be used to further personalize the site experience with Elementor, creating virtually unlimited possibilities for customization.
Thanks for reading!
(And if you aren’t already using WP Fusion, you can check out our licenses here.)