#Overview
WP Fusion includes an integration with Elementor to let you control visibility of page elements based on a user’s tags in your CRM or marketing automation platform.
#Access Control
To set up access rules on Elementor elements, open the settings for any widget, and click on the Advanced tab. Under the WP Fusion section, you will see several settings.
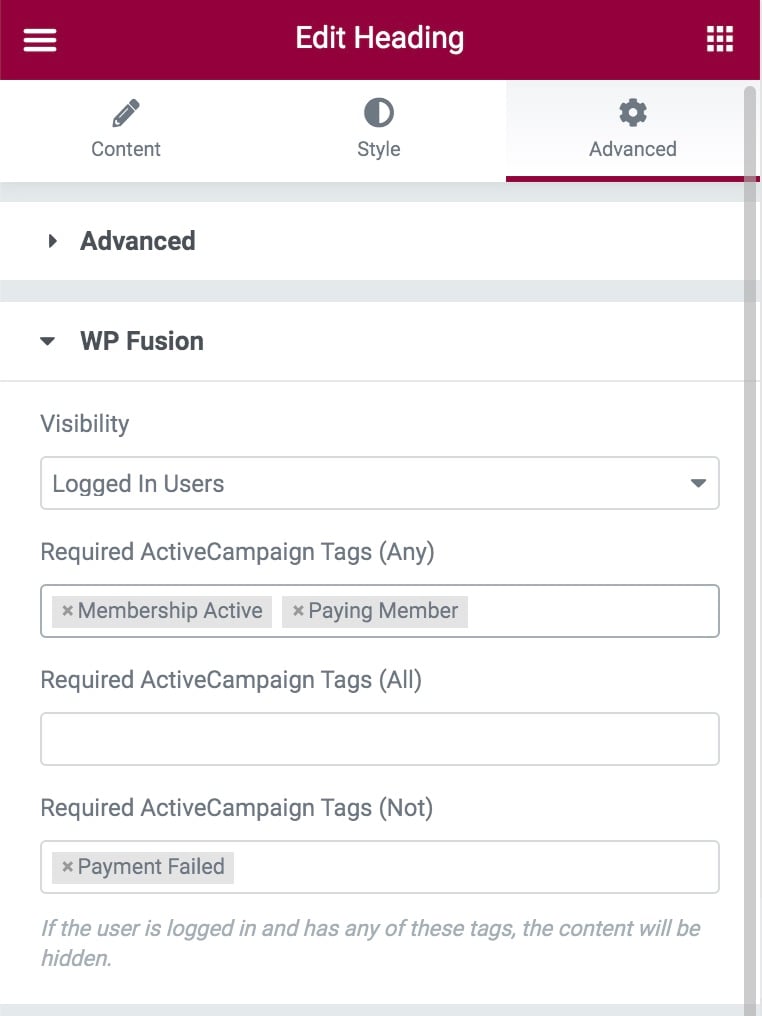
The Visibility dropdown sets the default visibility for the widget. The options are:
- Everyone: The widget will be visible to everyone regardless of whether they’re logged in or not (this is the default)
- Logged in users: The widget will only be visible to logged in users
- Logged out users: The widget will only be visible to guests on your site
- Users who can access the post: Visibility will be determined based on the access rules configured on the underlying post (see below)
- Users who cannot access post: Users who cannot access the post, based on the access rules configured on the post
Depending on the visibility mode you’ve selected, there will be additional options
- Required Tags (any): The element will only be shown if the user is logged in and has at least one of the specified tags
- Required Tags (all): The element will only be shown if the user is logged in and has all of the specified tags
- Required Tags (not): If the Visibility mode is set to Everyone, the element will be shown to guests, and hidden from logged in users if they have any of the specified tags. If the visibility mode is set to Logged In Users, the element will be hidden from guests, and hidden from logged in users if they have any of the specified tags
#Visibility indicator
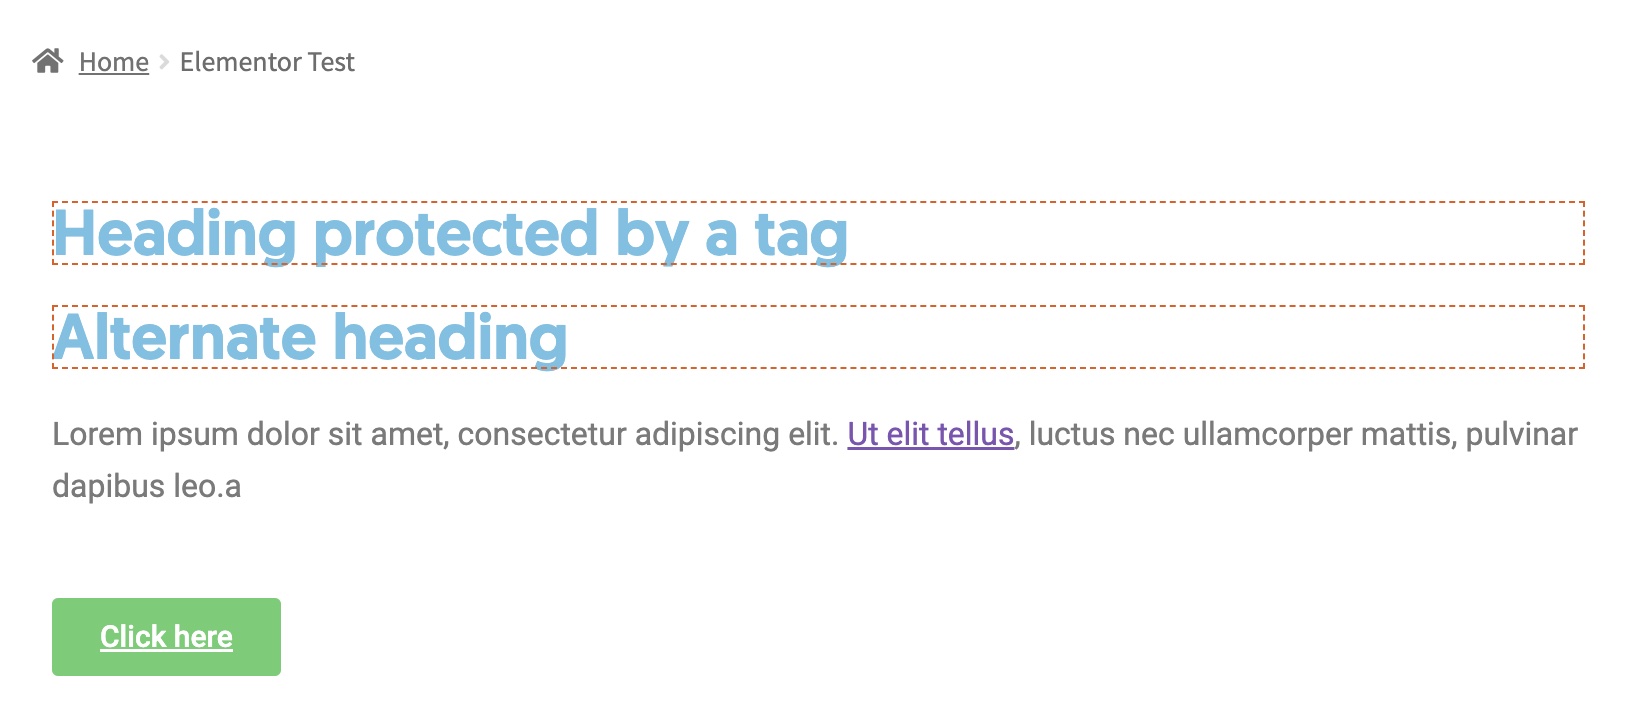
When editing content with Elementor, widgets that are protected by WP Fusion access rules will be displayed with an orange dotted line.
#Display conditions
WP Fusion also supports display conditions with Elementor Pro.
This allows you to combine tag-based access rules with other criteria such as the user’s role, the date, custom fields, and more.

#Inheriting access rules from posts
The Loop Builder is a powerful feature in Elementor that allows you to create custom “loops” (i.e. post grids) of other posts on your site. WP Fusion supports the loop builder by allowing you to set the visibility of an element based on the rules configured in the WP Fusion meta box on the underlying post.
To use this feature, select any element in a loop builder template, and set the WP Fusion Visibility dropdown to either Users who can access the post or Users who cannot access the post.

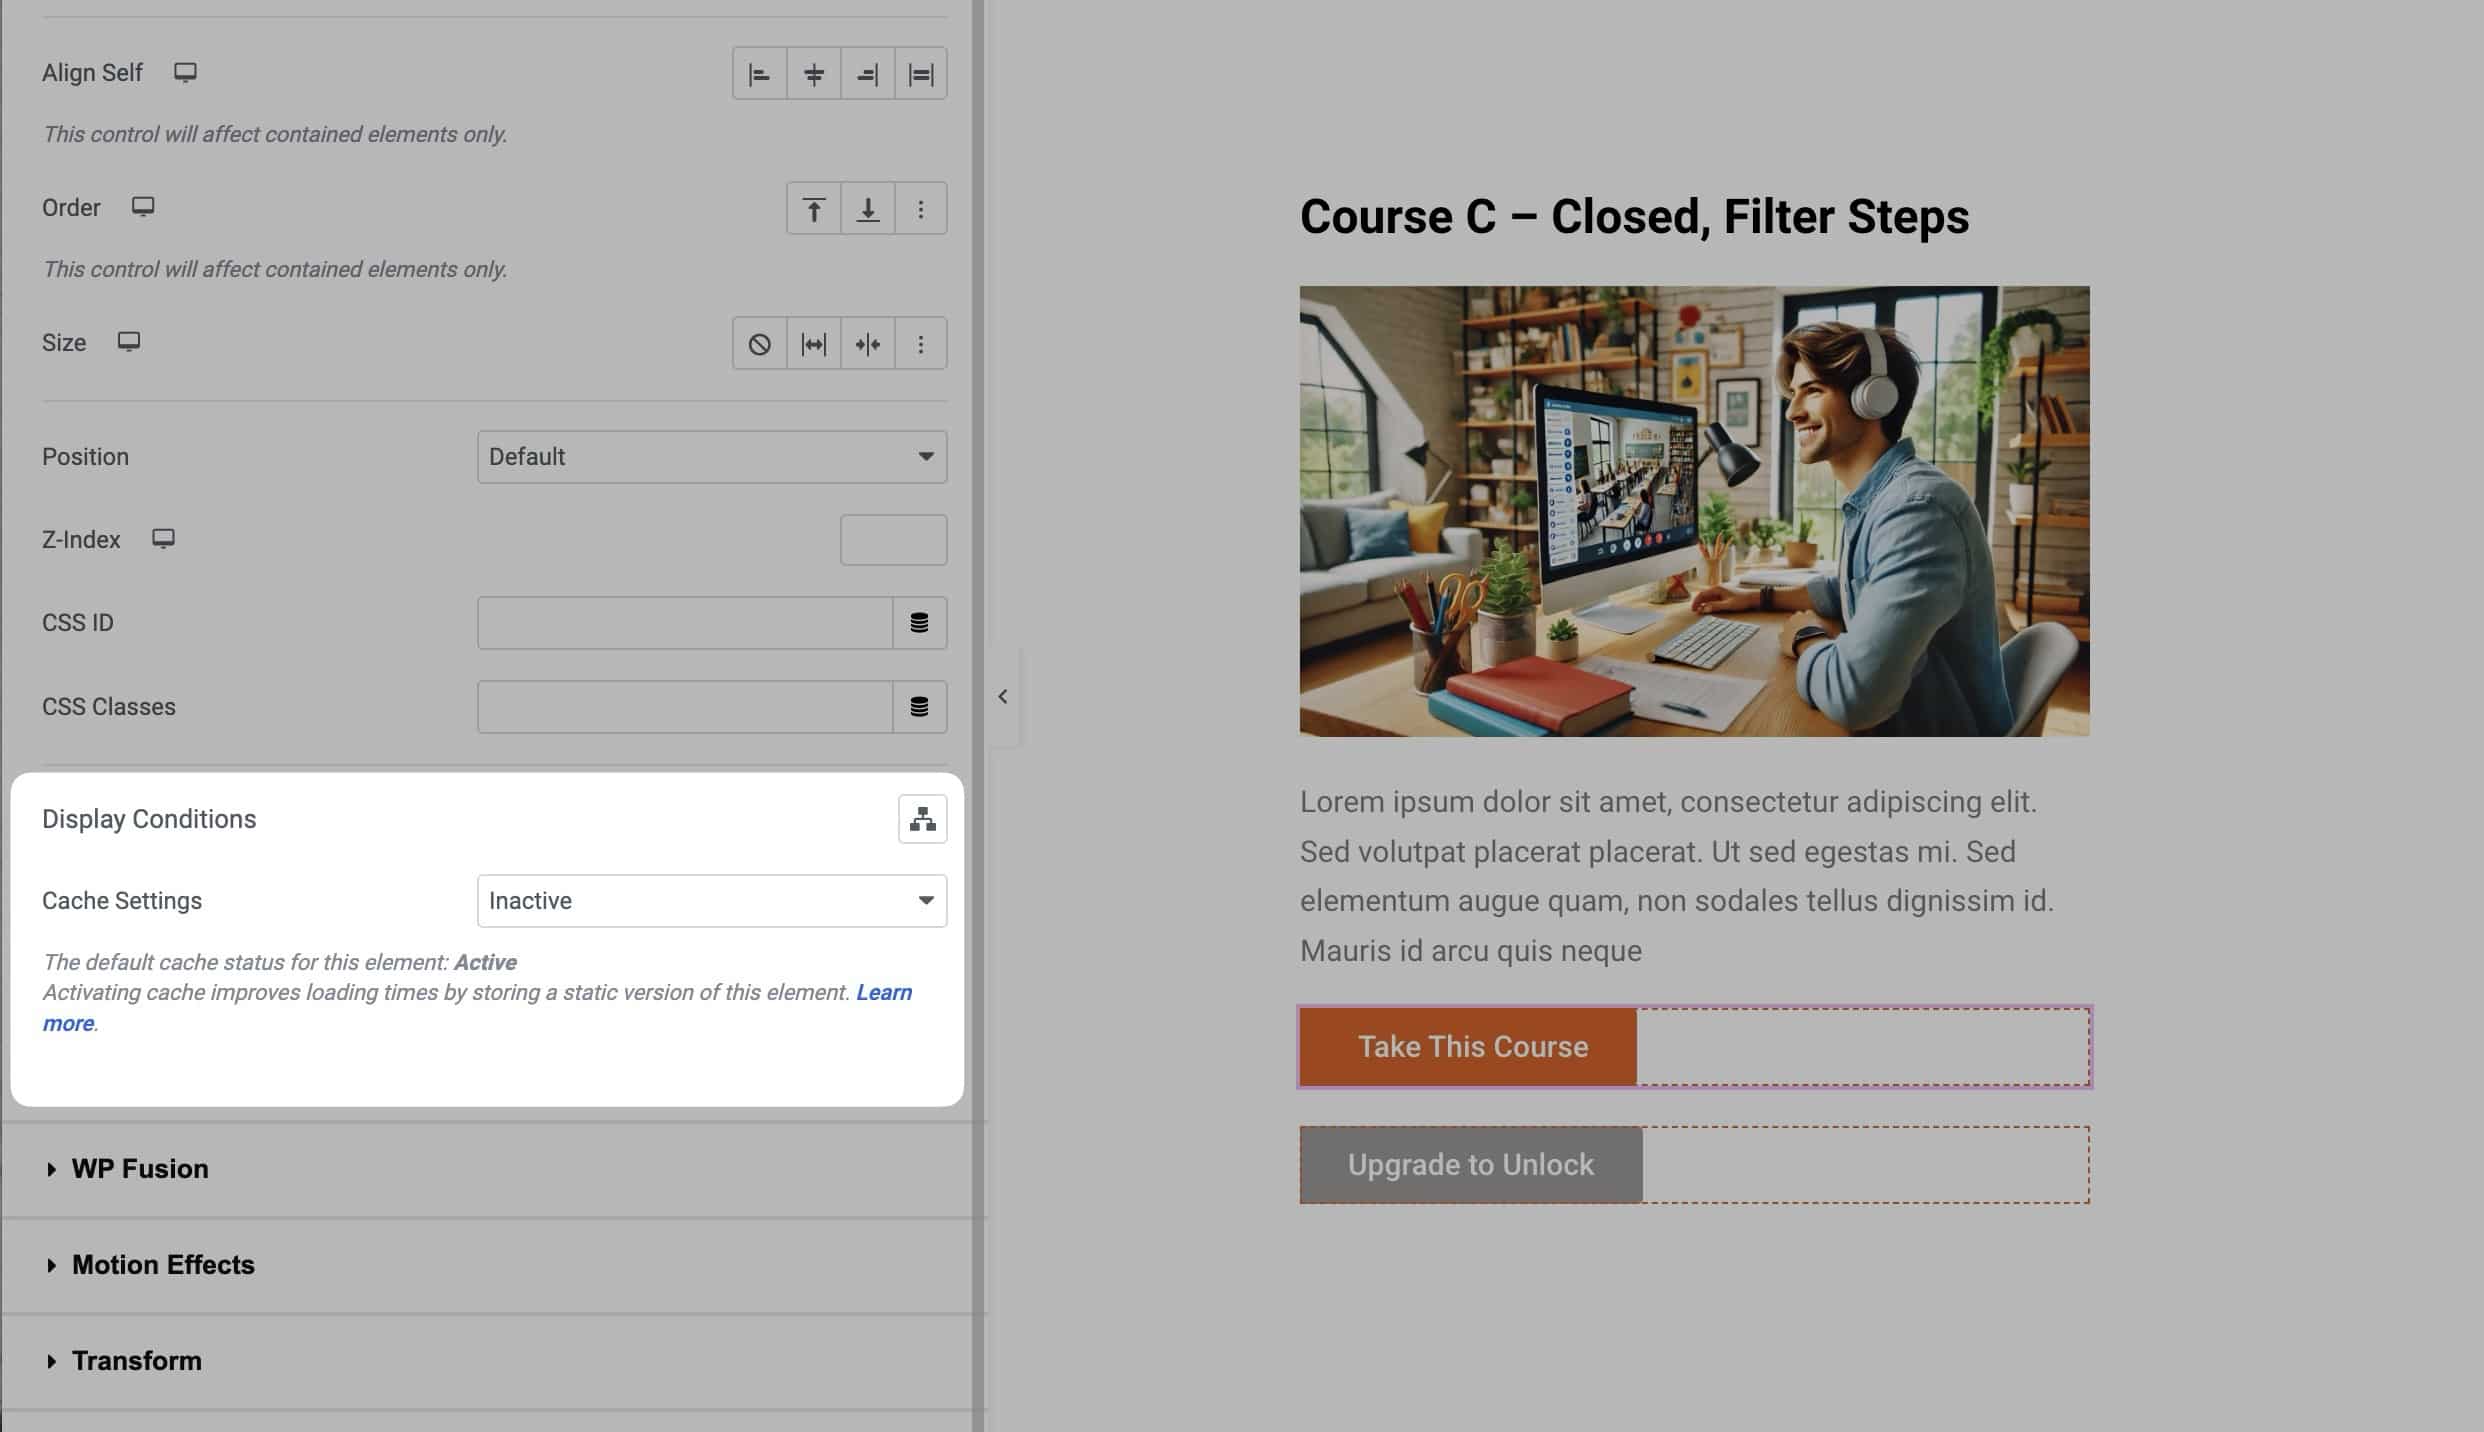
In this example, we’ve built a course grid where the buttons are shown dynamically based on the user’s tags in your CRM, and the access rules configured on the underlying post.
The Take This Course button is set to Users who can access the post, the Upgrade to unlock button is set to Users who cannot access the post.
When the course grid is displayed, the buttons are shown dynamically based on the current user’s tags and the access rules configured on each course.

Note: to use this feature, you must set the Cache Settings to “Inactive” under Advanced » Layout » Display Conditions for any widgets you’d like to be conditionally displayed.
#Hotspots
WP Fusion supports the Hotspot Widget with Elementor Pro, allowing you to conditionally display hotspots on images based on a user’s tags or lists in your connected CRM.

A great use case for this is creating interactive diagrams or maps that unlock new steps as users progress through course content on your site.
When editing any hotspot, you can select one or more required tags in your CRM from the “Required tags” dropdown. If set, the hotspot will only be shown to users who are logged in and have at least one of the specified tags.
#Elementor Popups
With Elementor Pro, WP Fusion also adds the ability to control the display of popups based on a user’s tags. To set this up, first create your popup, and then open the Advanced Rules window.
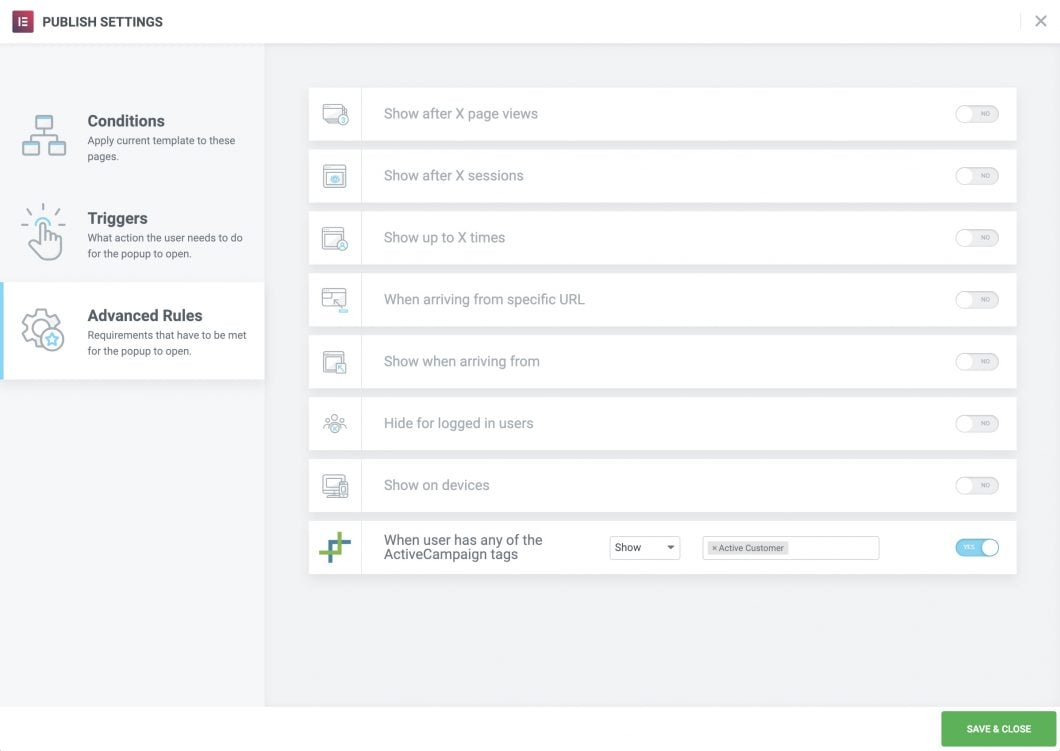
Click the toggle switch to turn on the WP Fusion condition. There are two options:
- Show: The popup will only be shown to logged in users who have at least one of the specified tags.
- Hide: The popup will be hidden from logged in users who have at least one of the specified tags.
#Filter Queries
WP Fusion adds an option to the Posts and Portfolio widgets in Elementor Pro which allows you to filter the displayed results using WP Fusion’s access rules.
To turn this on enable the setting for Filter Queries in the Query tab of the widget settings.
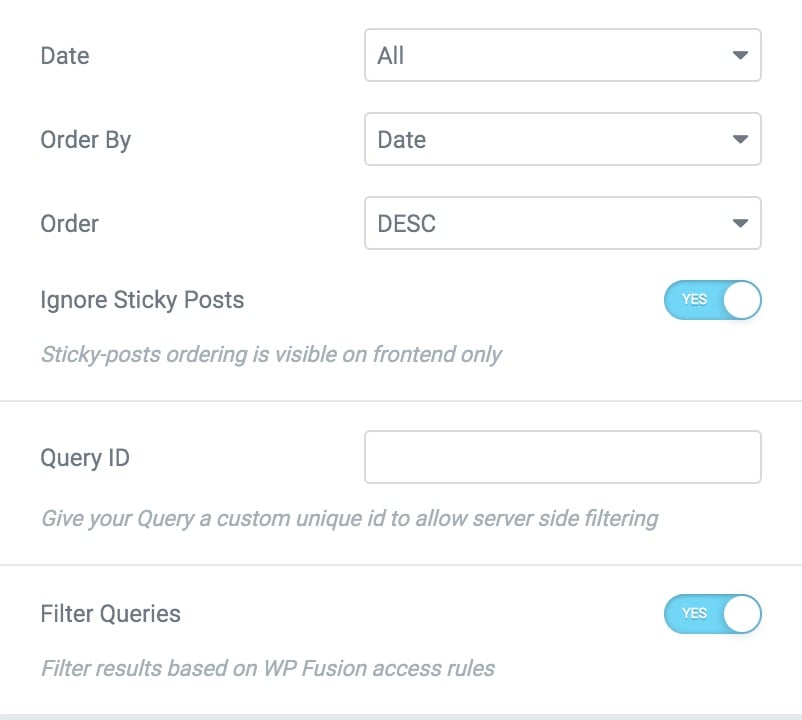
With this setting on, any posts the user doesn’t have access to will be removed from the results.
You can use this to create personalized post listings, for example of courses or media items.
Filter Queries is also supported with Jet Engine’s Listing Grid widget.
#Tracking clicks
WP Fusion can track clicks on Elementor buttons and elements by applying tags in your CRM. For more info see the bottom of Link Click Tracking.
#Developers
WP Fusion includes one filter for Elementor which allows you to create more advanced visibility rules than are possible via the UI. You can learn more and find examples under wpf_elementor_can_access.