#Can I generate an invoice / provide my VAT number?
Yes you can generate an invoice within your account area on our site. In the Purchases & Subscriptions section click Generate Invoice next to your order, and you’ll be able to provide your invoice details.
#Does WP Fusion work on WordPress multisite?
Yes, WP Fusion works on multisite WordPress installs. It is installed and configured at the site level, not the network level.
#Is WP Fusion GDPR compliant?
Yes! Unlike third-party integration tools like Zapier, WP Fusion integrates your WordPress website directly with your CRM over your CRM’s API.
That means no data is stored on or passes through our servers at any time. All data is securely encrypted and sent directly to your CRM.
Please note that if you are using a platform that supports site tracking, you will need to obtain permission from your visitors before tracking their page views.
#Can I connect WP Fusion to multiple CRMs?
The short answer is no.
Because WP Fusion provides a bi-directional sync between your WordPress site and your CRM, it’s not practical to connect to multiple CRMs simultaneously.
In an ideal setup, your CRM or marketing automation platform is the hub of your business online, and the master record of your contacts and their data. Your WordPress site is a spoke connected to your CRM via WP Fusion.
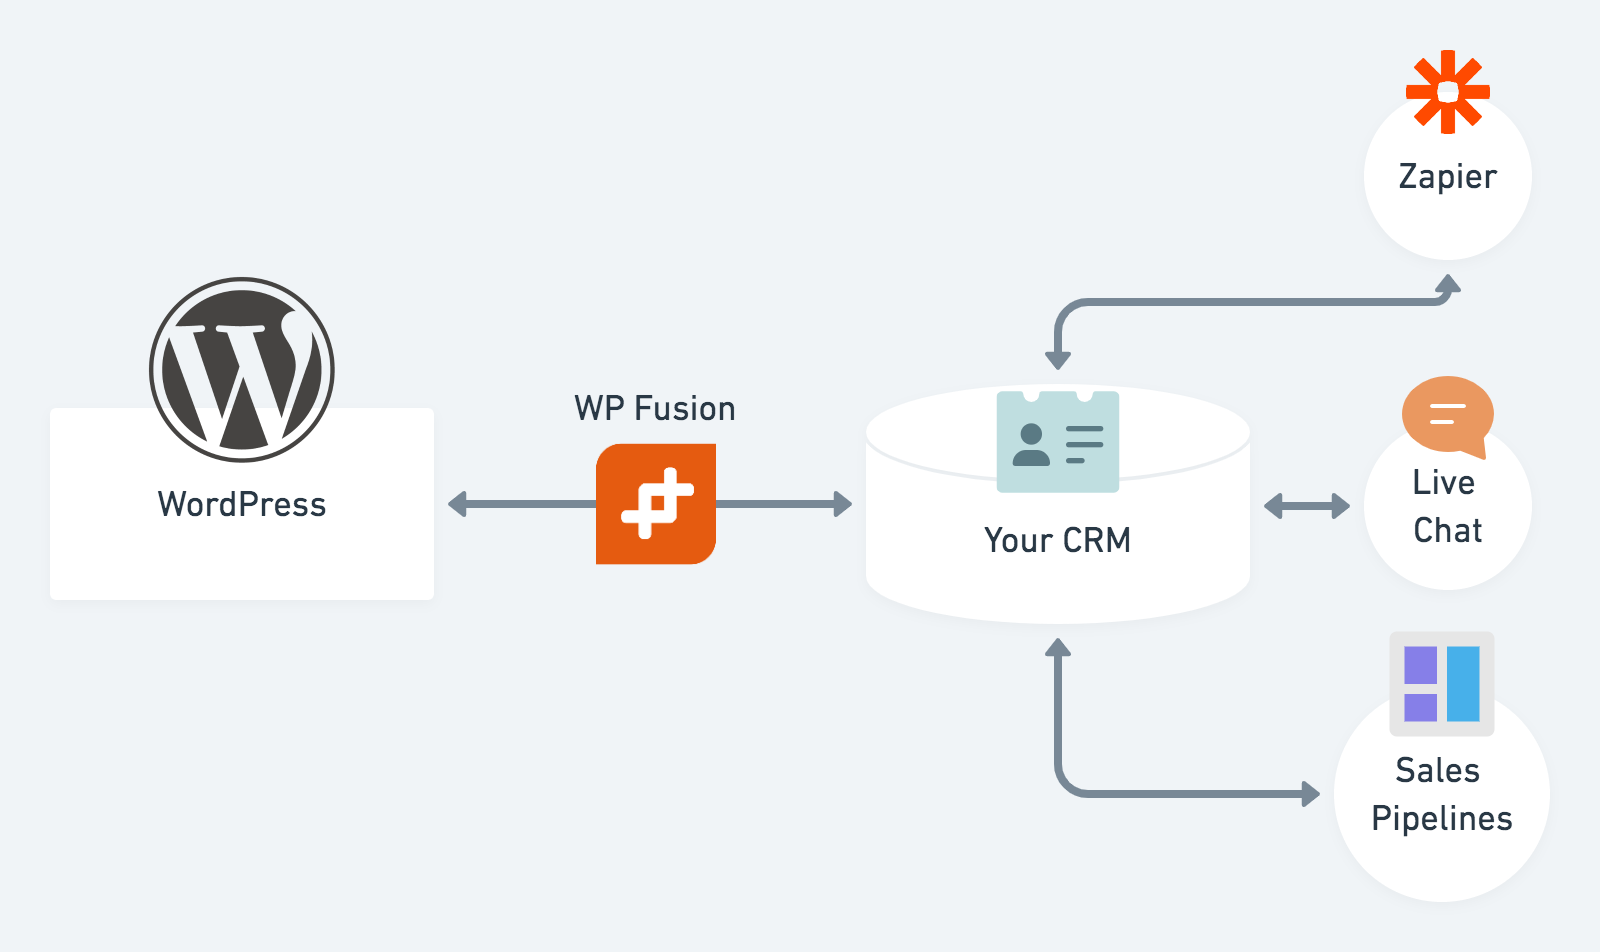
When you connect multiple platforms bi-directionally with WP Fusion, your WordPress site becomes responsible for keeping data in sync between your other services. For example an email address change in Intercom gets synced to WordPress, and then WP Fusion needs to sync it onwards to ActiveCampaign.
This will quickly overwhelm your website since it’s not optimized for routing data in real time between third-party services. For something like that Zapier is much more appropriate.
#What are my options?
WP Fusion works best when it’s connected to your marketing automation platform, since it’s syncing data related to individual customers and contacts.
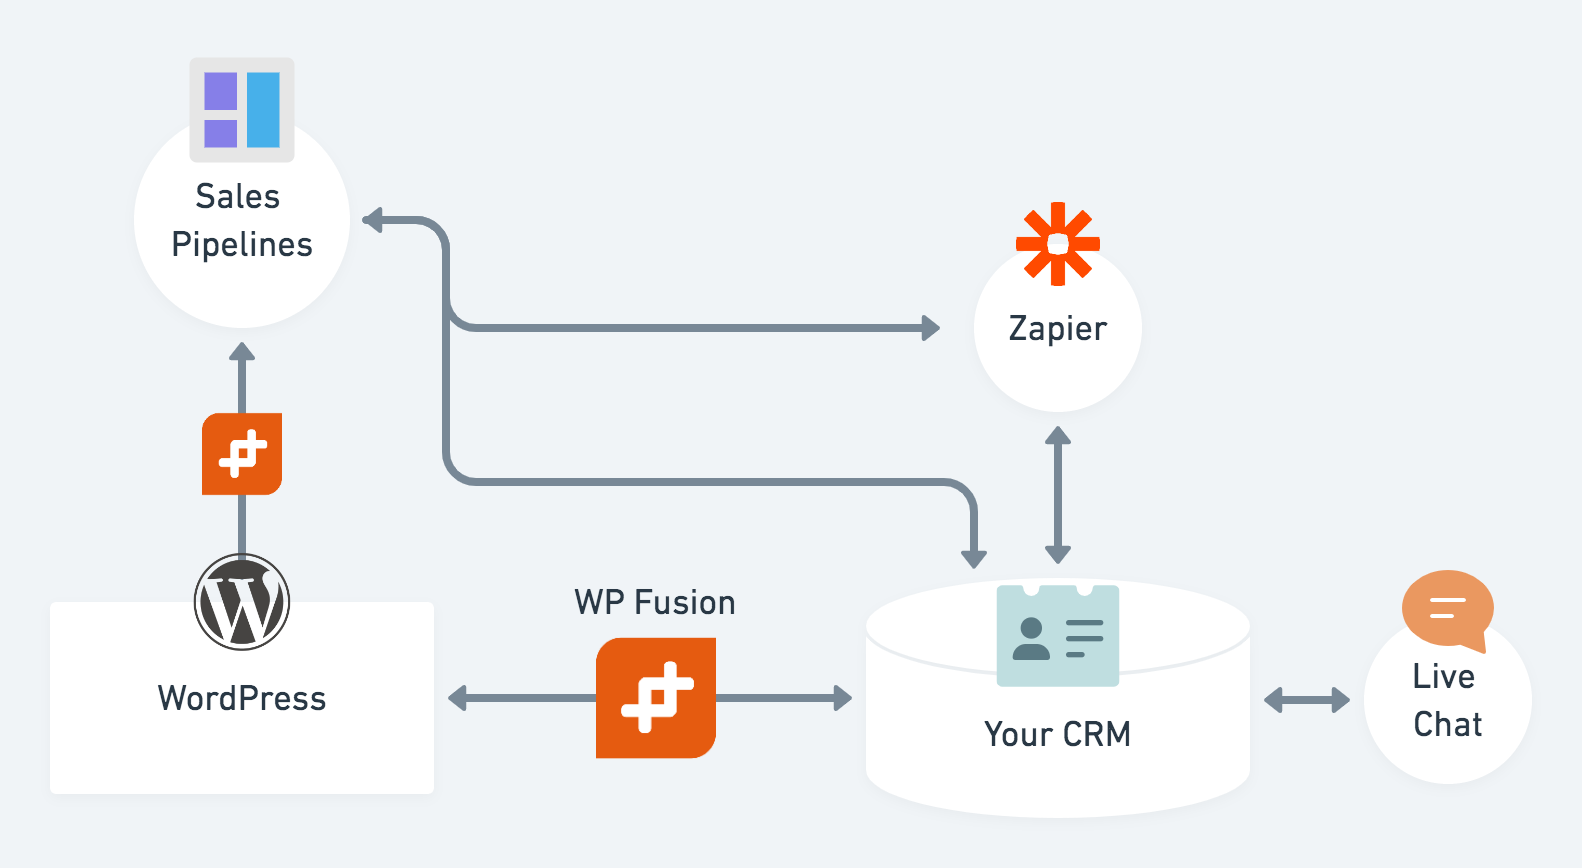
If you need to use an additional service in addition to this (for example Pipedrive to manage sales pipelines), it’s best to connect it directly to your marketing automation tool, with Zapier or another integration tool. Then you can trigger an opportunity to be created in your sales automation platform based on activity in your marketing automation platform.
In some cases you may want to trigger an outside service directly from WordPress. Using WP Fusion’s Webhooks / Zapier Addon you can ping an external URL based on user activity on your site, such as completing a course or making a purchase. Since this is a one-way sync of data, it doesn’t impact performance or create a risk of data loss.
#Why can’t I use multiple tags for auto-enrollments / Link With Tag?
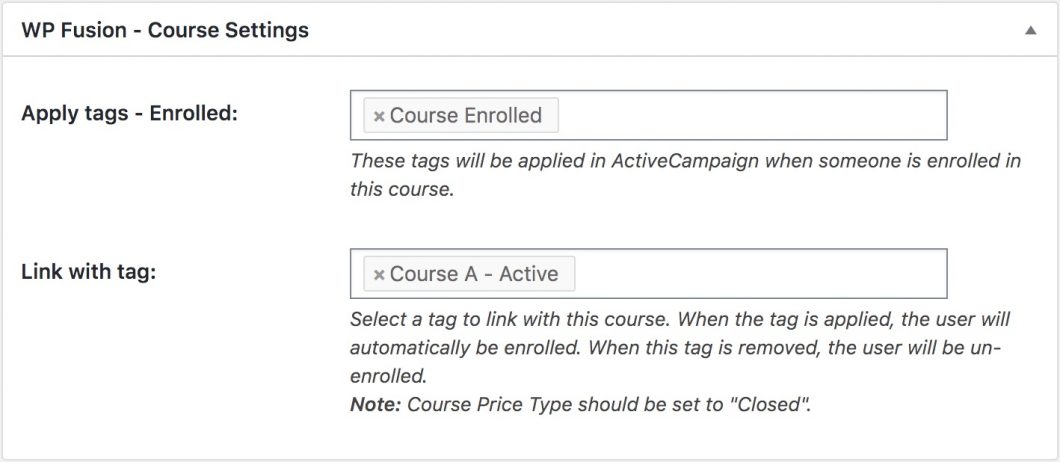
WP Fusion includes a feature with most LMS and membership plugins that we call “Link with Tag“. This lets you specify a CRM tag that can be used as a trigger to auto-enroll someone into a course or membership.
When the tag is applied the user is enrolled, and when the tag is removed the user is unenrolled.
The link with tag setting is limited to one tag, if you try to select more than one tag you will see a message saying “You can only select one item“.
#Why can’t you select multiple tags?
The reason you can only select one tag is comes from the fact that the linked tag is also used as an un-enrollment trigger.
Look at the following example:
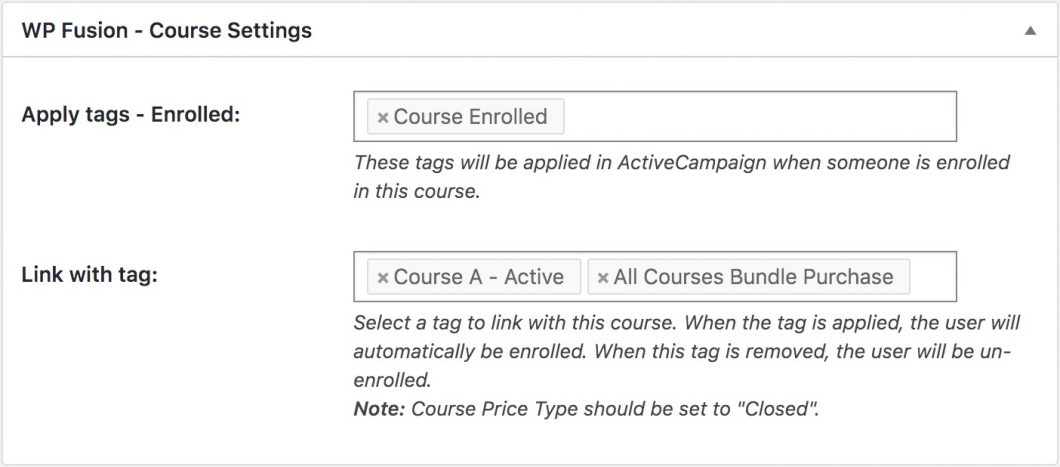
In this example, someone is selling access to courses individually by applying the Course A – Active tag, and also selling bundled course access by applying the All Courses Bundle Purchase tag.
Imagine a scenario where an admin needs to manually add a user to the course, or course access is granted by another plugin like WooCommerce or Uncanny Automator:
- The user is enrolled in the course. However, if the linked tag isn’t applied, the user will be immediately removed from the course, since the linked tag is also an un-enrollment trigger
- To keep the user from being unenrolled, WP Fusion must apply the linked tags whenever a user is added to a course, from any source
- This applied both tags Course A – Active and All Courses Bundle Purchase
- The All Courses Bundle Purchase tag is also linked with 4 other courses, this triggers the user to be enrolled in all of those courses as well
- When the user is enrolled in those courses, they are auto-assigned those linked tags, Course B – Active, Course C – Active, Course D – Active, and Course E – Active
- Now the user has access to all of the courses on your site and a bunch of undesired tags
- In situations where you have a lot of courses or memberships linked together (i.e. 20+) this can also cause your website to crash, as the user is enrolled in everything on your site simultaneously and dozens of API calls are sent to your CRM
For this reason WP Fusion doesn’t allow you to use multiple tags for auto-enrollment triggers.
#How can I sell bundled courses using auto-enrollment tags?
A simple way to auto-enroll people into multiple courses is to simply apply all of the linked tags when a bundle purchase is made. Then by looking at a contact’s tags in your CRM you can easily see exactly which courses they are in. Removing a linked tag will unenroll them from that course, and a refund or subscription cancellation will remove all the linked tags and unenroll them from all the associated courses.
That works fine with a small bundle of two or three courses, but it ends up being a lot of tags if you have a large bundle, and becomes hard to manage.
There is a great alternative to that if you’re using either LearnDash or LifterLMS:
LearnDash
With LearnDash you can create a Group for your course bundle, and set a linked tag on this group.
In our example above, the All Courses Bundle Purchase tag would be associated with an All Access group. When the tag is applied the user will be added to the group, which then grants access to all courses, even though the user doesn’t have the linked tags from any of the individual courses.
Removing the linked tag removes the user from that group, and their course access is revoked.
LifterLMS
Likewise, with LifterLMS you can create a Membership for your course bundle, and set a linked tag on this membership.
In our example above, the All Courses Bundle Purchase tag would be associated with an All Courses membership. When the tag is applied the user will be added to the membership, which then grants access to all courses, even though the user doesn’t have the linked tags from any of the individual courses.
By using Groups or Memberships as an extra level of access control, you can create different overlapping bundles of access to your courses which still use a single linked tag for auto-enrollment.
#How do I use external shopping carts with WP Fusion?
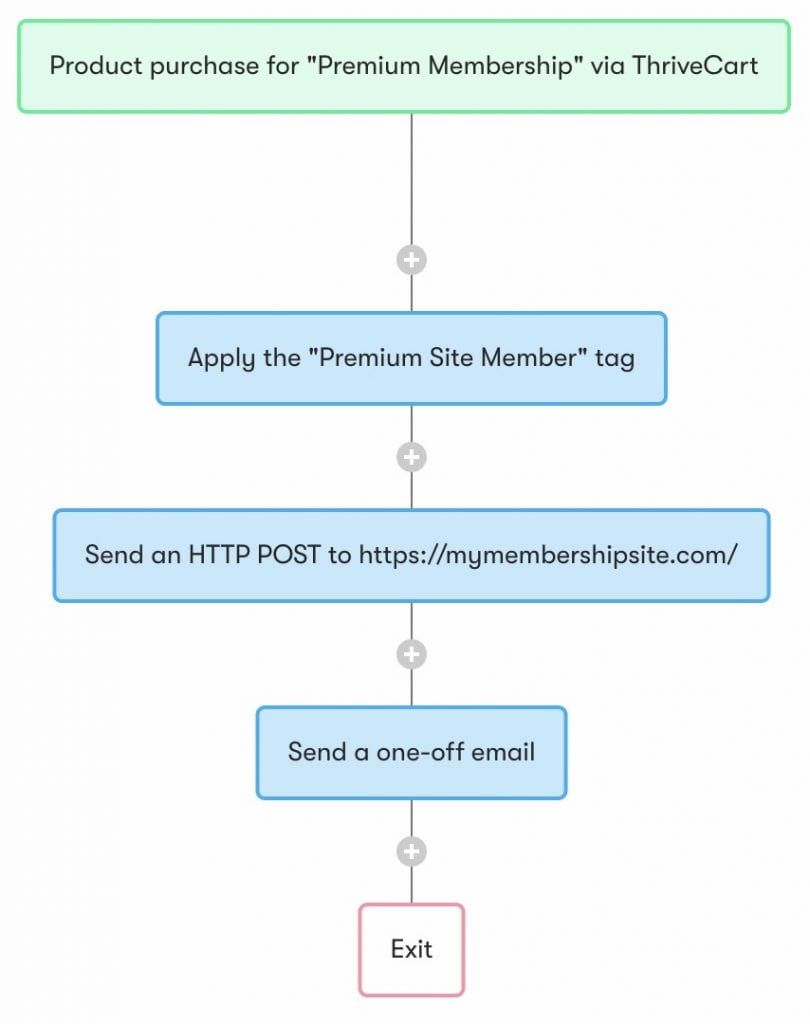
Any external system that connects to your CRM, like ThriveCart or SamCart, can be used with WP Fusion. The principles are universal, but at right you can see an example workflow using Drip.
The purchase in ThriveCart triggers the automation. Then a tag is applied to the new subscriber. This is the tag that you will use to unlock content in WordPress. Or it can be used to trigger an automated enrollment in any of our supported membership or LMS plugins.
After the tag is applied, a webhook is sent to your site. This tells WP Fusion to create a new WordPress user and load their tags. WP Fusion generates a password and stores it back in a custom field in Drip.
The final step is sending a welcome email with the subscriber’s password included. When they log into your site, they’ll be able to access their content right away.