#Overview
WP Fusion integrates with Ninja Forms to save form submissions to your CRM or marketing automation system.

Using WP Fusion you can add and update contacts when forms are submitted, and also apply tags.
#Setup
After creating a form, navigate to the Emails & Actions section and click the blue plus icon to add a new action.
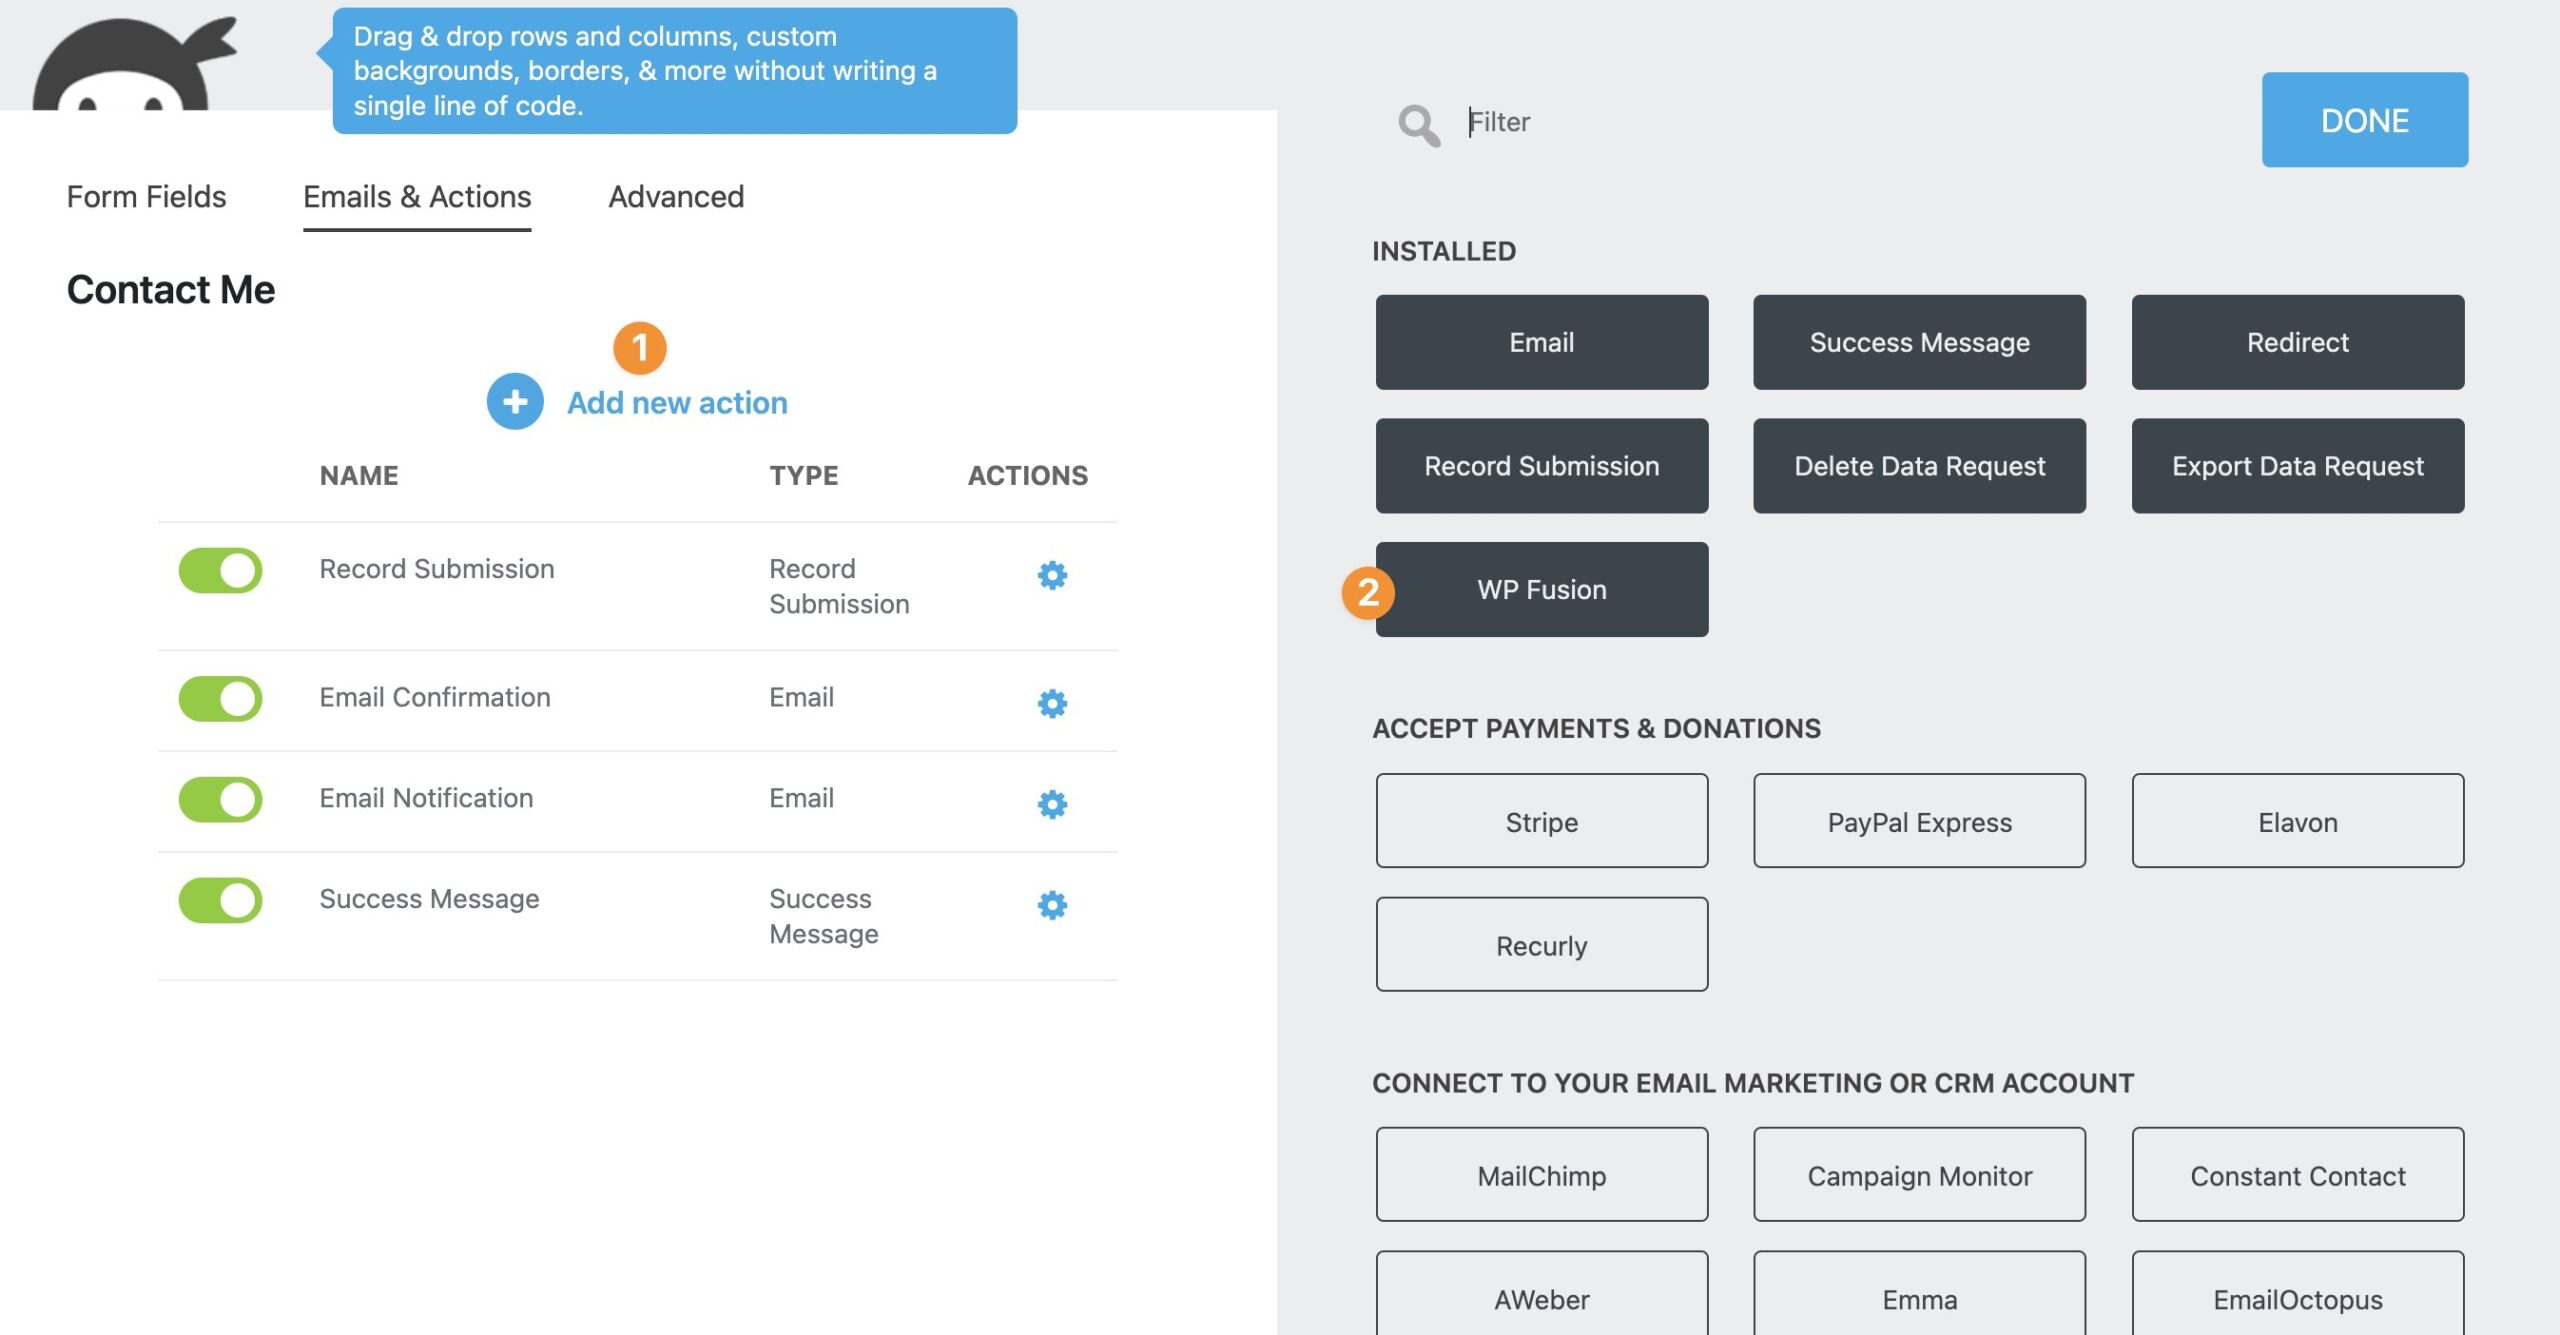
Select WP Fusion from the list, and click on the gear icon to open the WP Fusion configuration panel.
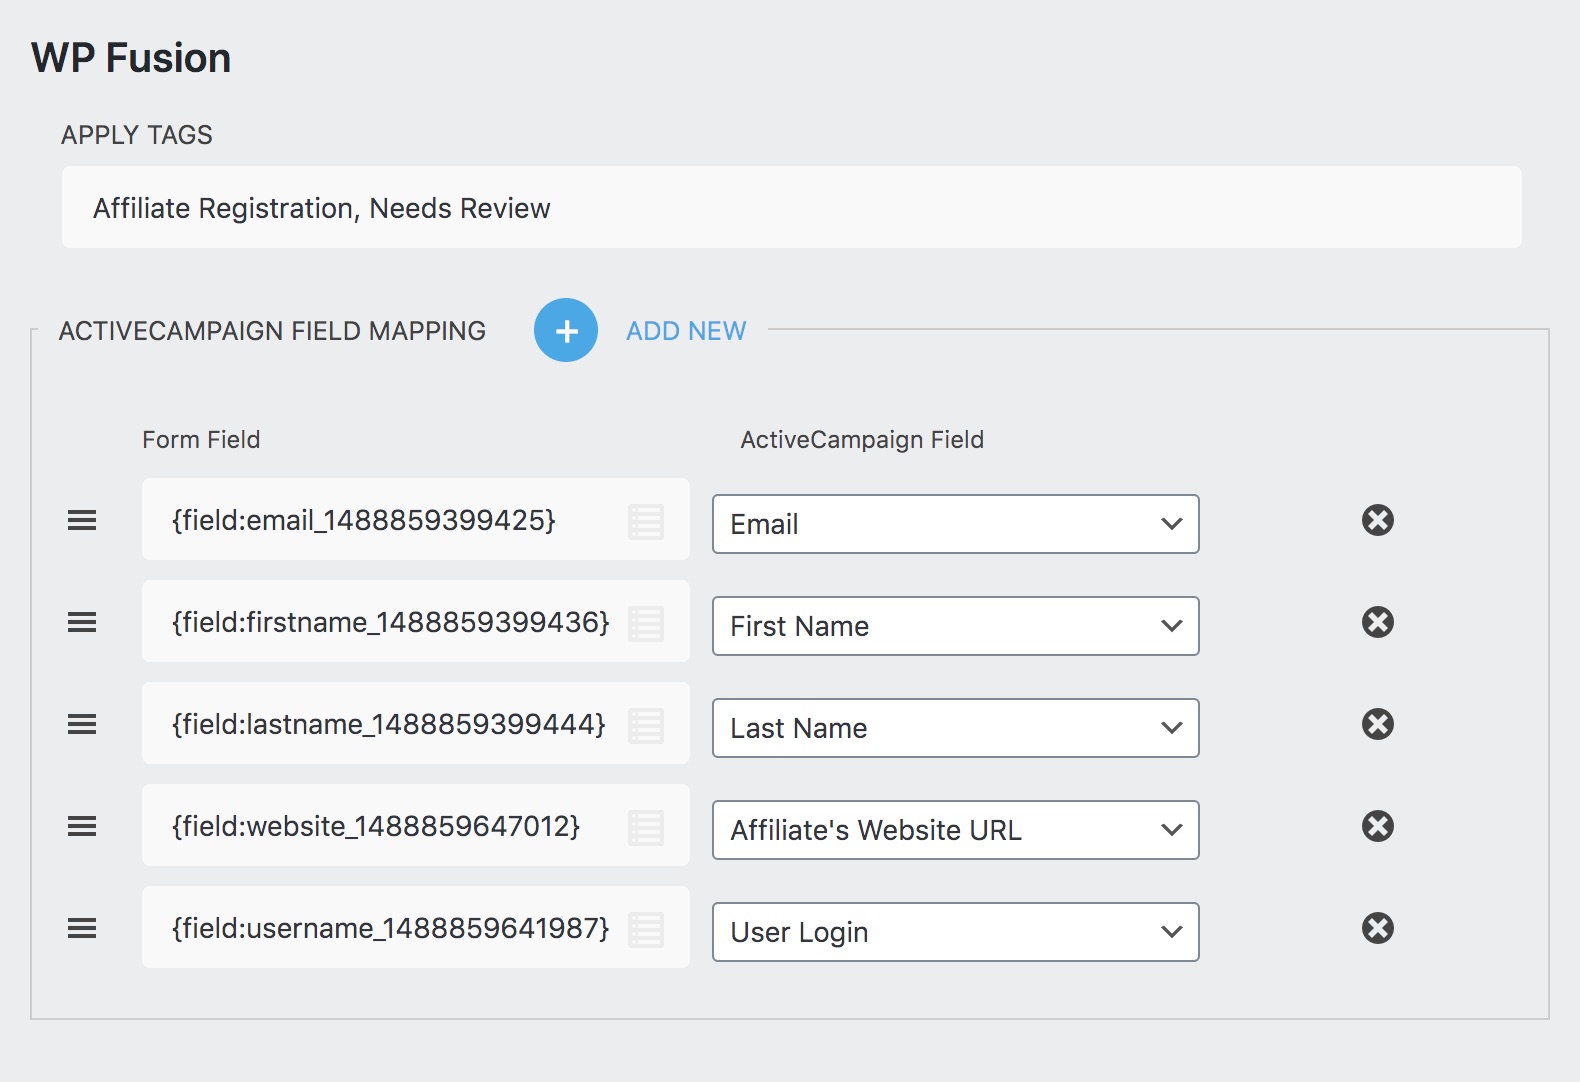
At the top you will see a setting for Apply Tags. Here you can enter a comma-separated list of tags to apply in your CRM when the form is submitted. You can use either tag labels or tag IDs.
Below you will see a field mapping interface. Click Add New to add a new field mapping. In the left column you’ll be able to select a field from your Ninja Form, and in the right column you’ll be able to select a corresponding field in your connected CRM.
#Syncing historical entries
If you already have existing Ninja Forms entries from before you installed WP Fusion, you can use a batch processing tool to export all of those entries to your CRM.
First configure your form feeds. Then navigate to Settings » WP Fusion » Advanced and scroll down to the Batch Operations section.
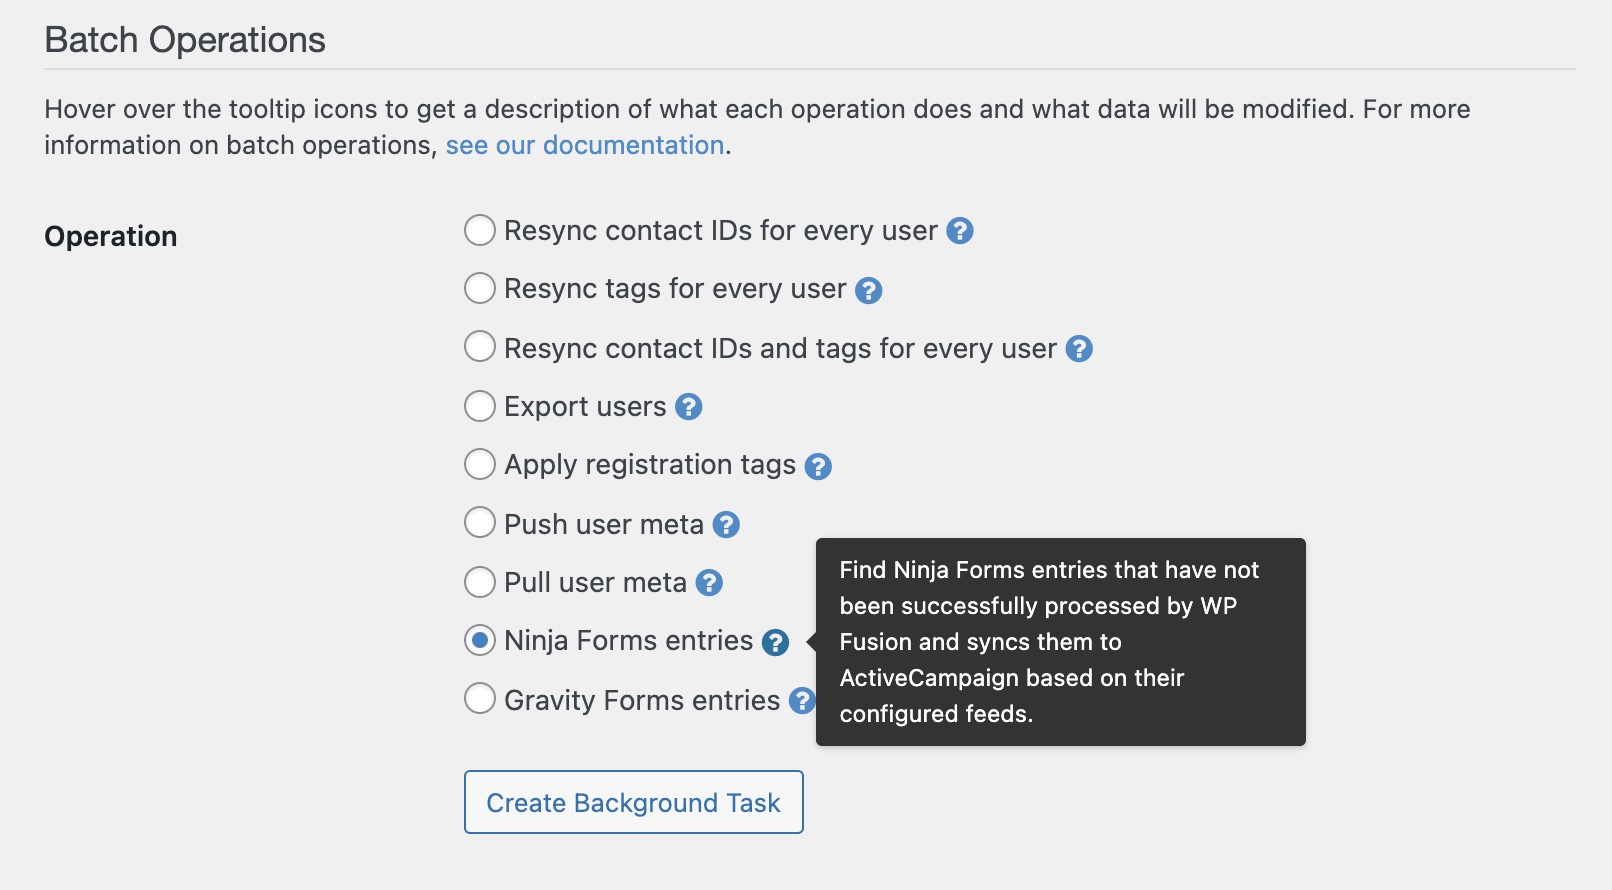
Select “Ninja Forms entries” from the list of options, and click Create Background Task.
WP Fusion will go through all of your historical entries, processing each according to the WP Fusion actions set up on the corresponding form. A status bar will appear at the top of the page indicating the progress.
After each entry is processed it will be locked by WP Fusion so it can’t be exported again, to prevent duplicate data from going to your CRM.