#Overview
WP Fusion integrates with Formidable Forms to add contacts to your CRM of choice when they submit a form on your site. You can also tag contacts based on the form that was submitted.
#Setup
After creating your form, go to the form settings and click on Actions & Notifications. From the actions row, click the WP Fusion icon to add a new form action.
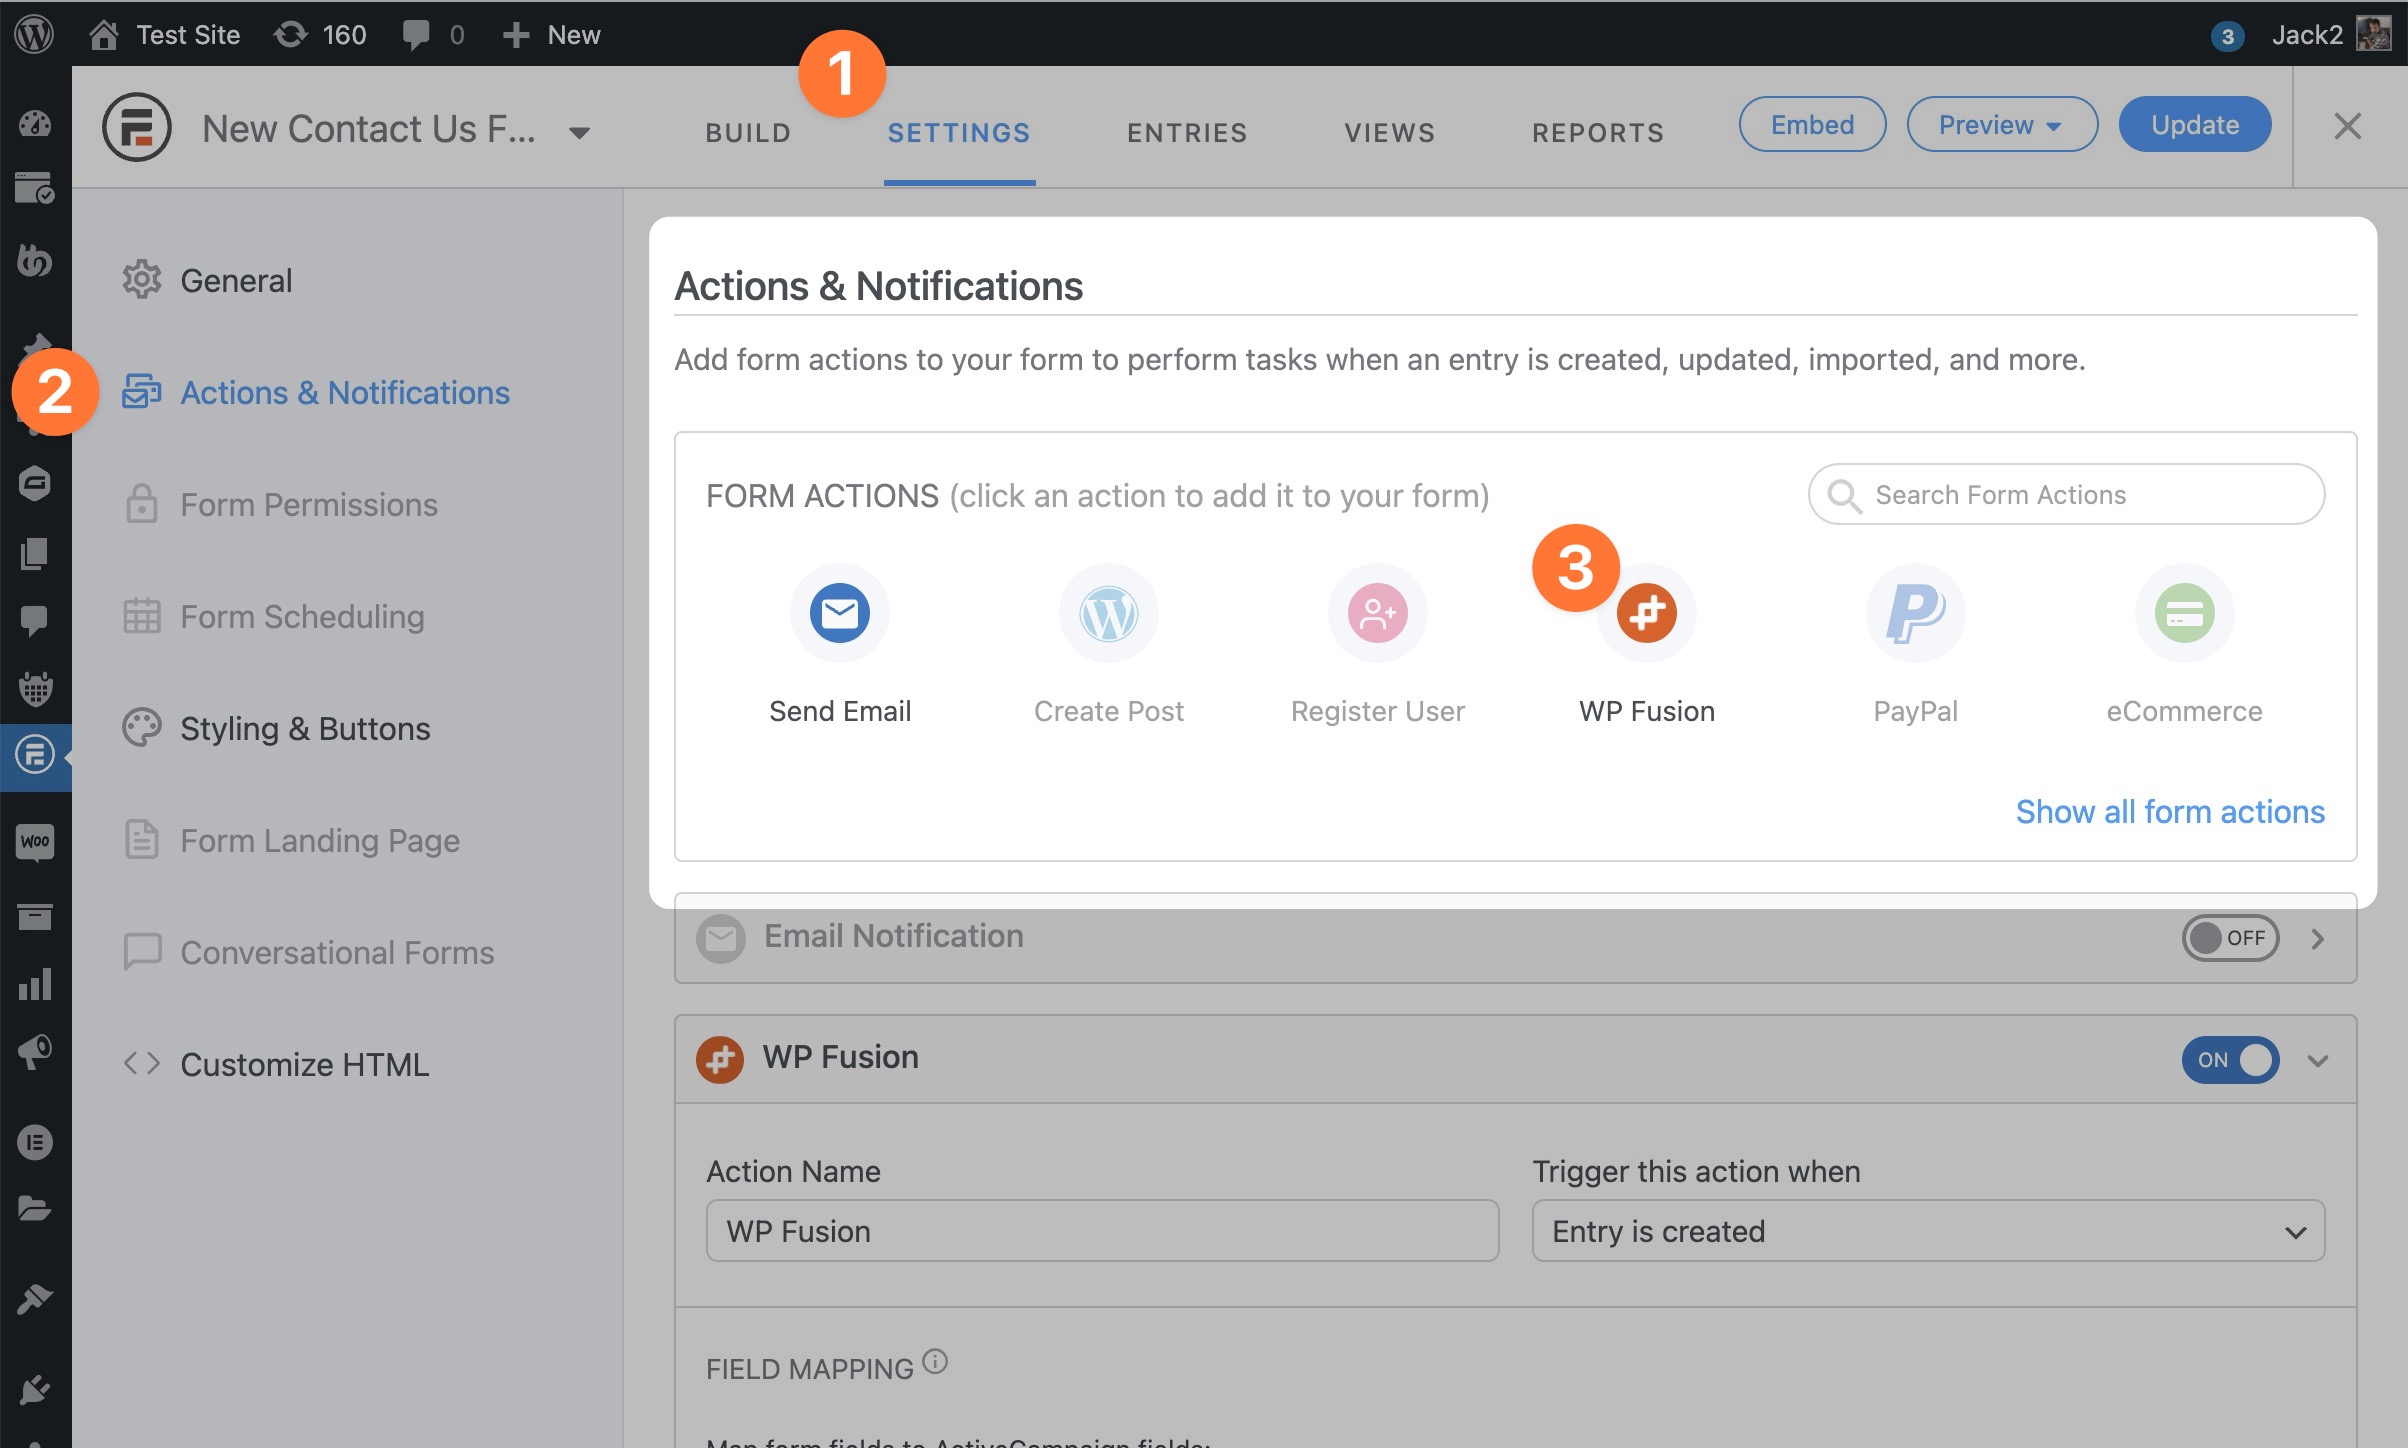
Then the WP Fusion form action panel will appear.
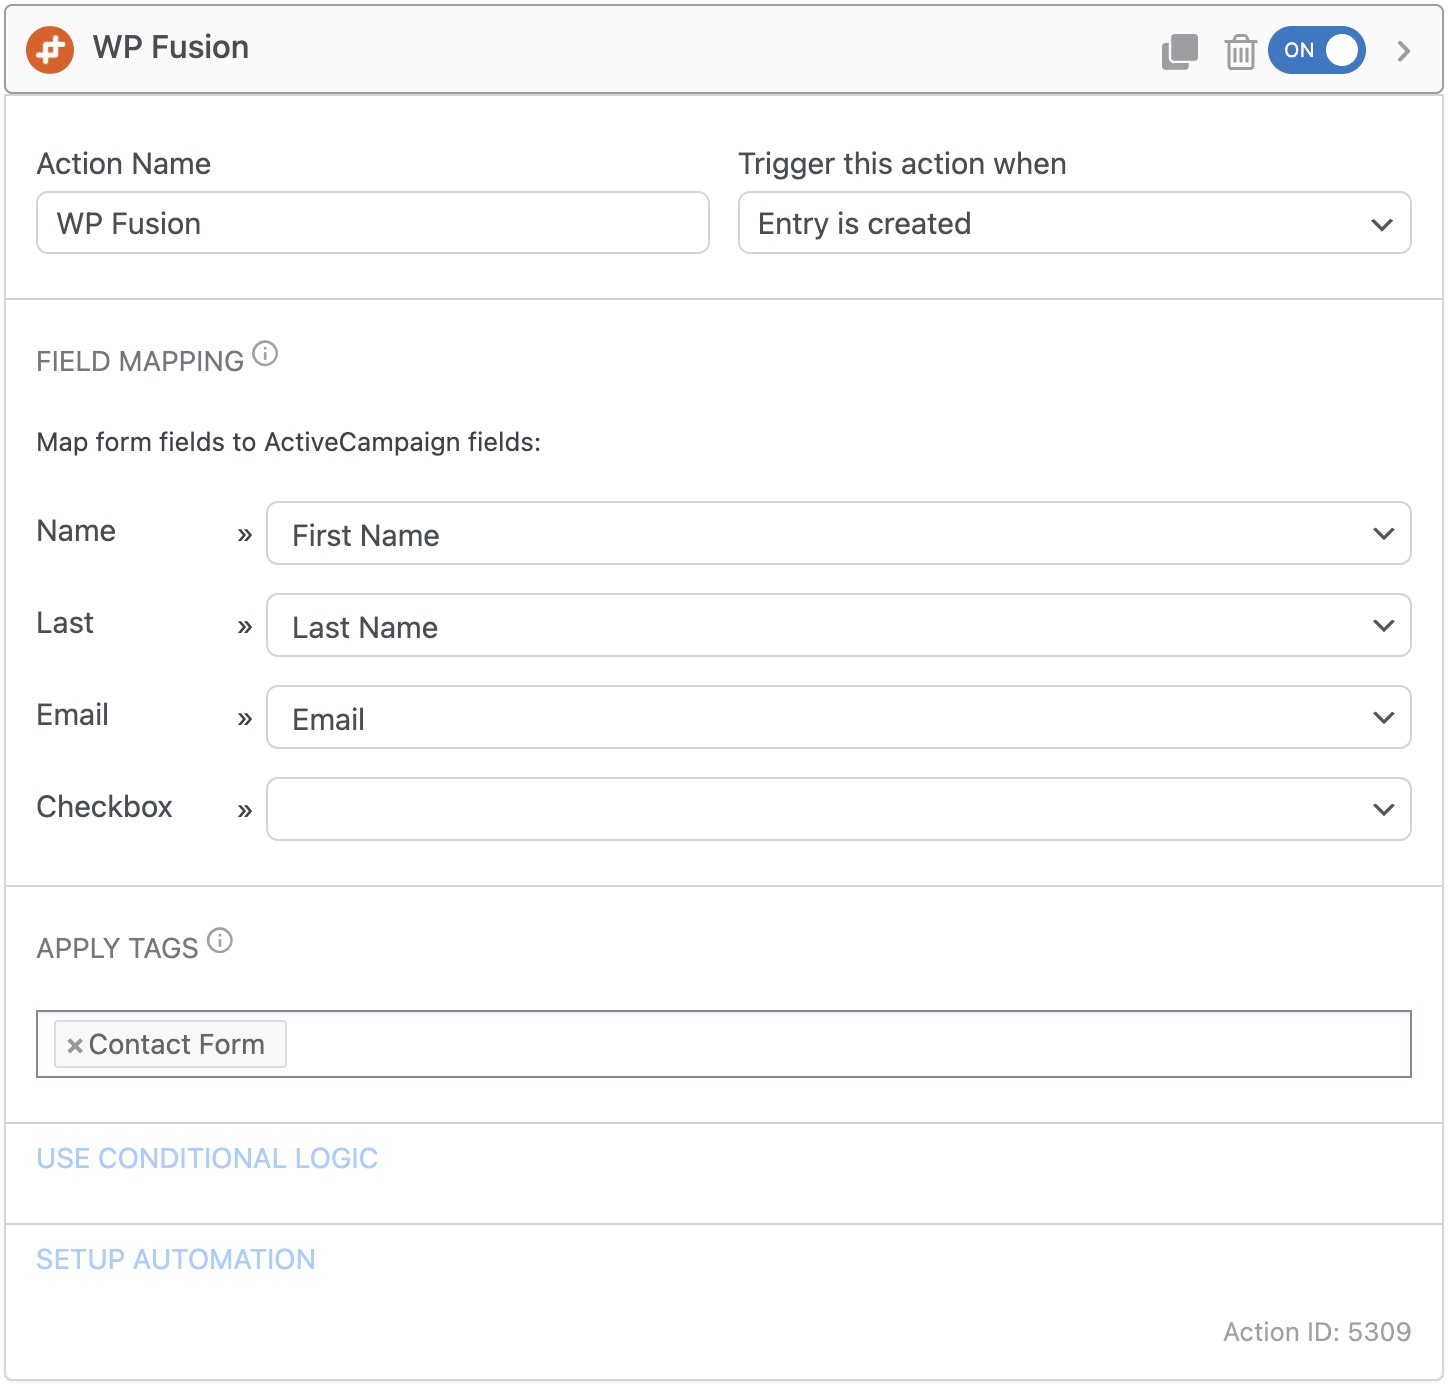
For each field on your form, you can select a corresponding contact field in your CRM to save the data. You can also specify tags to be applied to the contact when they fill out the form.
If you are using Formidable Forms Pro and conditional logic, you can create multiple WP Fusion form actions to apply different tags based on your conditional logic rules.
#Payments
If you’re using a payment gateway addon for Formidable Forms (or the free Stripe integration with Formidable Forms Lite), you can also optionally trigger your WP Fusion actions based on payment or subscription status.
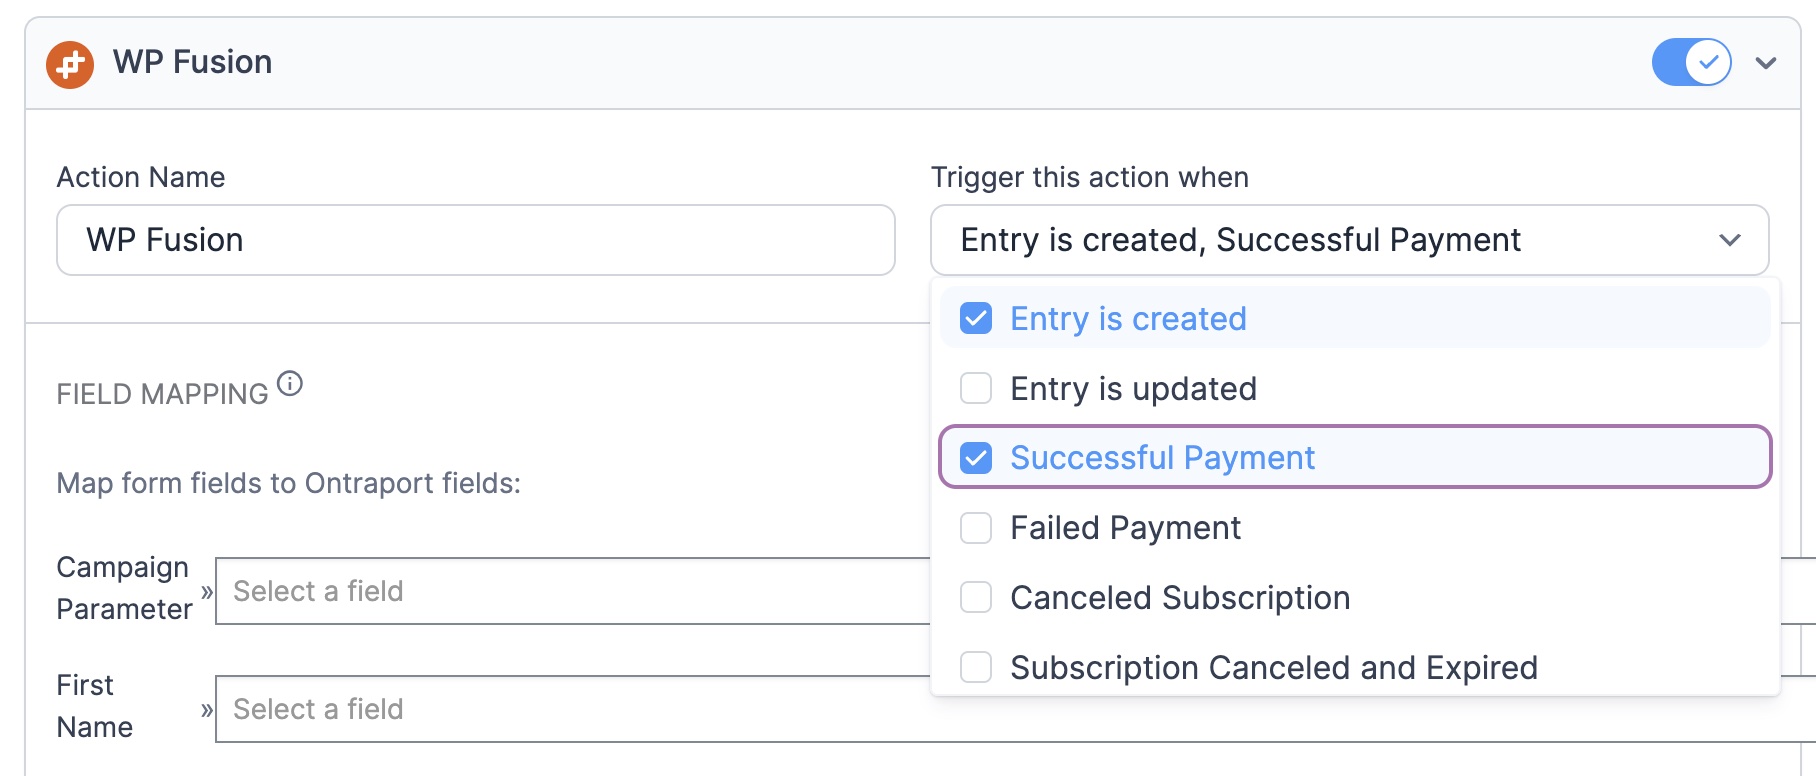
These options will appear in the Trigger this action when dropdown when editing the WP Fusion actions on any payment form.
Note: The Payment Failed trigger refers to a failed recurring payment. A failed initial payment will trigger the Entry is created trigger but will not fire any of the other triggers.
For more information see the Formidable Forms documentation.
#User Registration
If you’re using the User Registration addon for Formidable Forms, WP Fusion can also sync user registrations and profile updates to your connected CRM.
In this case it’s not necessary to set up a WP Fusion form action.
#Action Setup
After creating your registration or profile form, add a User Register action under the Actions and Notifications panel in the Formidable Forms settings.
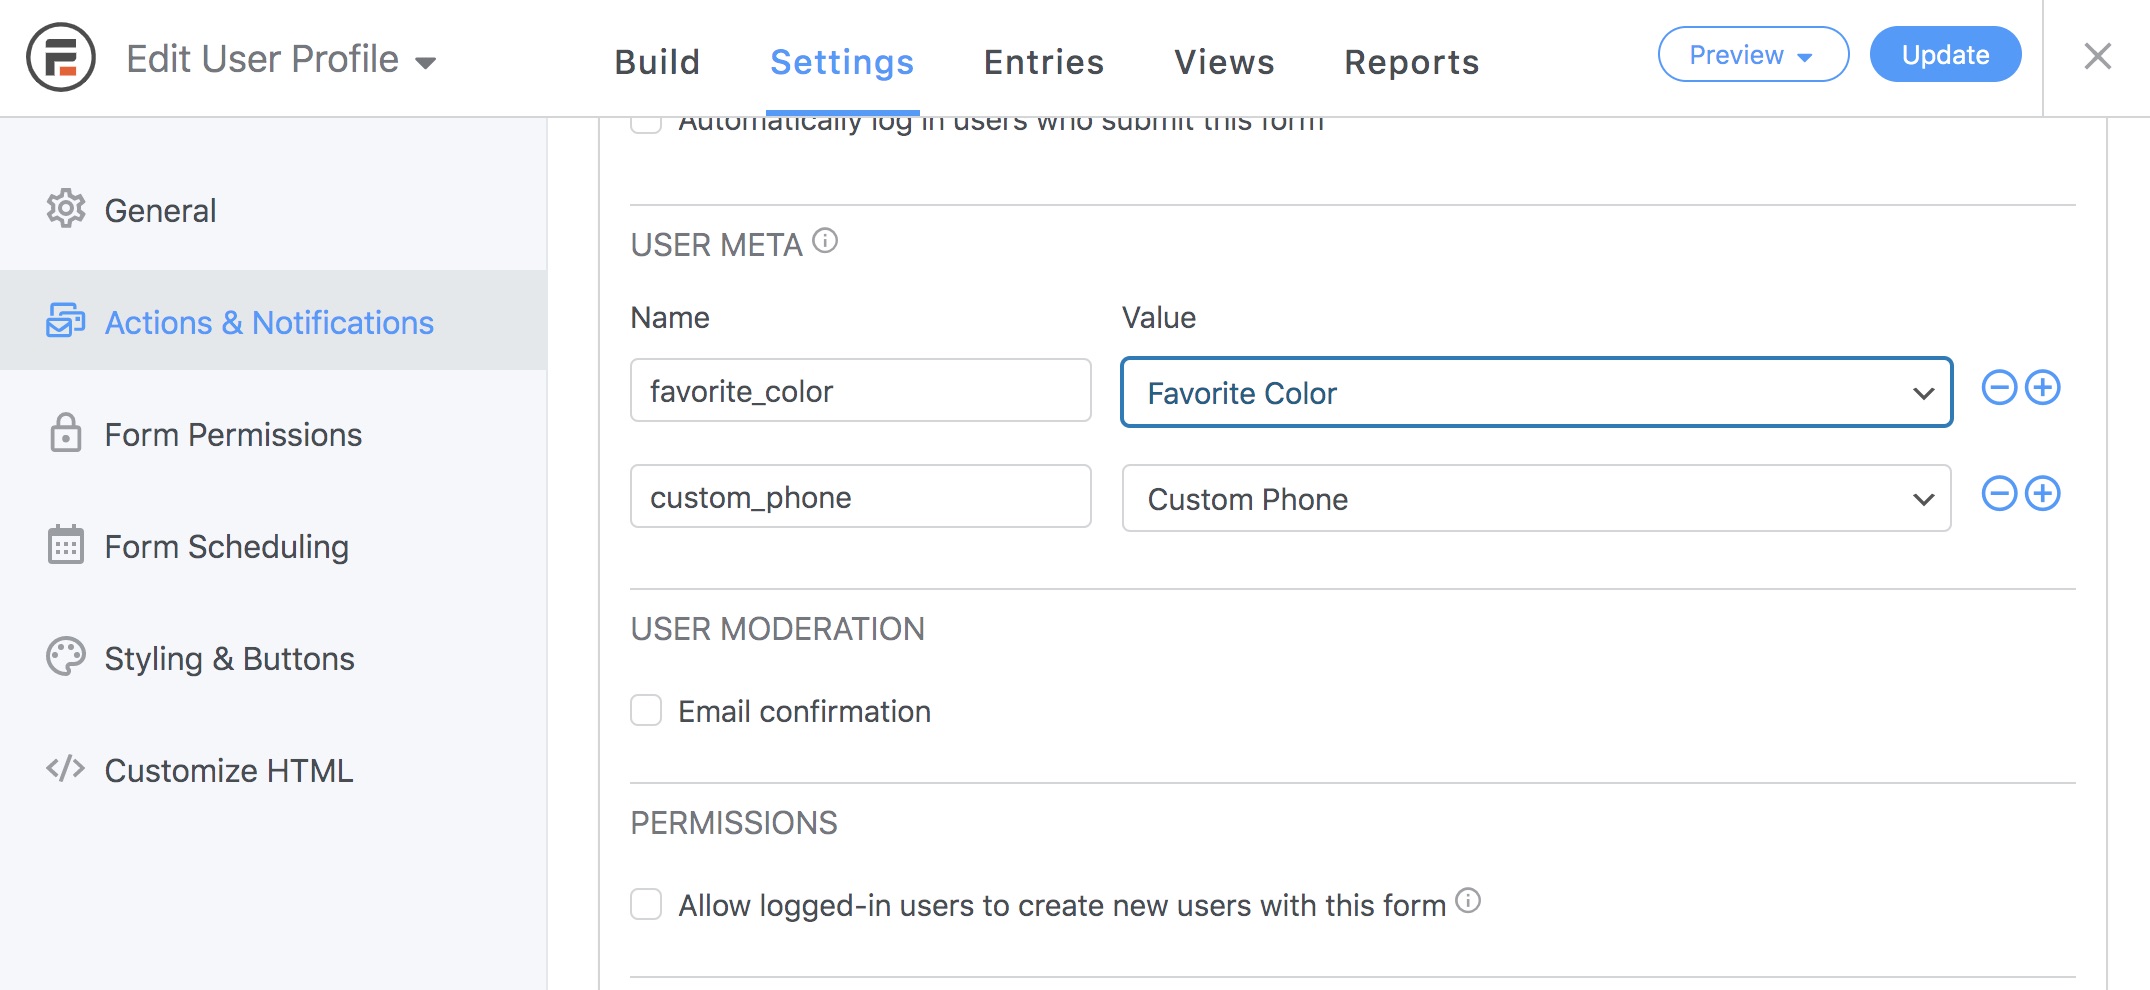
For each form entry you’d like to save to the user record, create a meta name, and select the corresponding form field.
For more information on the User Registration action setup, see the Formidable Forms documentation.
#Syncing the fields to your CRM
Once you’ve configured the User Registration action, head to the Contact Fields tab in the WP Fusion settings and scroll down to the Formidable Forms Registration section.
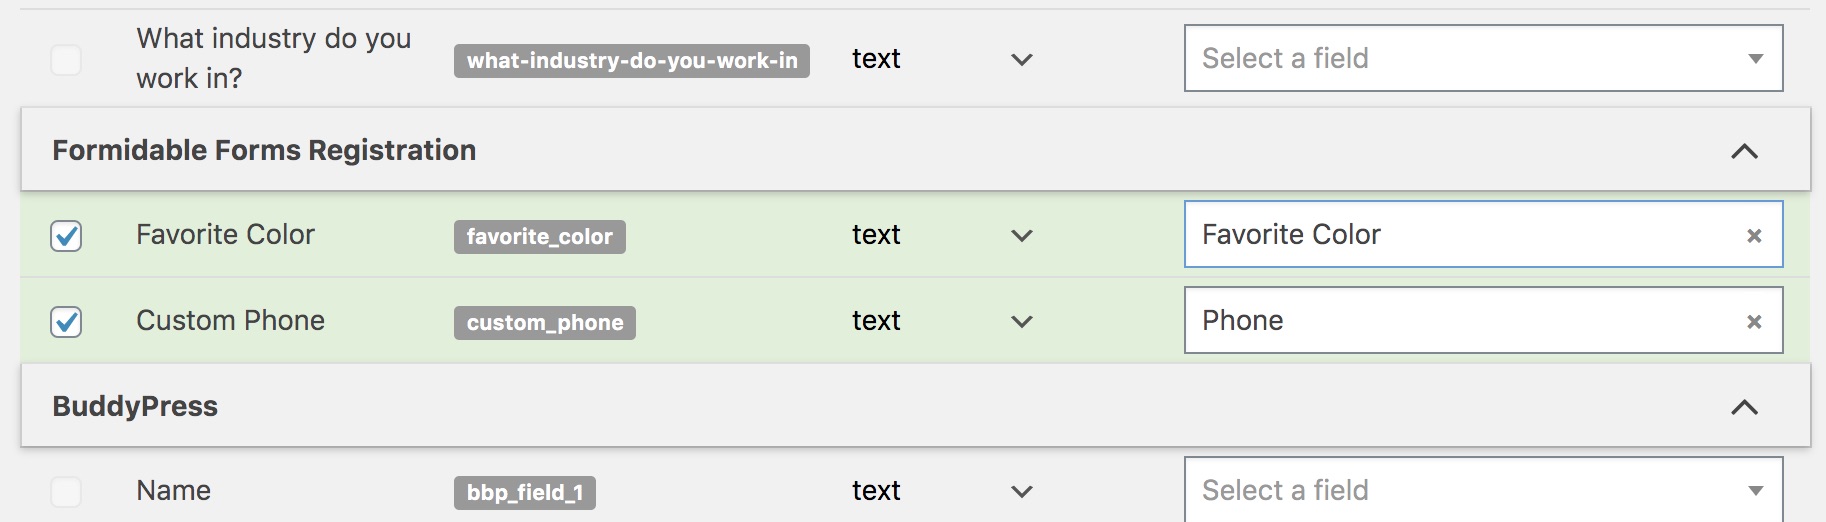
For each registration field you’ll be able to select a corresponding field in your CRM to store the data.
When a user registers or updates their profile, the selected fields will be synced to your CRM.