#Overview
WP Fusion includes a series of tools that let you export data in bulk to your CRM. These are found under Settings » WP Fusion » Advanced » Batch Operations.

The options available will depend on which plugins you have active. For each operation you can hover over the tooltip indicator to get a description of what data will be synced or modified.
Note: These operations can potentially modify thousands of records in both WordPress and your CRM, and they are irreversible. It’s always recommended to test with a single record before running a batch operation— for example doing a test checkout before exporting orders, or a test registration before exporting users.
#When to use a batch operation
Just because WP Fusion can export a large amount of data to your CRM doesn’t mean it’s always the best tool for the job. WP Fusion needs to respect the API limits of your connected CRM, as well as the resource limits of your server.
For example, to run a Push User Meta batch operation to sync 30,000 users’ metadata with Ontraport would take about 28 hours to process.
As an alternative, you could use a plugin like WP All Export to export all of your user data to a .csv, and upload it into the CRM in only a few minutes.
The batch operations are best for syncing data that can’t be easily exported any other way, for example applying tags based on MemberPress subscription statuses, or exporting WooCommerce orders.
#Usage
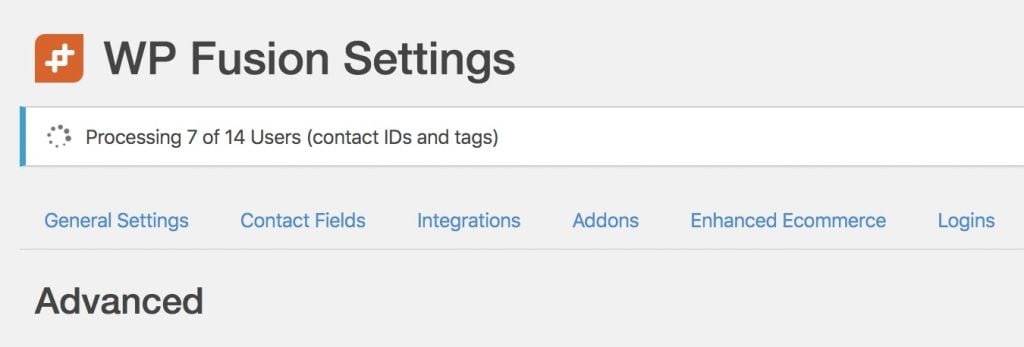
To run a batch operation, select the operation you’d like to perform from the list of radio buttons and then click Create Background Task. A status indicator will appear at the top of the page showing the number of records to be processed and the number remaining.
Some notes:
- You can leave the page while the background worker runs and it will continue to process the queue in the background.
- If the background process gets stuck you can refresh the page and it will pick up where it left off.
- It’s recommended to turn on the activity logs so you can see what data is being sent or loaded, as well as any potential errors.
Note on speed: Most CRMs have some kind of API limits with regards to the number of API calls you can make in a period of time. WP Fusion pauses in between each step in the background process to avoid exceeding these API limits. How long the pause is depends on your connected CRM.
Depending on the number of records you are processing, this can cause the background worker to take several hours (or even days) to complete. For example exporting 30,000 WooCommerce orders to Drip would take about 18 hours to fully process.
#Skip already processed
In some cases, you may be asked whether you’d like to Skip already processed records.
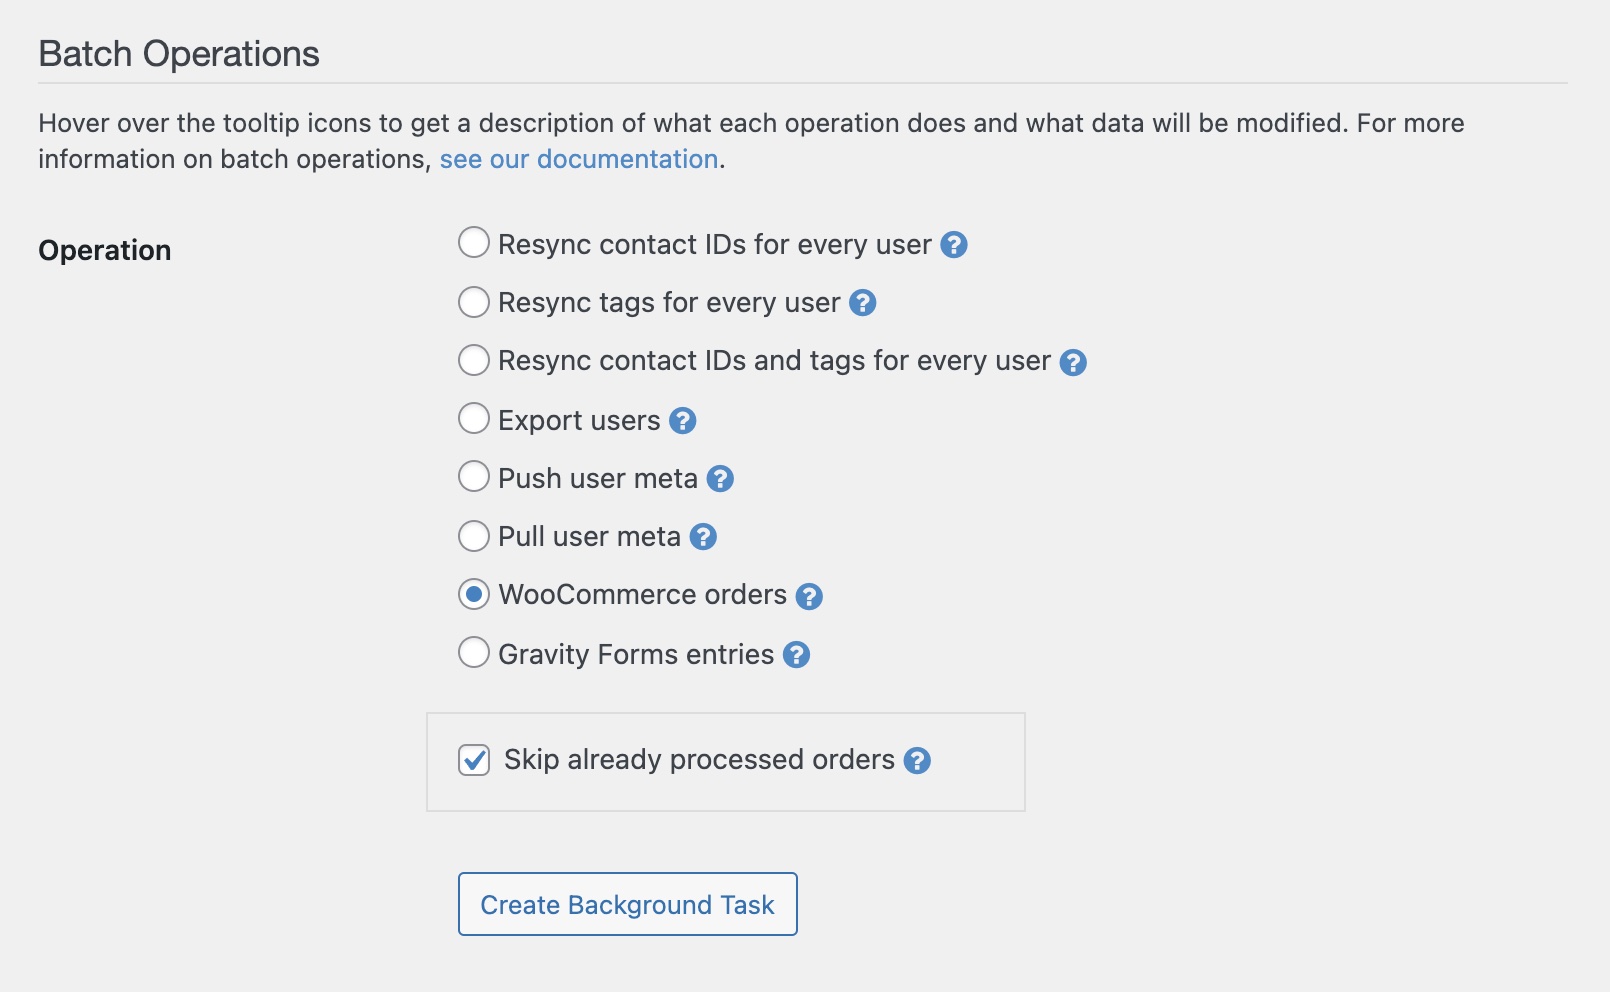
By default, WP Fusion will not export an order, payment, or form entry to your CRM if it’s already been successfully exported. This is to prevent creating duplicate records.
If you want to go ahead and create duplicate records anyway (for example after switching CRMs or accounts), you can uncheck the Skip already processed box before clicking the start button. This will cause WP Fusion to export all orders, regardless of whether or not they were synced previously.
#Core methods
These operations are part of WP Fusion core and aren’t tied to any particular plugin integration. They are:
#Resync Contact IDs
Looks up every WordPress user by email address in your CRM, and updates their cached contact ID. This does not modify any tags or other data, or trigger automated enrollments.
When to use it: If the cached contact IDs for your WordPress users have gotten out of sync with the contact records in your CRM, this will update that cache, so profile updates and new tags get applied to the correct contact record.
This operation is sometimes preferable to Resync Contact IDs and Tags because if you’re using linked tags / auto-enrollment tags into courses or membership levels, you may not want to modify any tags until you’ve confirmed that every user is linked to the correct contact record.
#Resync Tags
Loads updated tags from your CRM for all WordPress users who already have a saved contact ID. This also triggers any automated enrollments via linked tags.
When to use it: If you’ve modified a lot of tags on a lot of contacts in your CRM (or deleted tags), this operation will bring the tags cached in WordPress for your users up to date with what’s in your CRM. This operation is faster than Resync Contact IDs and Tags because it doesn’t need to first confirm the contact’s email address.
Also, if you’ve recently changed an auto-enrollment tag on a course or membership (for example with a LearnDash course), you may want to update your users automated enrollments based on their current CRM tags. Running the Resync Tags operation will trigger any automated enrollments (and un-enrollments) when the tags are loaded from your CRM.
#Resync Contact IDs and Tags
All WordPress users will have their contact IDs checked / updated based on email address and tags will be loaded from their CRM contact record. This also triggers any automated enrollments via linked tags.
This operation is the same as running Resync Contact IDs and Resync Tags, it just does both at the same time.
When to use it: When a user registers in WordPress, WP Fusion stores their CRM contact ID on your site so that future updates can properly be synced. But if you manually merge a bunch of contacts (for example to remove duplicates), it’s possible that these IDs will no longer be accurate. Running a Resync Contact IDs and Tags operation ensures WP Fusion has all of your WordPress users linked to the correct contact record and has the latest copy of their tags.
#Export Users
This operation queries any WordPress users who do not have a saved CRM contact ID. For each user, WP Fusion will first look for an existing contact record by email address. If one is found, their contact ID will be saved and tags will be loaded.
If no existing record is found, a new record will be created. Any fields configured on the Contact Fields tab will be synced. Any tags specified for Assign Tags on the General settings tab will be applied.
When to use it: If you’re just setting up WP Fusion for the first time, you may have WordPress users that aren’t already in your CRM or marketing automation tool. This tool lets you export those users.
#Apply registration tags
On the General tab in the WP Fusion settings, there’s an Assign Tags option that lets you specify tags to be applied in your CRM when a user registers a new WordPress user account.
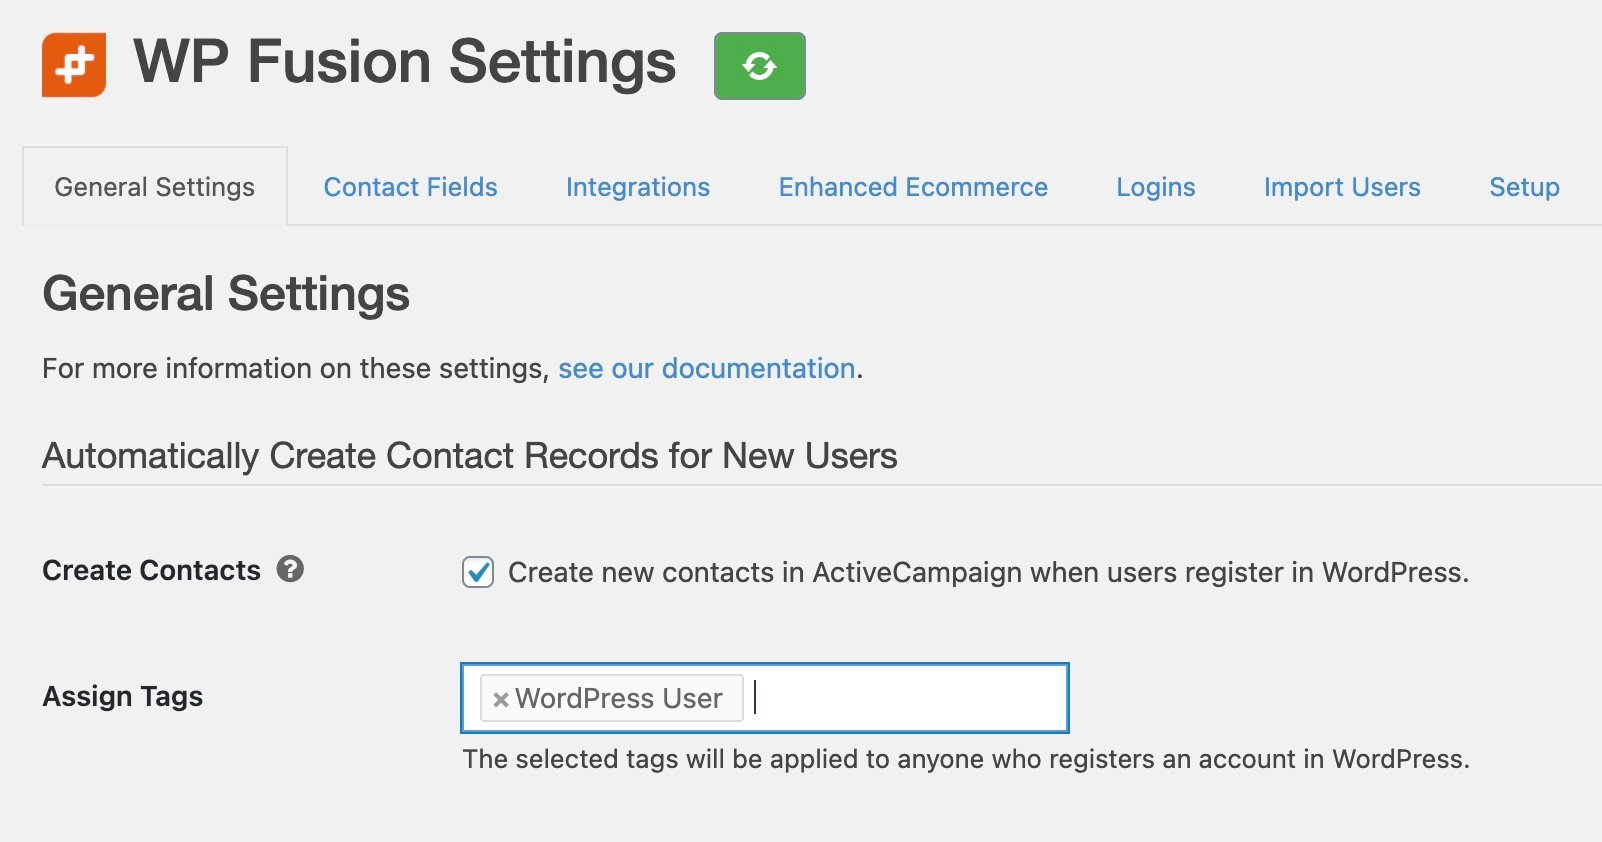
These tags are only applied to new user registrations, but if you want to retroactively apply the same tags to every user already registered on the site, you can run the Apply registration tags operation.
When to use it: This operation is useful if you’re trying to reconcile the counts between users on your site and contact records in your CRM. By applying the same tag to every user on your site, you can easily see how many records are missing from your CRM.
#Push User Meta
All WordPress users with a contact record will have their meta data pushed to your CRM, overriding any data on the contact record with the values from WordPress. Any fields enabled on the Contact Fields tab will be synced.
When to use it: This is most commonly used when you’ve just enabled a new field for sync (for example User ID, or Date Registered), and need to export the values from that field to existing contact records in your CRM.
#Pull User Meta
All WordPress users with a contact record will have their meta data loaded from your CRM, overriding any data in their user record with the values from their contact record. Any fields enabled on the Contact Fields tab will be loaded.
When to use it: This operation would be used when you’ve just enabled a new WordPress field for sync with a custom field in your CRM that already contained data. This operation will load that custom field data into WordPress so it can then be displayed with a shortcode or used by other plugins.
#Troubleshooting
The background worker is a complex process. It’s designed to work across all hosting environments, without affecting the speed or stability of your site.
While it’s generally very reliable, we have encountered issues with both caching and security plugins. The most common issue is that it will process a single batch of records (20 or so) and then not proceed to the next batch until the page is reloaded.
To aid in troubleshooting the background worker, WP Fusion does a status check on it every 5 seconds, and outputs some status information to the JavaScript console in your browser.
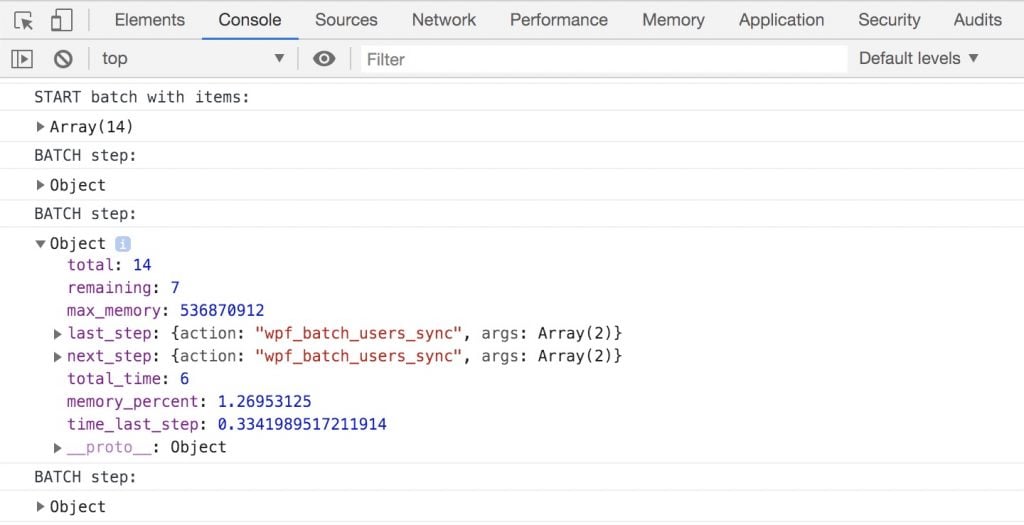
This will output the total list of items in the queue, as well as information about the state of the process in terms of previous action, next action, and resource utilization.
Some things to note are:
- Most servers have a
max_execution_timeof 30 seconds for PHP scripts. To get around this, the background worker will attempt to restart itself when thetotal_timevalue exceeds 20 (seconds). However, if thetime_last_stepvalue is greater than 10 (seconds), this could mean that the 30 secondmax_execution_timegets exceeded and the process times out.This most commonly happens on slower hosts when exporting WooCommerce orders, using the Enhanced Ecommerce addon. The process of creating a contact record, applying tags, creating products, registering an invoice, and adding the products to the invoice can take a long time for each order. You can speed up this process by first running an Export Users operation before exporting your orders. Since the contact records will already exist in your CRM, this reduces the time required to process each order. - WP Fusion tries to detect the available memory on your host and won’t let the background worker exceed 80% of available memory. However sometimes it’s not able to properly detect the available memory, and so
memory_percentshows at 100% and the process prevents itself from running. You can disable this check by returningfalsefrom thewpf_batch_memory_exceededfilter. - Because WP Fusion makes sustained requests to admin-ajax.php over a long period of time, it can sometimes get blocked by security plugins. If you notice the batch status isn’t updating, it’s possible the background request is getting blocked. To see if that’s happening you can check your site’s access logs for any traffic to
/wp-admin/admin-ajax.php?action=wpf_background_processis being blocked with a 403 (Unauthorized) status. If you’re using WordFence you can also put the plugin into Learning Mode before starting the batch operation to train it to allow this kind of traffic.
#Rate limiting
Most CRMs have some sort of API rate limiting. For example
- ActiveCampaign: 5 requests per second
- Drip: 3600 requests per hour
- Infusionsoft: 1500 requests per minute
- Ontraport: 3 requests per second
- Zoho: 15000 requests per day
During batch operations it’s possible to hit these limits, after which you’ll begin to see error messages in the WP Fusion logs.
Because most CRMs reset their rate limiting every 60 seconds, WP Fusion does not cancel a batch operation when it it’s a rate-limiting error, it will continue to try to export data, and record errors as applicable.
With CRMs that have lower rate limits (such as Drip), WP Fusion artificially slows down any batch operations to avoid hitting any API limits. That is achieved using the wpf_batch_sleep_time filter. Returning a number from that filter causes WP Fusion to sleep() for the specified number of seconds before moving on to the next task.
For example, to add a one second pause between each batch step:
add_filter( 'wpf_batch_sleep_time', function() {
	return 1;
});#Changing the timeout limit
By default the batch operations will run for up to 20 seconds per cycle, before stopping and starting a new process.
If you’re still getting timeout errors, you can shorten this using the wpf_batch_default_time_limit filter.
add_filter( 'wpf_batch_default_time_limit', function() {
	return 15;
});#Modifying the initial query
In some cases, a corrupted order, deleted user, deleted product, or other unexpected data may be crashing the batch worker before it can start.
You can modify the initial query using the pre_get_posts or pre_get_users filters (depending on whether the query is for posts or users).
function limit_wpf_batch_size_posts( $query ) {

	if ( doing_action( 'wp_ajax_wpf_batch_init' ) ) {

		$query->set( 'posts_per_page', 100 );
		$query->set( 'paged', 1 );

	}

}

add_filter( 'pre_get_posts', 'limit_wpf_batch_size_posts' );
This example limits the initial query to 100 posts, and returns the first page of results (rather than trying to query all posts at the same time).
function limit_wpf_batch_size_users( $query ) {

	if ( doing_action( 'wp_ajax_wpf_batch_init' ) ) {

		$query->set( 'number', 100 );
		$query->set( 'paged', 1 );
		$query->set( 'orderby', 'registered' );
		$query->set( 'order', 'DESC' );

	}

}

add_filter( 'pre_get_users', 'limit_wpf_batch_size_users' );
This example limits the WP_User_Query to the 100 most recently registered users.
#Cancelling
Generally, you can click the Cancel button on the batch operation status bar to cancel the current operation. The operation will be terminated at the end of the current cycle (usually within about 20 seconds)
In some situations, for example if the exporter has timed out, it may not be possible to cancel the background worker by clicking the button. In that case you can append &wpf-cancel-batch to the WP Fusion settings page URL to force-clear the queue from the database.
For example https://mysite.com/wp-admin/options-general.php?page=wpf-settings&wpf-cancel-batch. You will see a status message showing the batch IDs that were deleted.
#Custom batch operations
For additional developer docs and examples, see the article on Registering Custom Batch Operations.
#Running batch operations on a schedule
For information on scheduling batch operations, see Scheduled Synchronization Using Cron.