#Overview
Using double opt-in is a great way to make sure only confirmed, high-quality leads sign up to your mailing list. It can also improve your sender reputation by reducing bounce rates and spam complaints.
Each CRM that WP Fusion supports handles double opt-ins in a different way. Here’s how to make use of the features in WP Fusion, as well as the features unique to each CRM.
#Opt-in management in WP Fusion’s plugin integrations
WP Fusion includes features across our various plugin integrations that help to manage opt-ins, marketing consent, and email address verification.
#Marketing consent checkboxes
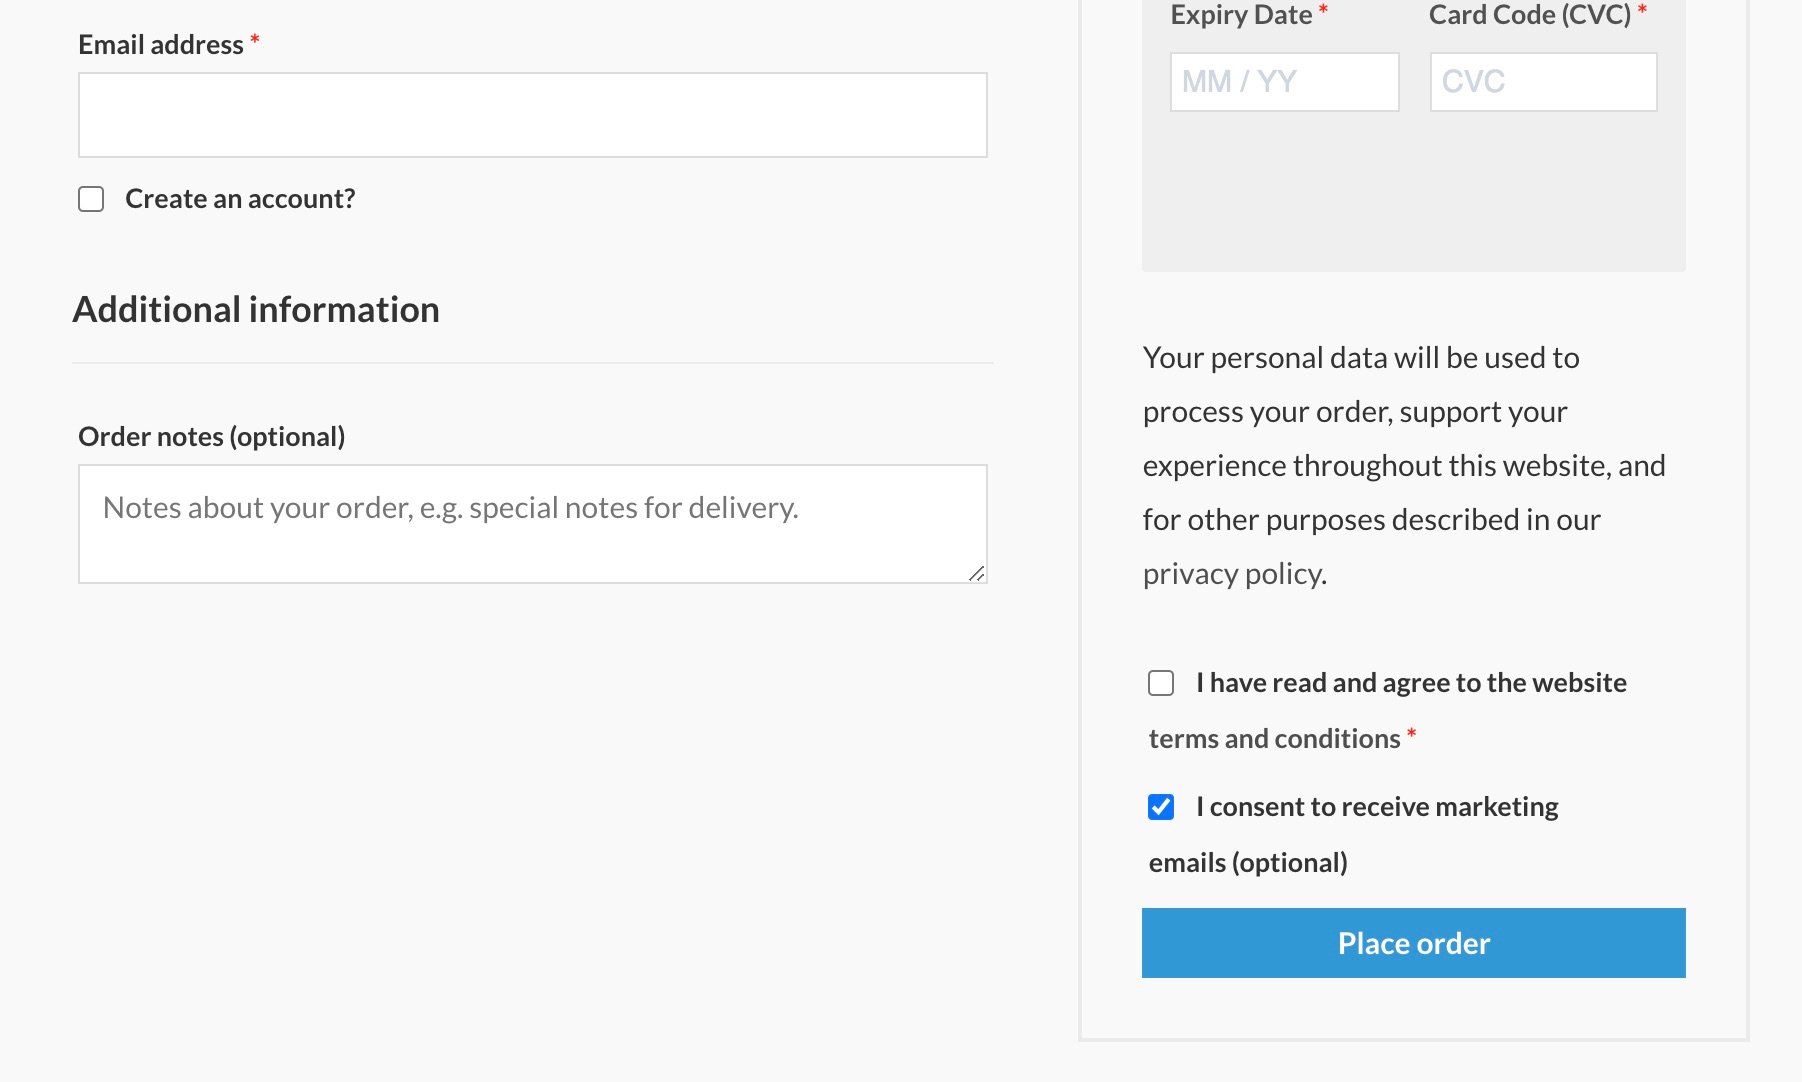
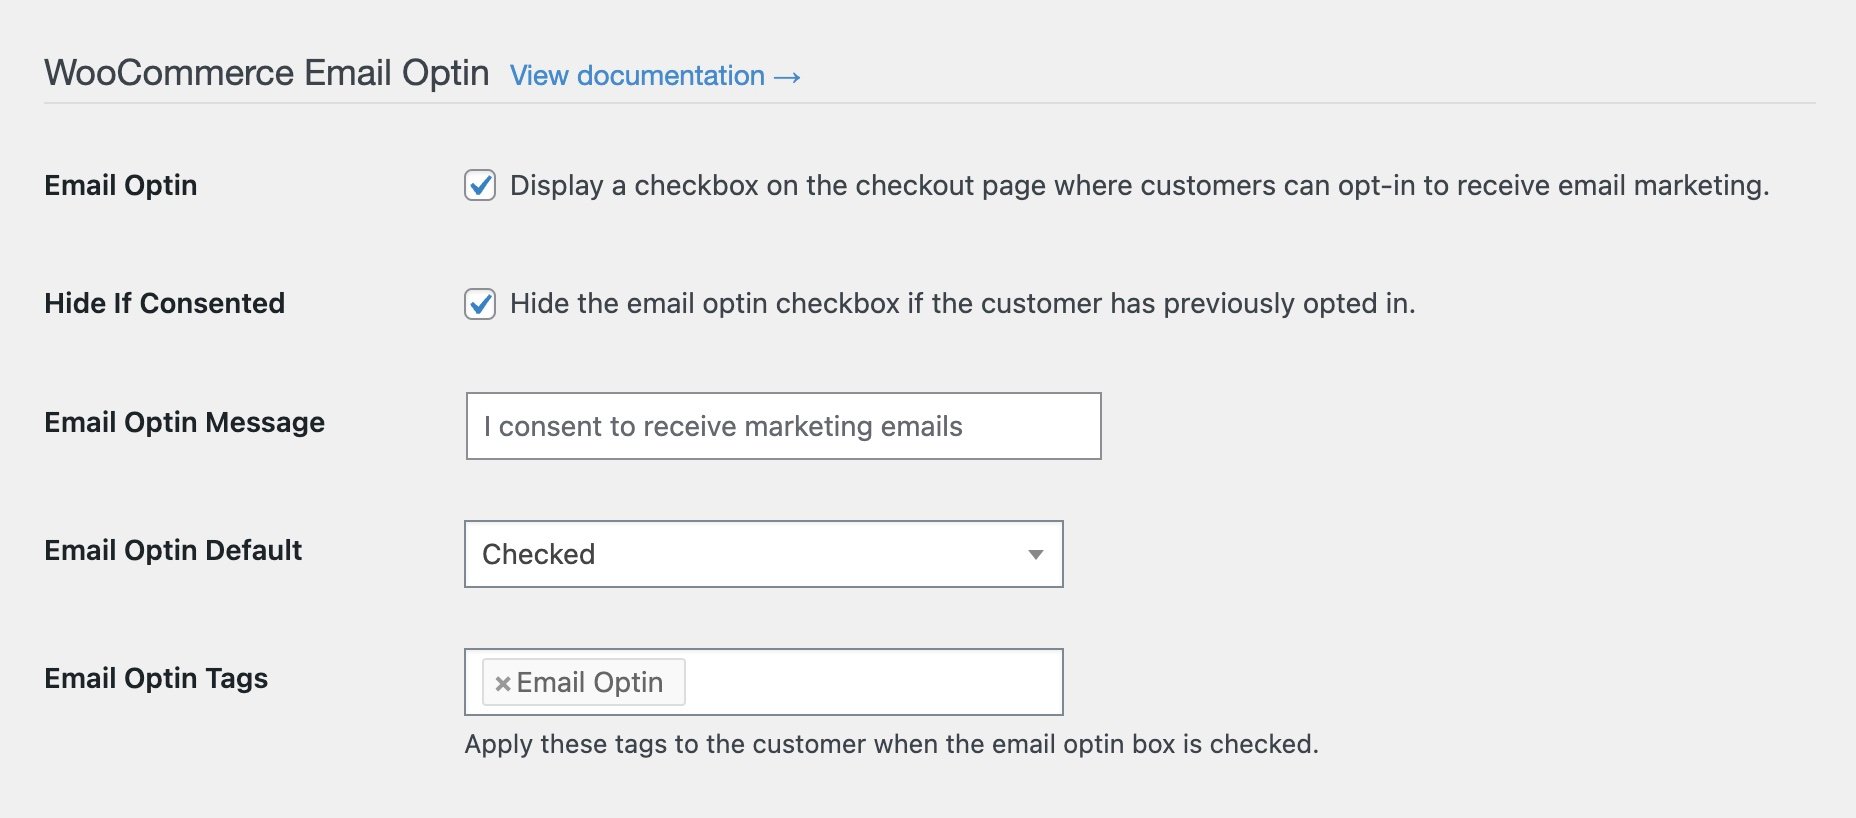
With WooCommerce, Easy Digital Downloads, and GiveWP, WP Fusion includes an option to add a marketing consent checkbox to the checkout fields.
In the settings, you can configure the label text, default checkbox state, and tags to apply when the optin checkbox is checked.
Even in platforms without a dedicated double opt-in flow, you can use this tag or list to segment your subscribers based on whether or not they have consented to receive marketing.
#Defer until activation
With BuddyPress / BuddyBoss, Ultimate Member, User Meta, WP Members, and WP User Manager, WP Fusion includes a feature called Defer Until Activation.
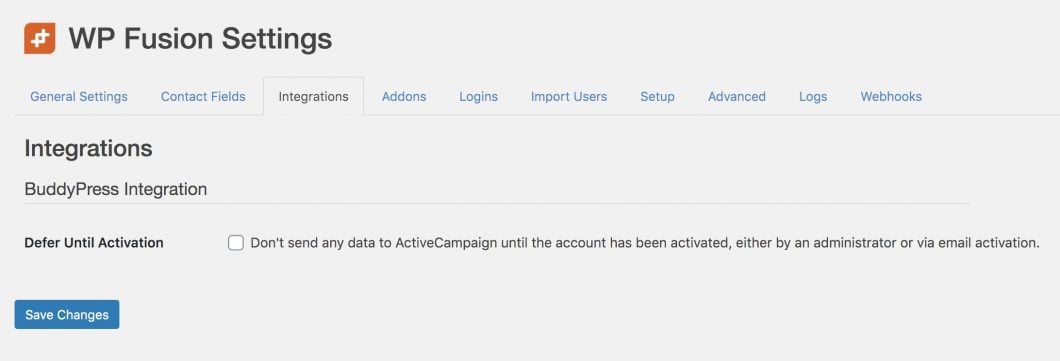
When this is checked, no data will be sent to your CRM until the member’s account is activated— either by clicking a confirmation link in an email, or manually by an admin.
This is a great way to make sure only valid email addresses are synced to your CRM.
#Opt-in management with WP Fusion’s CRM integrations
The features WP Fusion offers for opt-in management also depend on the capabilities of the connected CRM or email marketing platform. The platforms we support are:
#ActiveCampaign
ActiveCampaign’s marketing consent is based on your lists. When a contact signs up to a list, they can be sent a double-opt-in email to confirm their subscription. When a contact clicks Unsubscribe in a campaign email, they will be unsubscribed from the list that email was sent to.
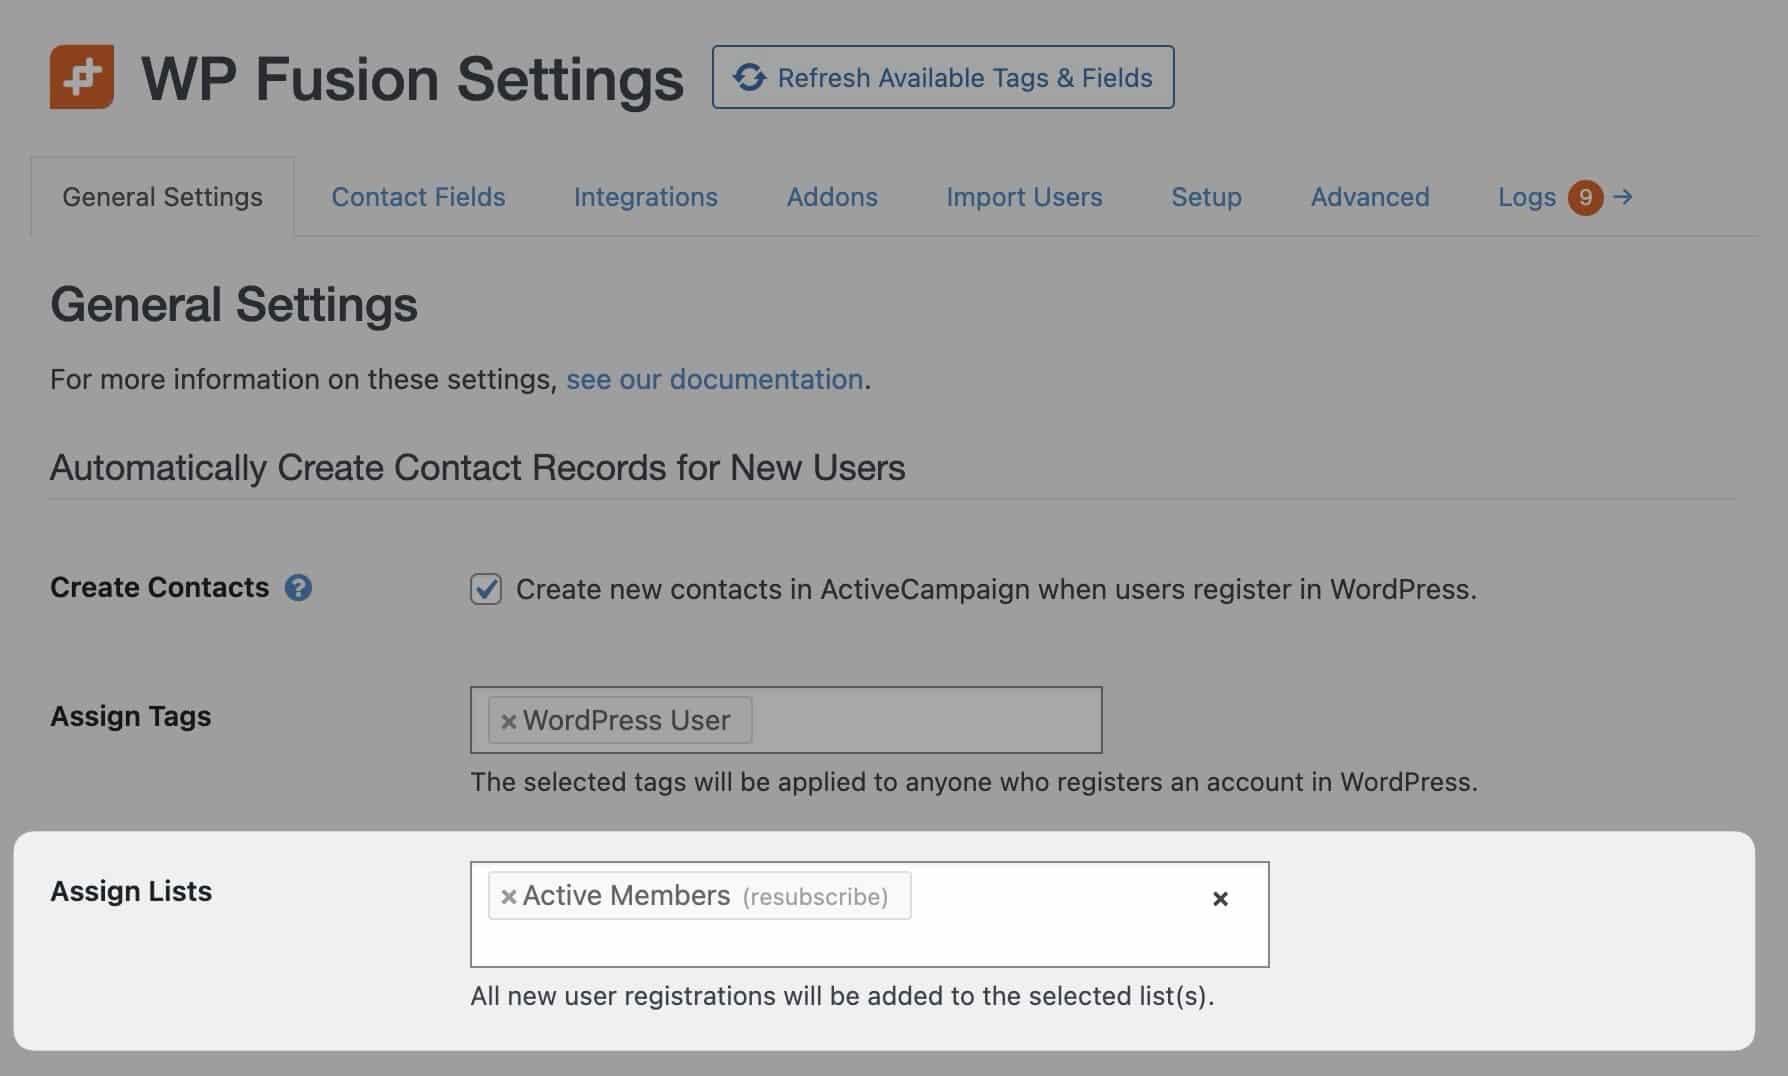
WP Fusion allows you to subscribe new contacts to one or more lists when they register an account in WordPress, or submit a form. You can also add contacts to lists in ActiveCampaign using automations that are triggered by tags or custom field updates.
By default, WP Fusion will not re-subscribe a contact to a list they had previously unsubscribed from.
If you want to re-subscribe unsubscribed contacts, you can select the list name containing “(resubscribe)” in the Select List(s) dropdowns.
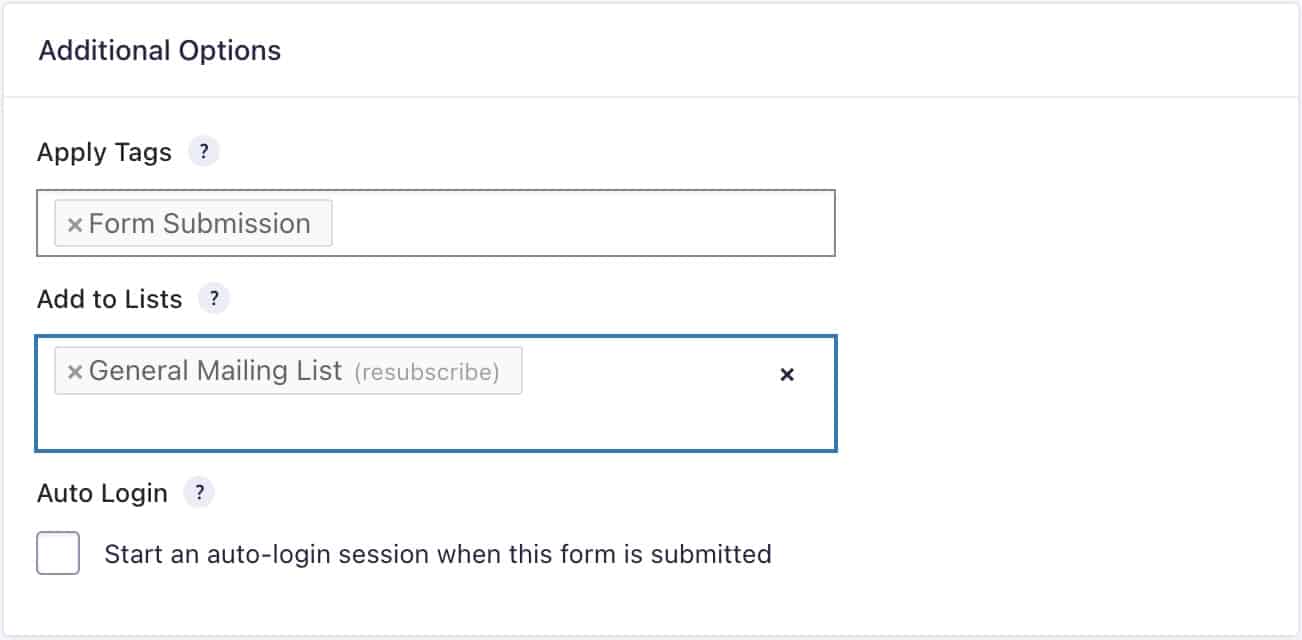
This will add the contact back to the list and make them eligible for marketing emails again.
Applying lists during form submissions (and resubscribing contacts to lists) is currently supported with:
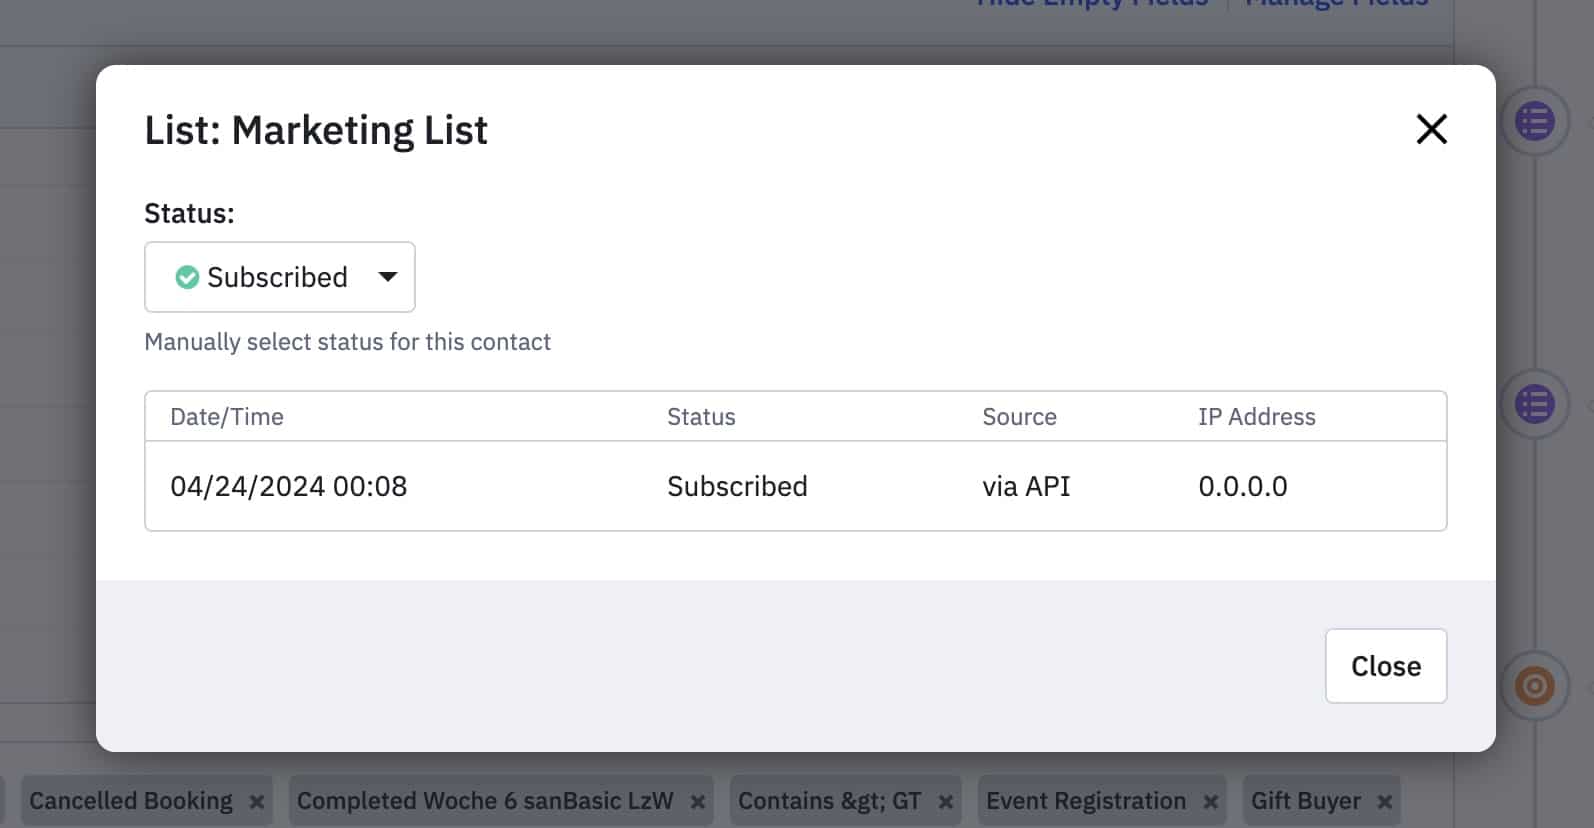
You will see the contact’s list status update in ActiveCampaign to “Subscribed”, and the source will show as via API.
Please use with caution: The form should make it clear that it will re-subscribe the contact to marketing.
Just purchasing a product from you or signing up for a course is not a guarantee that the person wants to receive marketing emails again after unsubscribing. This could lead to your messages getting reported as spam, and damage the sending reputation of your ActiveCampaign account.
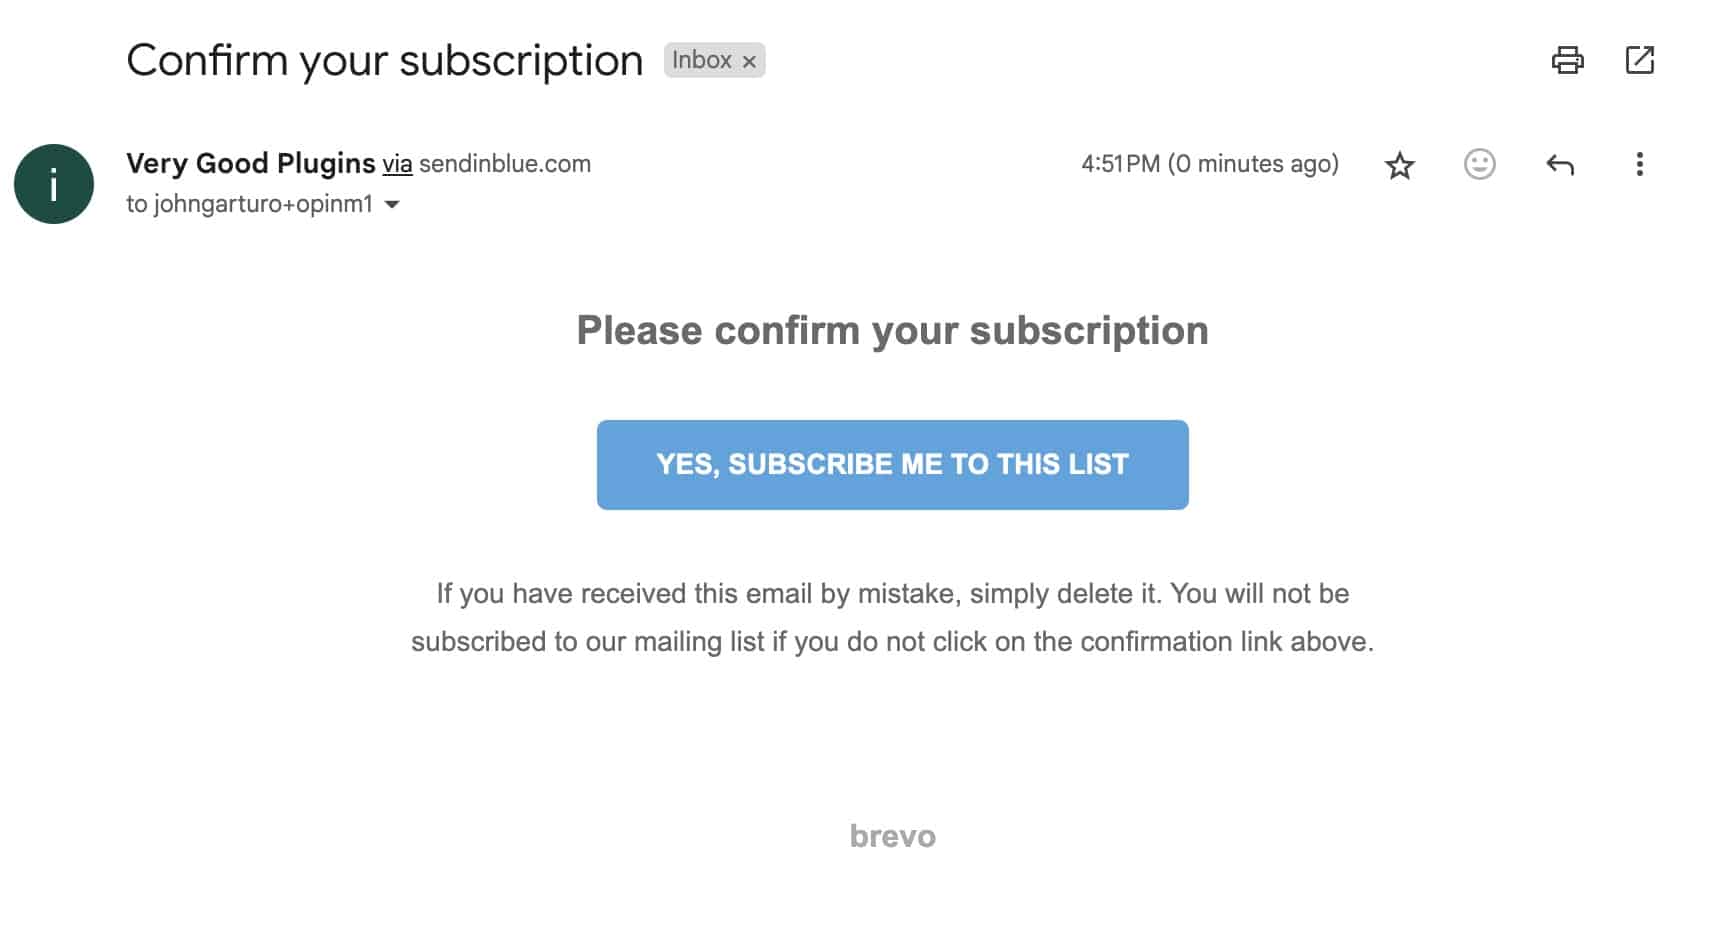
#Brevo
The simplest method to use double opt-in with Brevo is to use the “automation method.” Essentially, each new subscriber gets added to a Pending or Unconfirmed list. You then use an automation to send them an opt-in confirmation email, and only move them to your main list once they have confirmed their subscription.
This is compatible with all of WP Fusion’s features and integrations.
For more advanced control you can also use a custom double opt-in template, connected to a Brevo form. For more information, see this tutorial.
Once you’ve created your opt-in template and linked it to your form, click Refresh Available Lists and Fields in the WP Fusion settings to load the new templates. Then, from the General settings tab, select your opt-in template from the Double Opt-in Template dropdown.
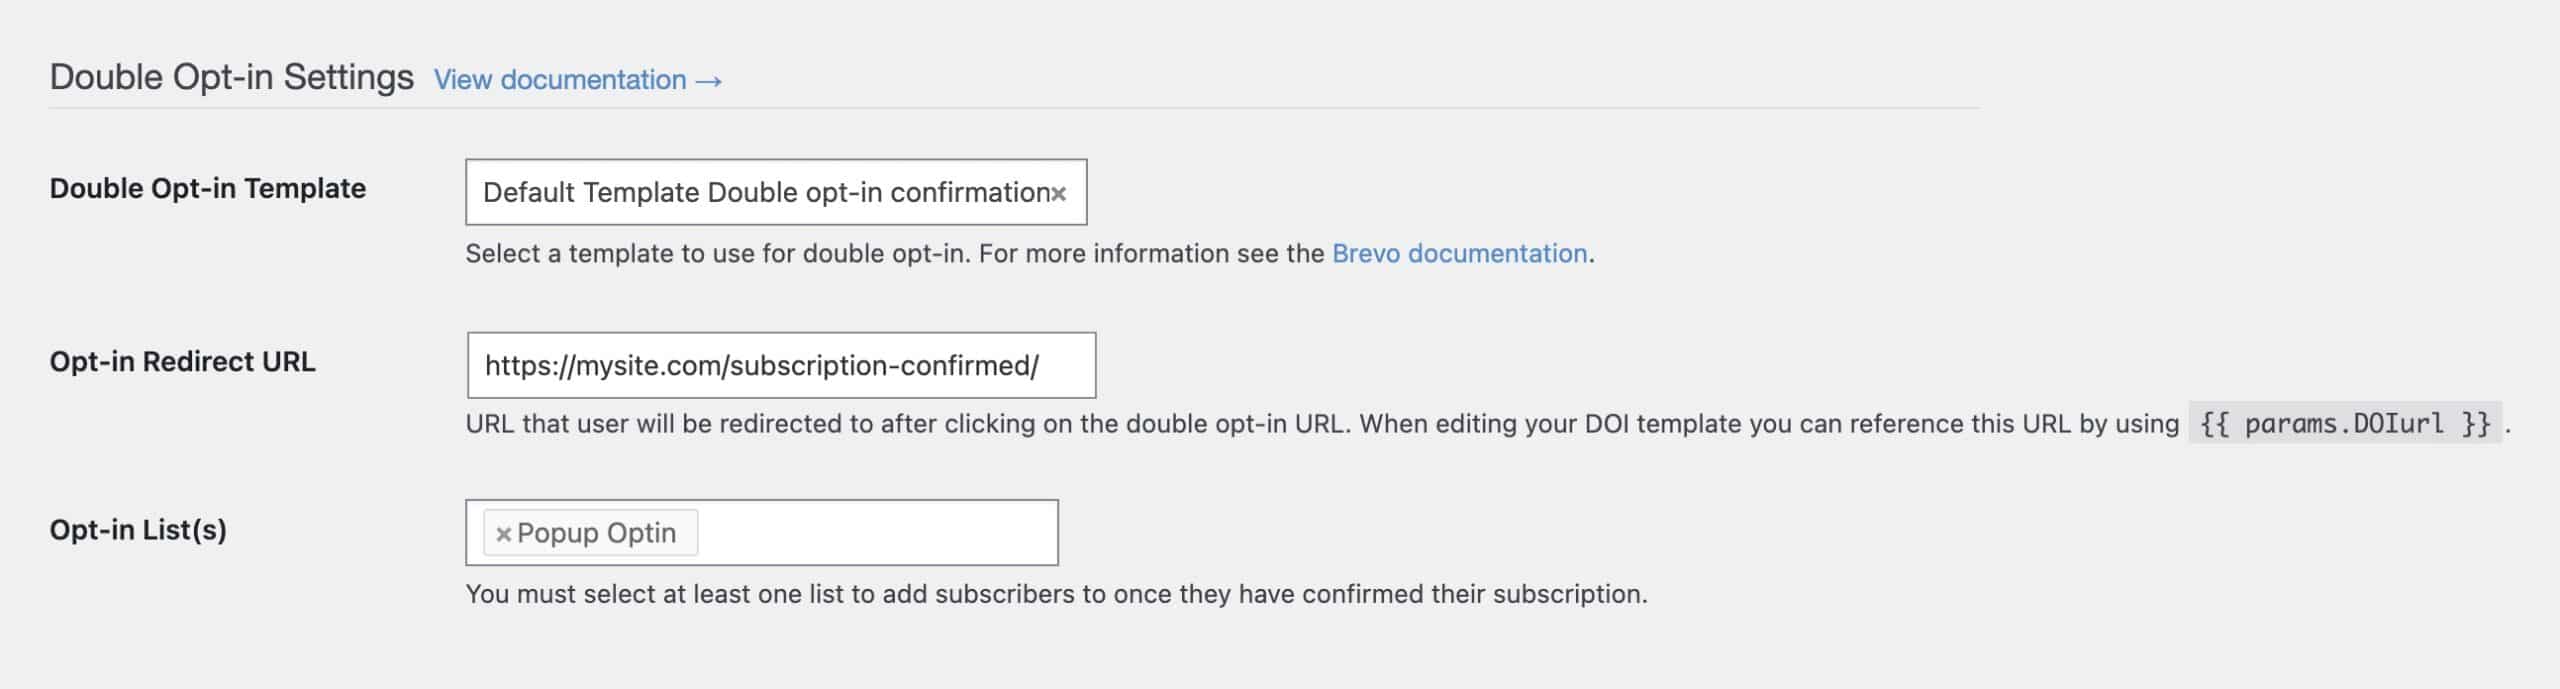
To use a custom double opt-in template, you will need to enter a redirect URL to take the subscriber after they’ve confirmed their subscription, as well as at least one list to use for all confirmed subscribers.
When WP Fusion creates the new subscriber, they will be added to Brevo in a pending state (they won’t appear under the All Contacts list). The subscriber will receive a confirmation email to verify their address. Once they click the link in the email, they will be redirected back to the Redirect URL and they will be added to the selected lists in Brevo.
Note: Because the new subscriber is pending in Brevo, it is not possible to assign any lists to them other than the lists selected in the Opt-in List(s) setting.
For this reason it’s recommended not to use a custom opt-in template with ecommerce or membership site purchases, since you won’t be able to segment customers based on their products or membership plan.
#MailerLite
You can configure WP Fusion’s default status for new MailerLite subscribers at Settings » WP Fusion » General » Default Optin Status.
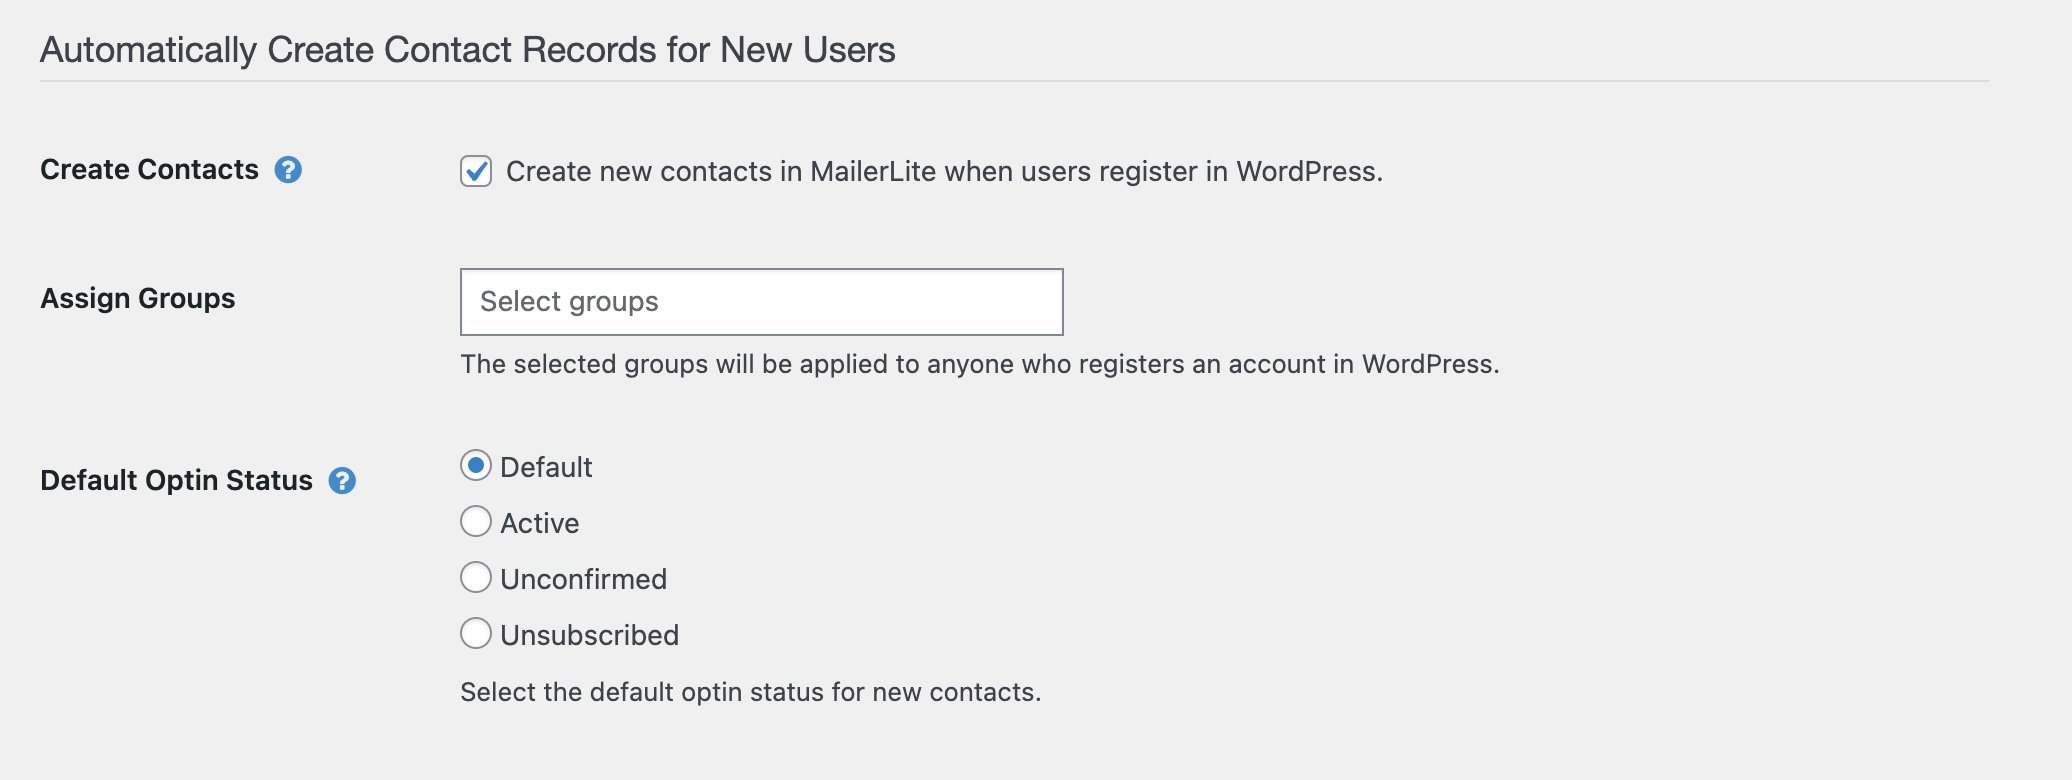
The options are:
- Default: WP Fusion will not specify an opt-in status for new subscribers. This means subscribers will follow the status you’ve configured in MailerLite— either active (by default), or unconfirmed if you’ve enabled Double opt-in for API and integrations.
- Active: All subscribers created by WP Fusion will be set to active.
- Unconfirmed: All subscribers created by WP Fusion will be set to unconfirmed, and a double opt-in email will be sent.
- Unsubscribed: All subscribers created by WP Fusion will be set to unsubscribed. You can still use groups to grant access to content in WordPress, but you will not be able to send emails to the subscribers, and they will not count towards your plan limit.
For more information, see MailerLite double opt-ins.
#Drip
Drip doesn’t have any configurable options for double opt-in emails. However, you can manage a subscriber’s marketing status via WP Fusion, using the Status field.
You can update the Status field via the Contact Fields panel in the WP Fusion settings, or via any of WP Fusion’s form integrations.
Syncing a value of of active will subscribe the person to marketing. Syncing a value of unsubscribed will unsubscribe the person.
For more information, see Inactive / Unsubscribed People in Drip.
#FluentCRM
With FluentCRM (same site and REST API), opt-in status is managed via the Status field. There are two options, pending and subscribed.
In the General tab of the WP Fusion settings, you can set the default status for all new contacts.
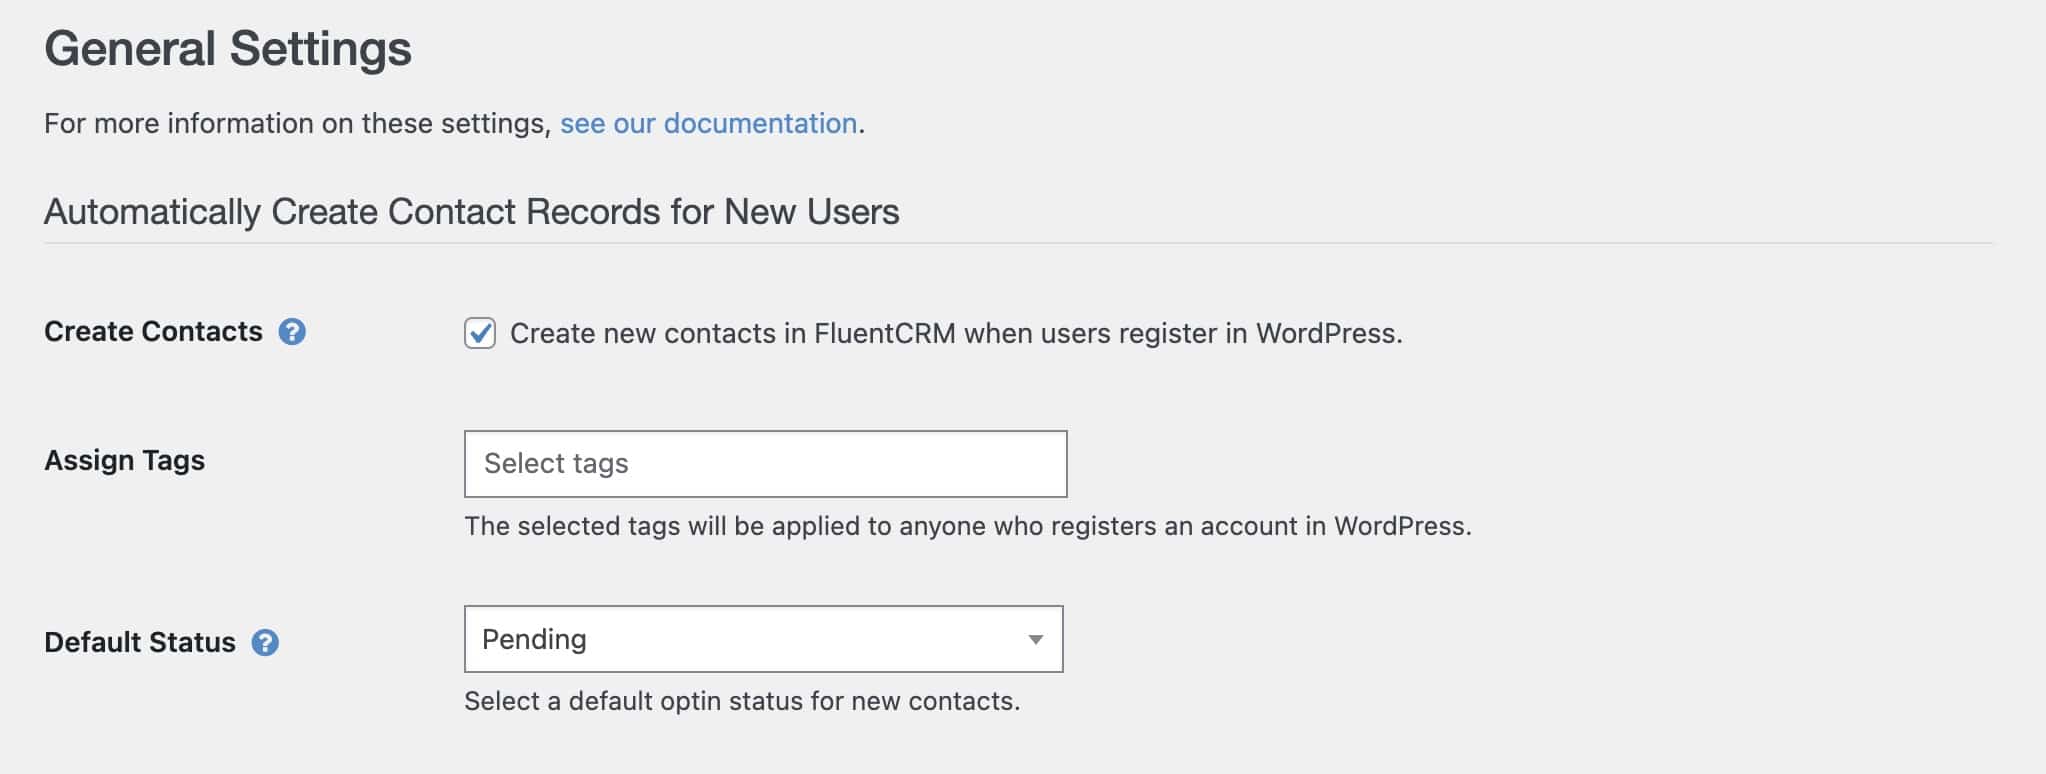
If the status is set to Subscribed, the contact will be marked as confirmed in FluentCRM and can receive marketing emails immediately. If the status is set to Pending, the subscriber will receive a double opt-in confirmation email based on your FluentCRM settings.
The default status can be overridden by syncing a value to the Status field. For example you could set the default status for the site to Subscribed, but create an opt-in form in Elementor with a hidden field set to pending. If you map this field with the Status field in FluentCRM, it will send an opt-in confirmation email to anyone who submits that specific form.
#Groundhogg
With Groundhogg (same site and REST API), you can set a default opt-in status for new contacts from the General tab in the WP Fusion settings.

This can also be overridden on a per-form basis by syncing to the Optin Status field. Groundhogg uses numeric IDs to update a contact’s status, so to update the status by syncing a hidden field, you will need to sync the correct ID. Those IDs are:
- Unconfirmed:
1 - Confirmed:
2 - Unsubscribed:
3 - Weekly:
4 - Monthly:
5
#Infusionsoft / Keap
With Infusionsoft and Keap opt-ins are automatic, there are no configurable options.
When a new contact is added by WP Fusion, they will be opted in and set to “Unconfirmed” (i.e. single opt-in). If an existing contact registers an account via WP Fusion, and their status is “non-marketable”, their optin status will be updated to “Unconfirmed”, so they can receive marketing emails.
You can set contacts to “Confirmed” by creating an email confirmation sequence.
Note: if a contact has previously unsubscribed from marketing (“Unsubscribed”) WP Fusion will not be able to update their status again. You can send individual emails to these email addresses, but cannot send any broadcast, or emails within a sequence to them.
For more information see Email statuses explained.
#Klaviyo
By default WP Fusion adds subscribers to Klaviyo lists with the NEVER_SUBSCRIBED status. This means subscribers can receive emails, but they will not show as confirmed for marketing.
You can choose to add subscribers to specific lists with marketing consent by selecting the alternate (opt-in to marketing) list name in the WP Fusion Select Lists dropdown.
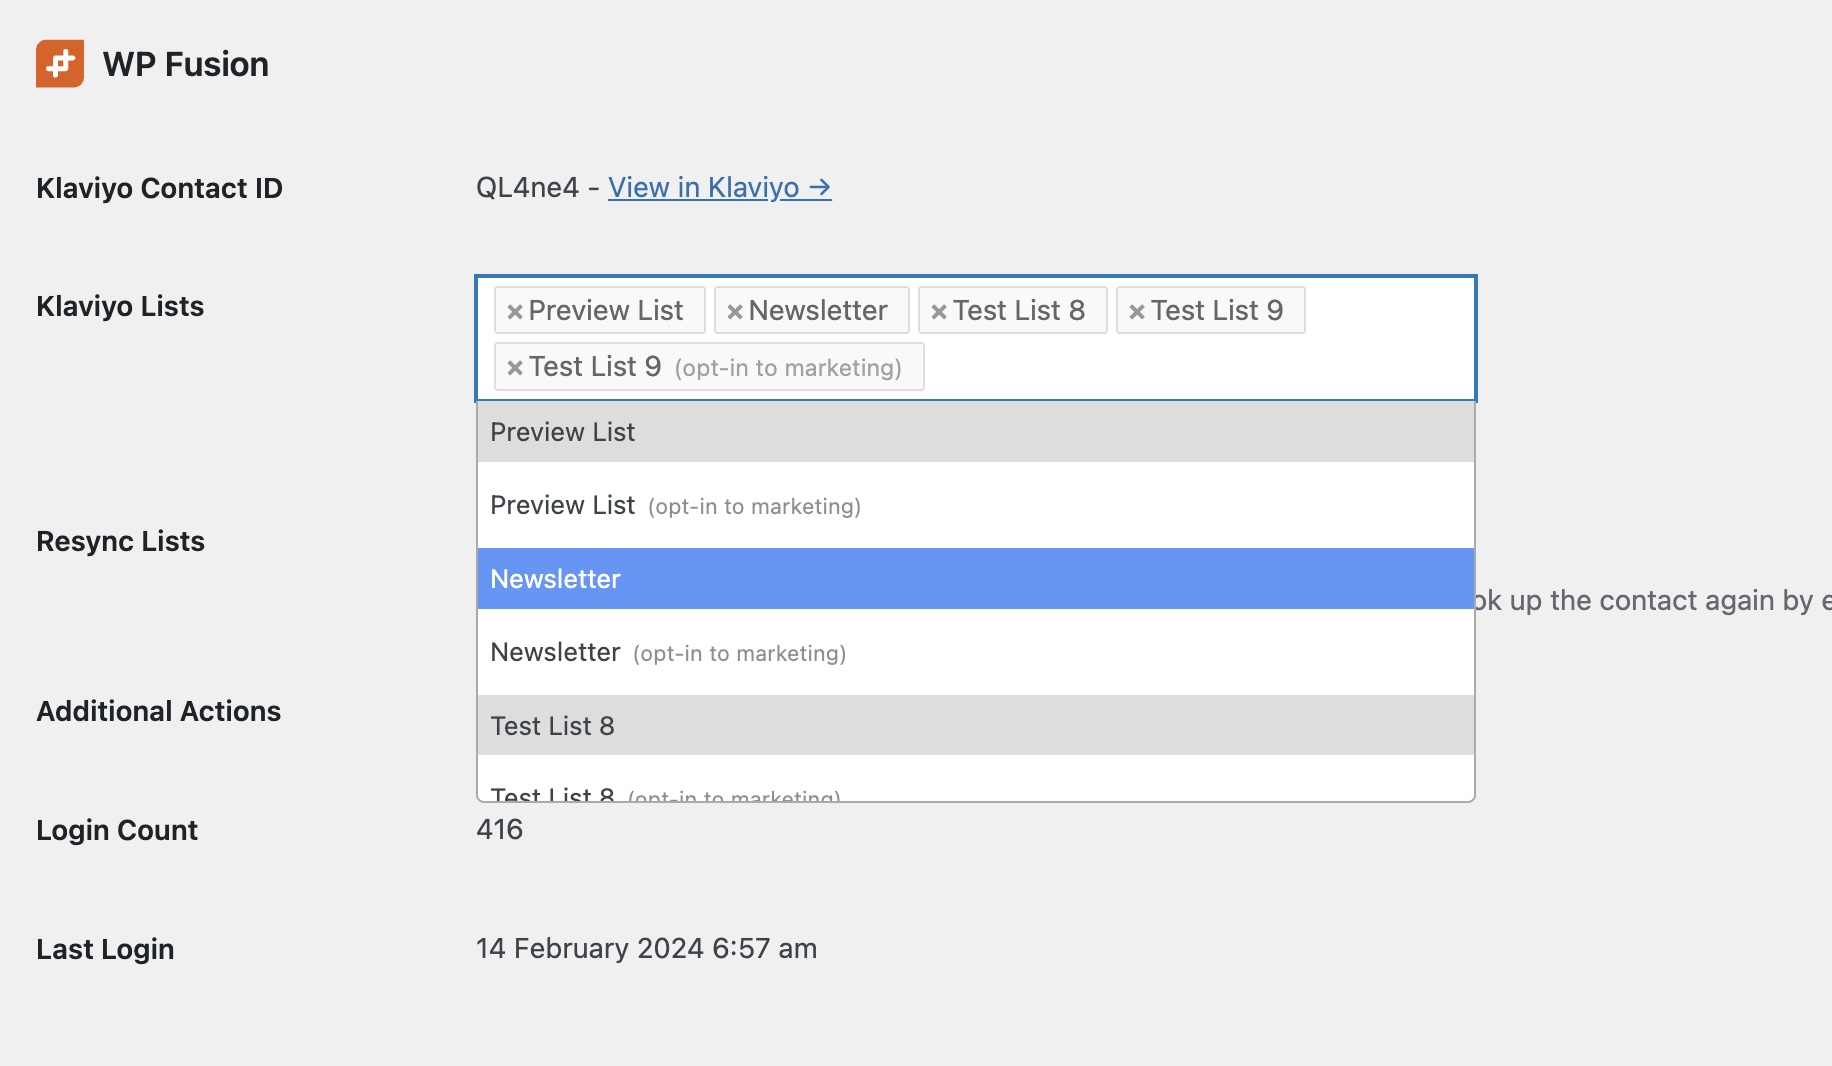
In this case the subscriber will be added to the list as SUBSCRIBED. The current timestamp will be used as the date of consent, and the marketing consent source will be recorded as WP Fusion.
For more information on Klaviyo list statuses see Klaviyo marketing consent.
#Klick-Tipp
With Klick-Tipp, you can select a Double Opt-in Process from the General tab in the WP Fusion settings.
If you’ve just created a new process, click Refresh Available Tags and Fields at the top of the page to update the options in the dropdowns.
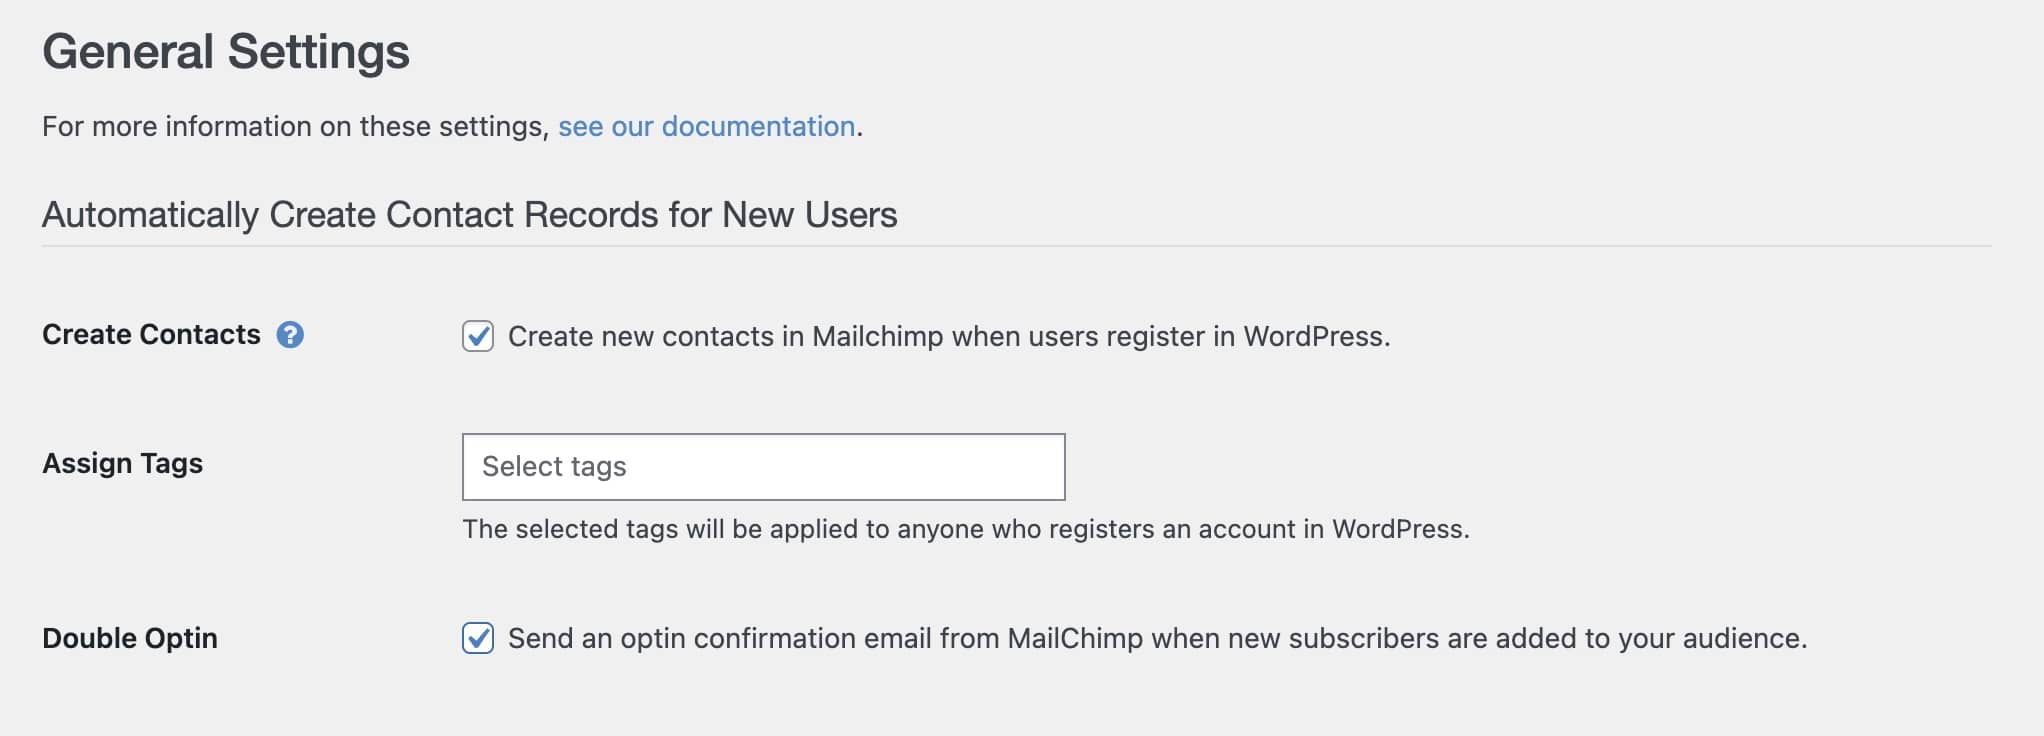
#Mailchimp
With Mailchimp, you can select Double Optin from the WP Fusion General settings to automatically send a confirmation email to anyone who is added to your audience.