#Overview
We love Ultimate Member as a great (free) solution to create beautiful login and registration pages, as well as searchable member directories.
#Sync Custom Fields
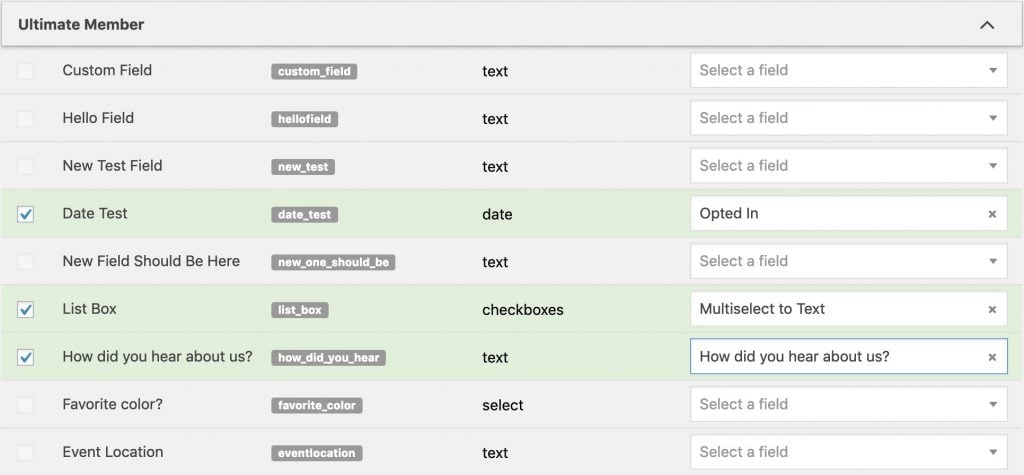
WP Fusion will automatically detect any custom fields you’ve created through Ultimate Member and allow you to sync these fields to fields in your CRM when a user registers or a profile is updated.
Any fields you’ve added to registration or profile forms will show up under the Ultimate Member heading under the Contact Fields list in the WP Fusion settings.
#Tagging
WP Fusion adds a few options specific to Ultimate Member for tagging contact records in your CRM.
#Tag Users on Registration
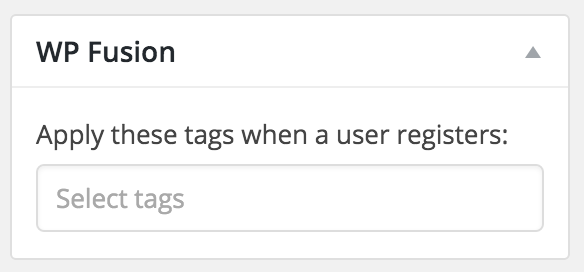
You can specify tags to be applied per registration form when a user registers, allowing you to segment users by which registration form they used.
This setting will appear in the sidebar while editing any Ultimate Member registration form.
#User Roles
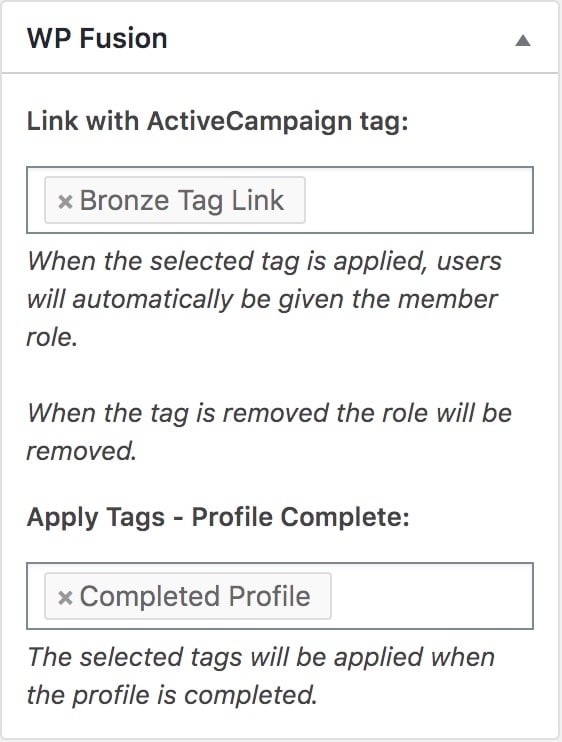
When configuring Ultimate Member user roles, WP Fusion allows you to “link” a user role to a tag. Once a role has been linked to a tag, users will automatically be granted this role when the tag is applied. If the tag is removed, the role will be removed.
This setting can be found in the sidebar when editing any Ultimate Member role.
To avoid leaving users with no role, if a linked tag is removed and the user has no other roles, WP Fusion will grant the user the Ultimate Member default registration role. This setting can be found under Ultimate Member » Settings » Appearance » Registration Form.
If the Profile Completeness addon is installed, you will also see a setting allowing you to specify tags to apply in your CRM when a user’s profile is completed.
#General Settings
WP Fusion has a few global settings for Ultimate Member. These can be found under Settings » WP Fusion » Integrations.
The settings are:
- Pull: Enabling this setting will cause WP Fusion to connect to your CRM and load the user’s latest metadata any time their Ultimate Member profile is loaded. This will slow down the load time of the profile, so the preferred way to send data back to Ultimate Member from your CRM is by setting up a webhook.
- Defer Until Activation: Enabling this setting will prevent WP Fusion from sending any data to your CRM (or applying any tags) to new users until their account has been activated. This can either be via the activation email sent by Ultimate Member, or a manual activation by an admin. This is a good way to get members to verify their email addresses before any data is sent to your CRM.
- Deactivation Tag: This setting can be used (most commonly with membership sites) to automatically deactivate a member’s account when a tag is applied, for example in the case of a payment failure. When the tag is removed their account will be reactivated.
#A note on webhooks
Using webhooks from your CRM, it’s possible to automatically import CRM contacts as WordPress users.
By setting the &role= parameter in the webhook URL to an Ultimate Member role slug, you can automatically assign an Ultimate Member user role to the new user.
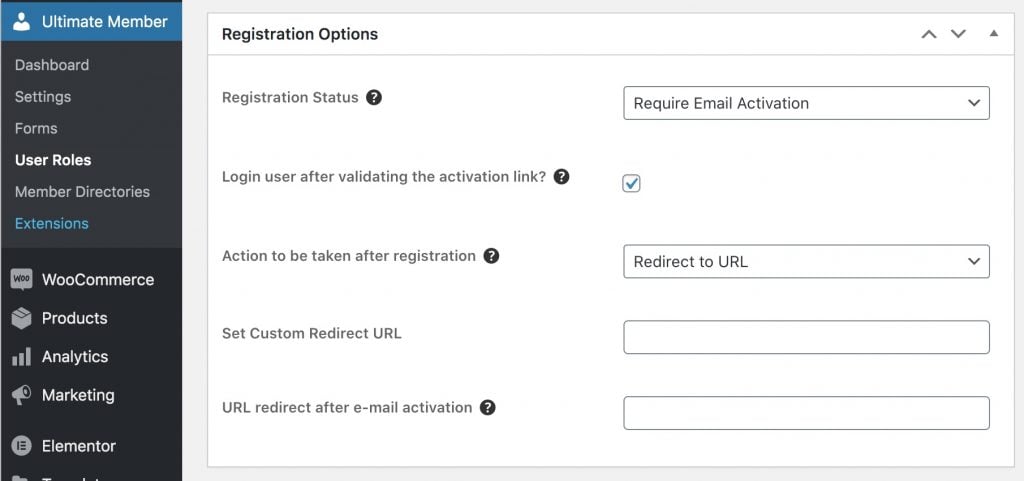
When used in conjunction with the Require Email Activation option on the Ultimate Member role, you can automatically send the new user an email with a link to activate their account.
To make this work properly, omit the &send_notification= parameter from your webhook URL.
For example:
https://mysite.com/?wpf_action=add&role=um_custom_role: New user will be imported with the role UM Custom Role, and the activation email will be sent from Ultimate Member. The default WordPress welcome email will not be sent.https://mysite.com/?wpf_action=add&role=um_custom_role&send_notification=false: New user will be imported with the role UM Custom Role, and no emails will be sent at all.https://mysite.com/?wpf_action=add&role=um_custom_role&send_notification=true: New user will be imported with the role UM Custom Role, and both the WordPress default new user welcome email and the Ultimate Member account activation email will be sent.
