#Overview
WP Fusion’s Enhanced Ecommerce Addon (available for Plus and Professional license holders) supports sending ecommerce transaction data as Orders to your Salesforce account for sales made in:
- WooCommerce
- Easy Digital Downloads
- Event Espresso
- GiveWP
- SureCart
- Gravity Forms
- LifterLMS
- MemberPress
- and Restrict Content Pro
#Getting started
Once you install the addon, the Enhanced Ecommerce tab will appear in the WP Fusion settings. To begin syncing orders with Salesforce, you must set an account ID for all orders.
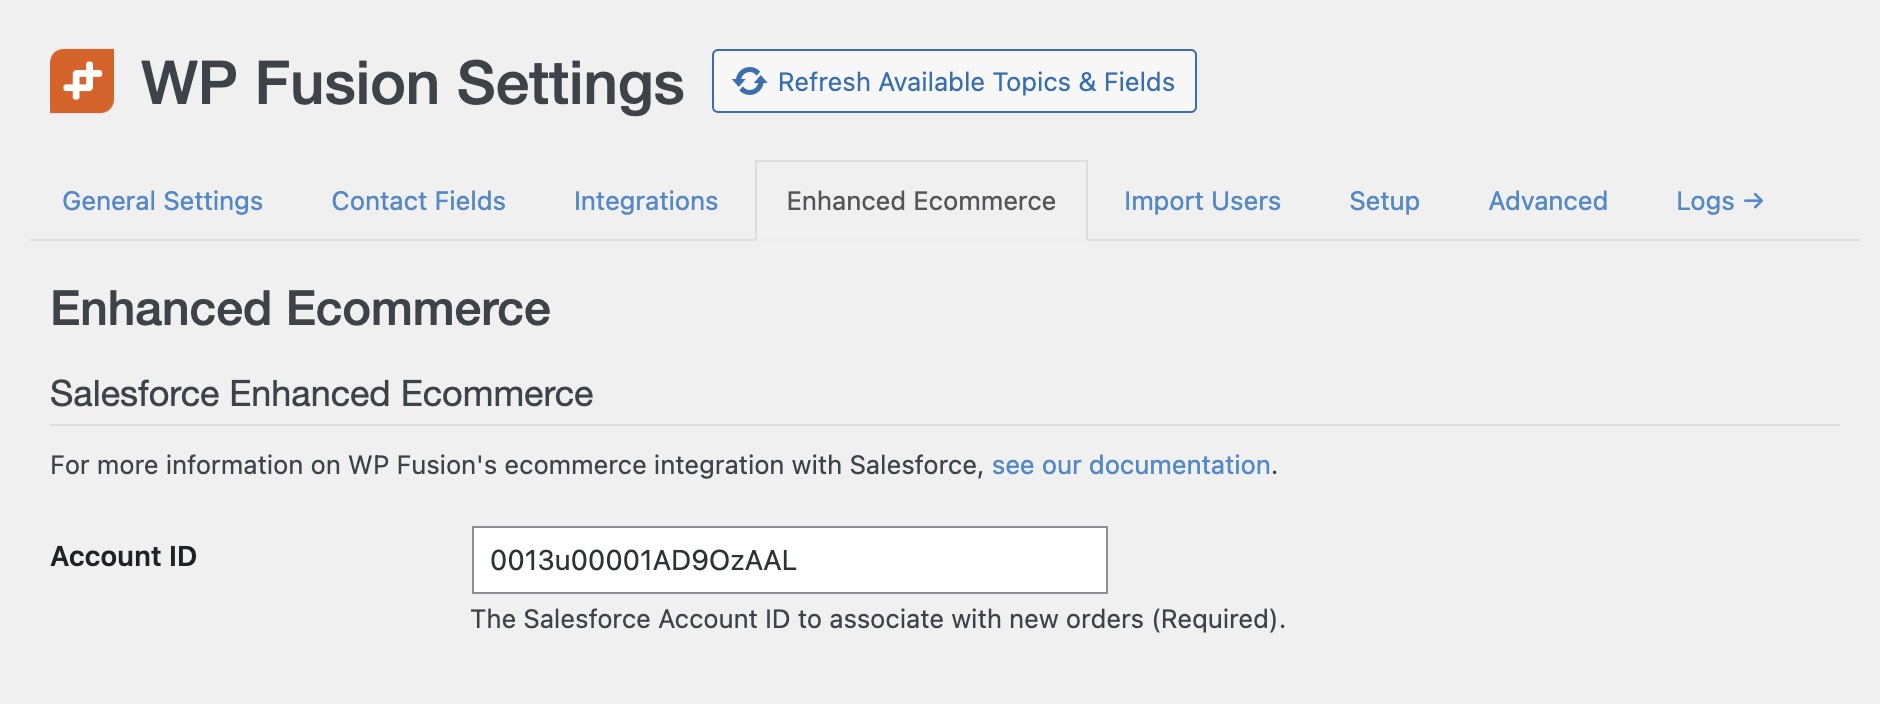
Once this is set, your new orders will begin syncing into Salesforce automatically.
#How it works
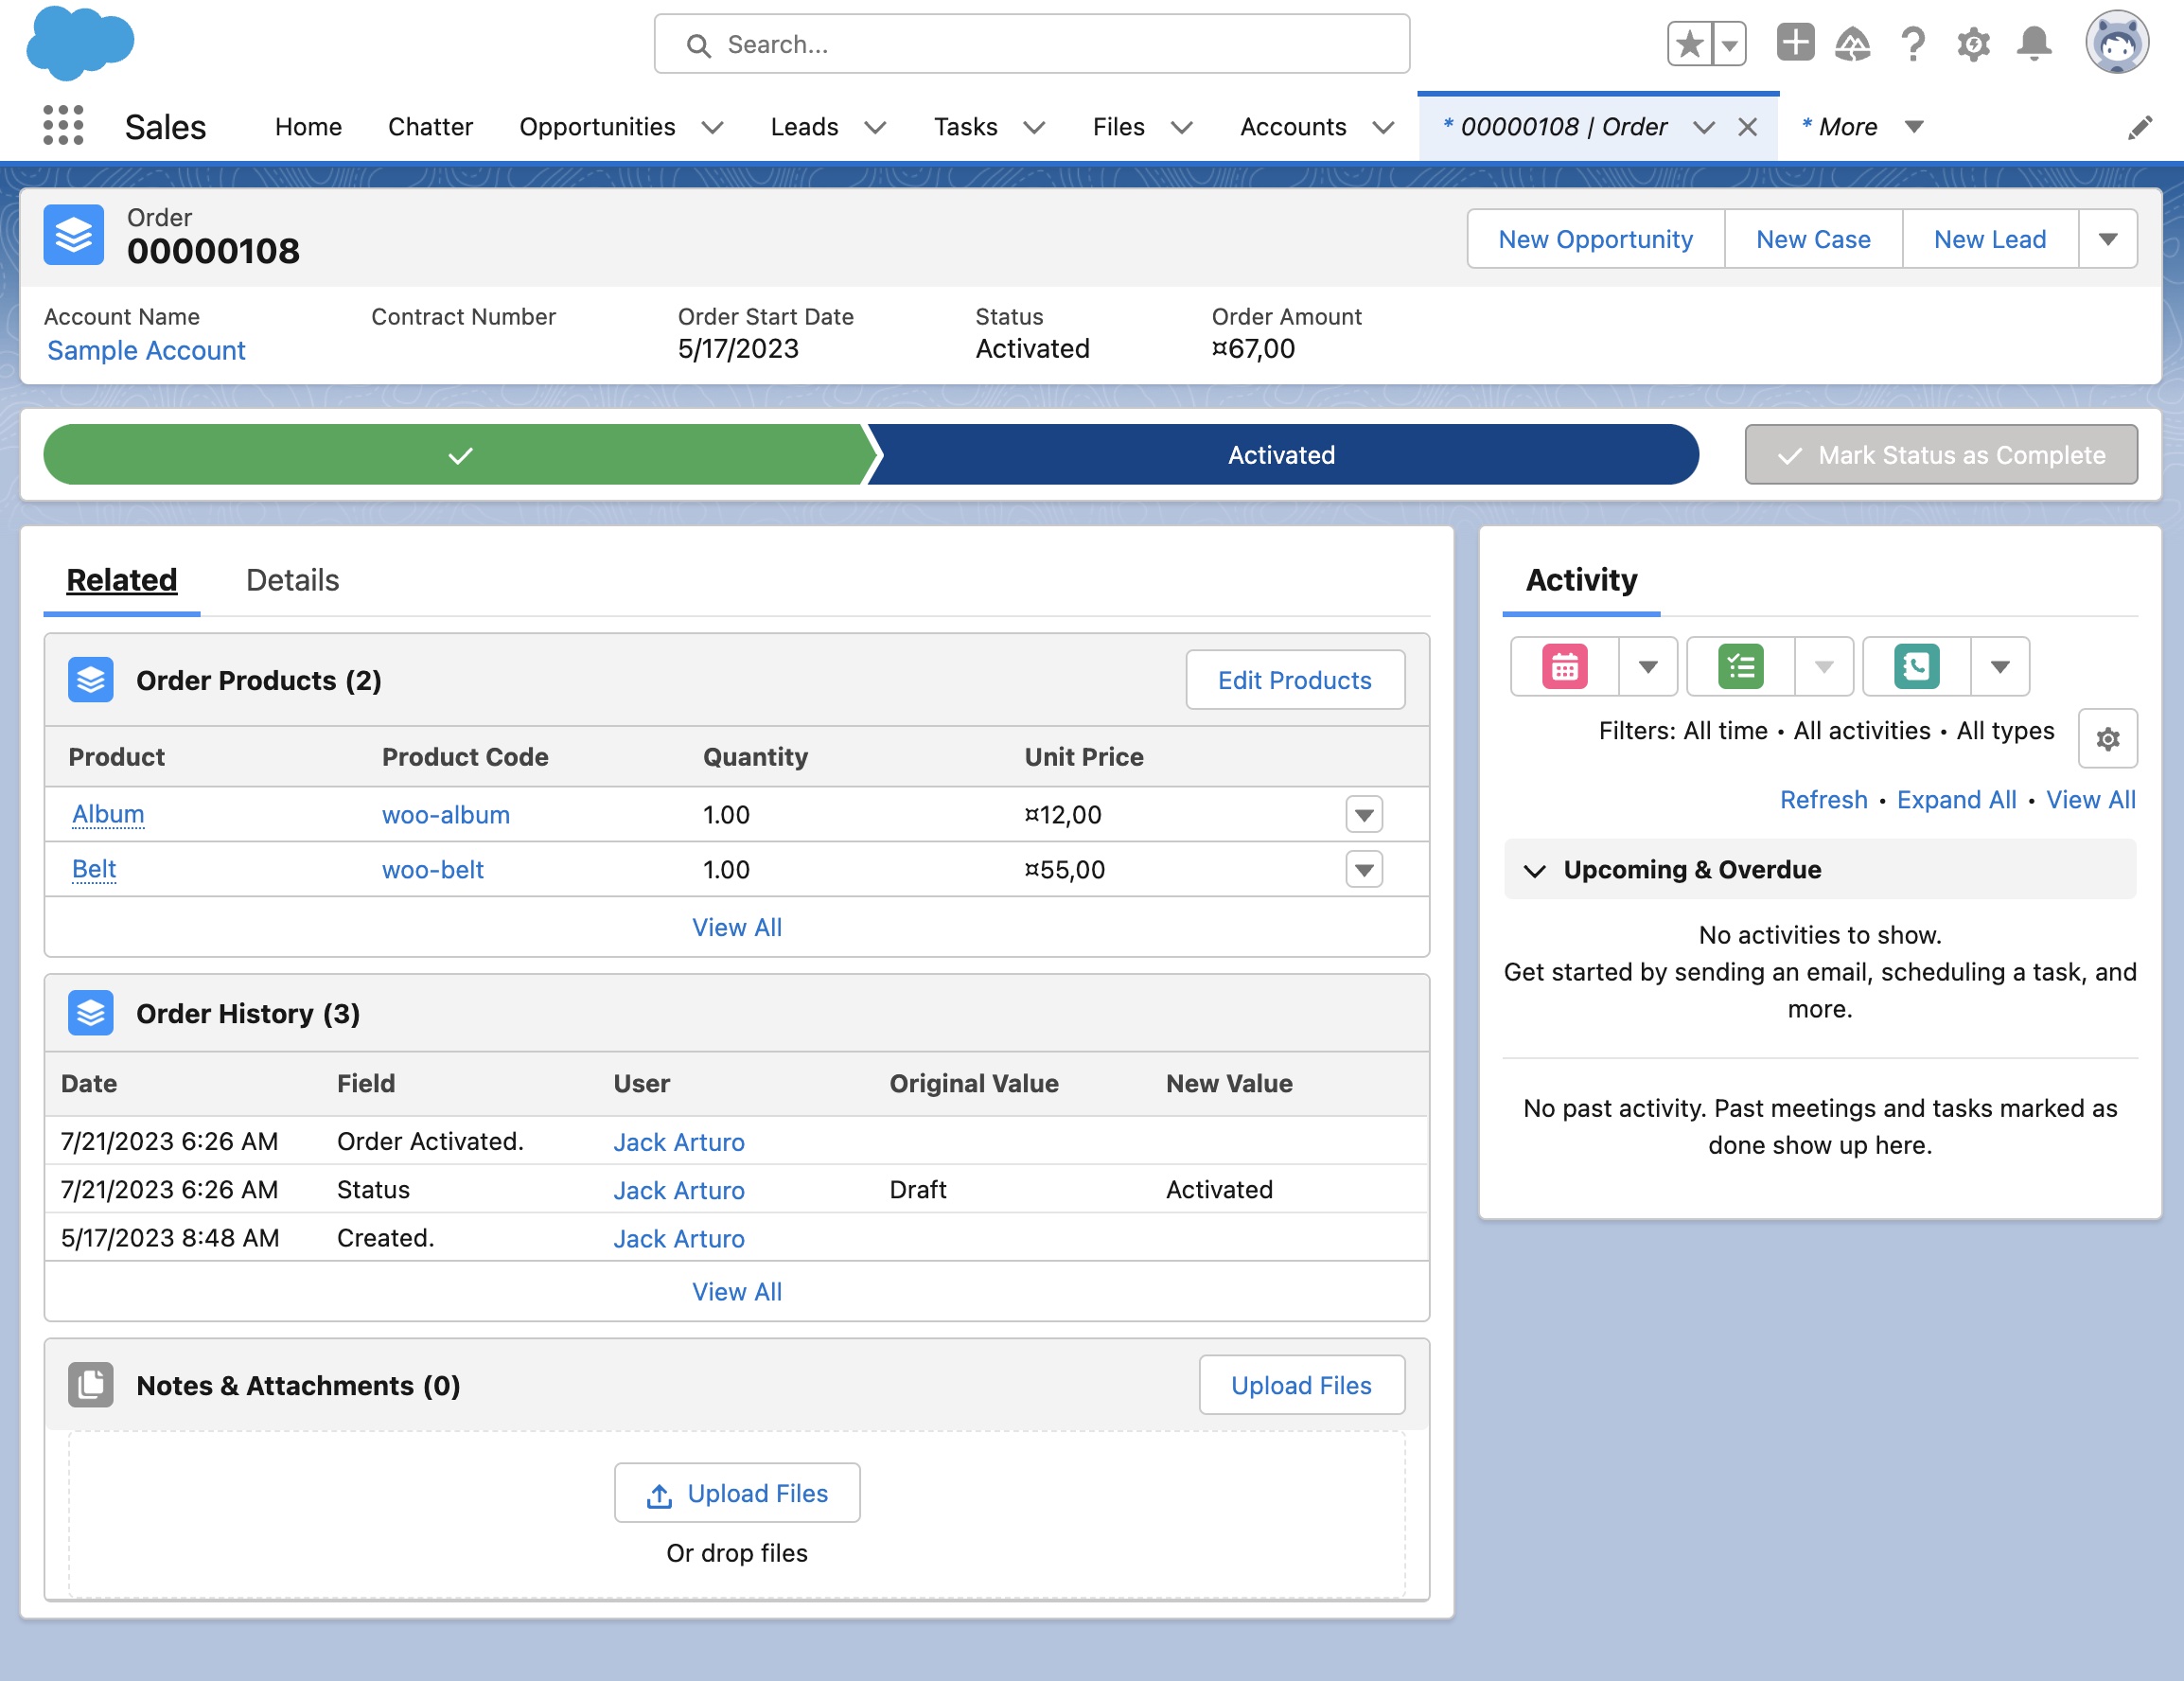
When a customer checks out on your site, WP Fusion will create a new order in Salesforce with the order label, date, and total.
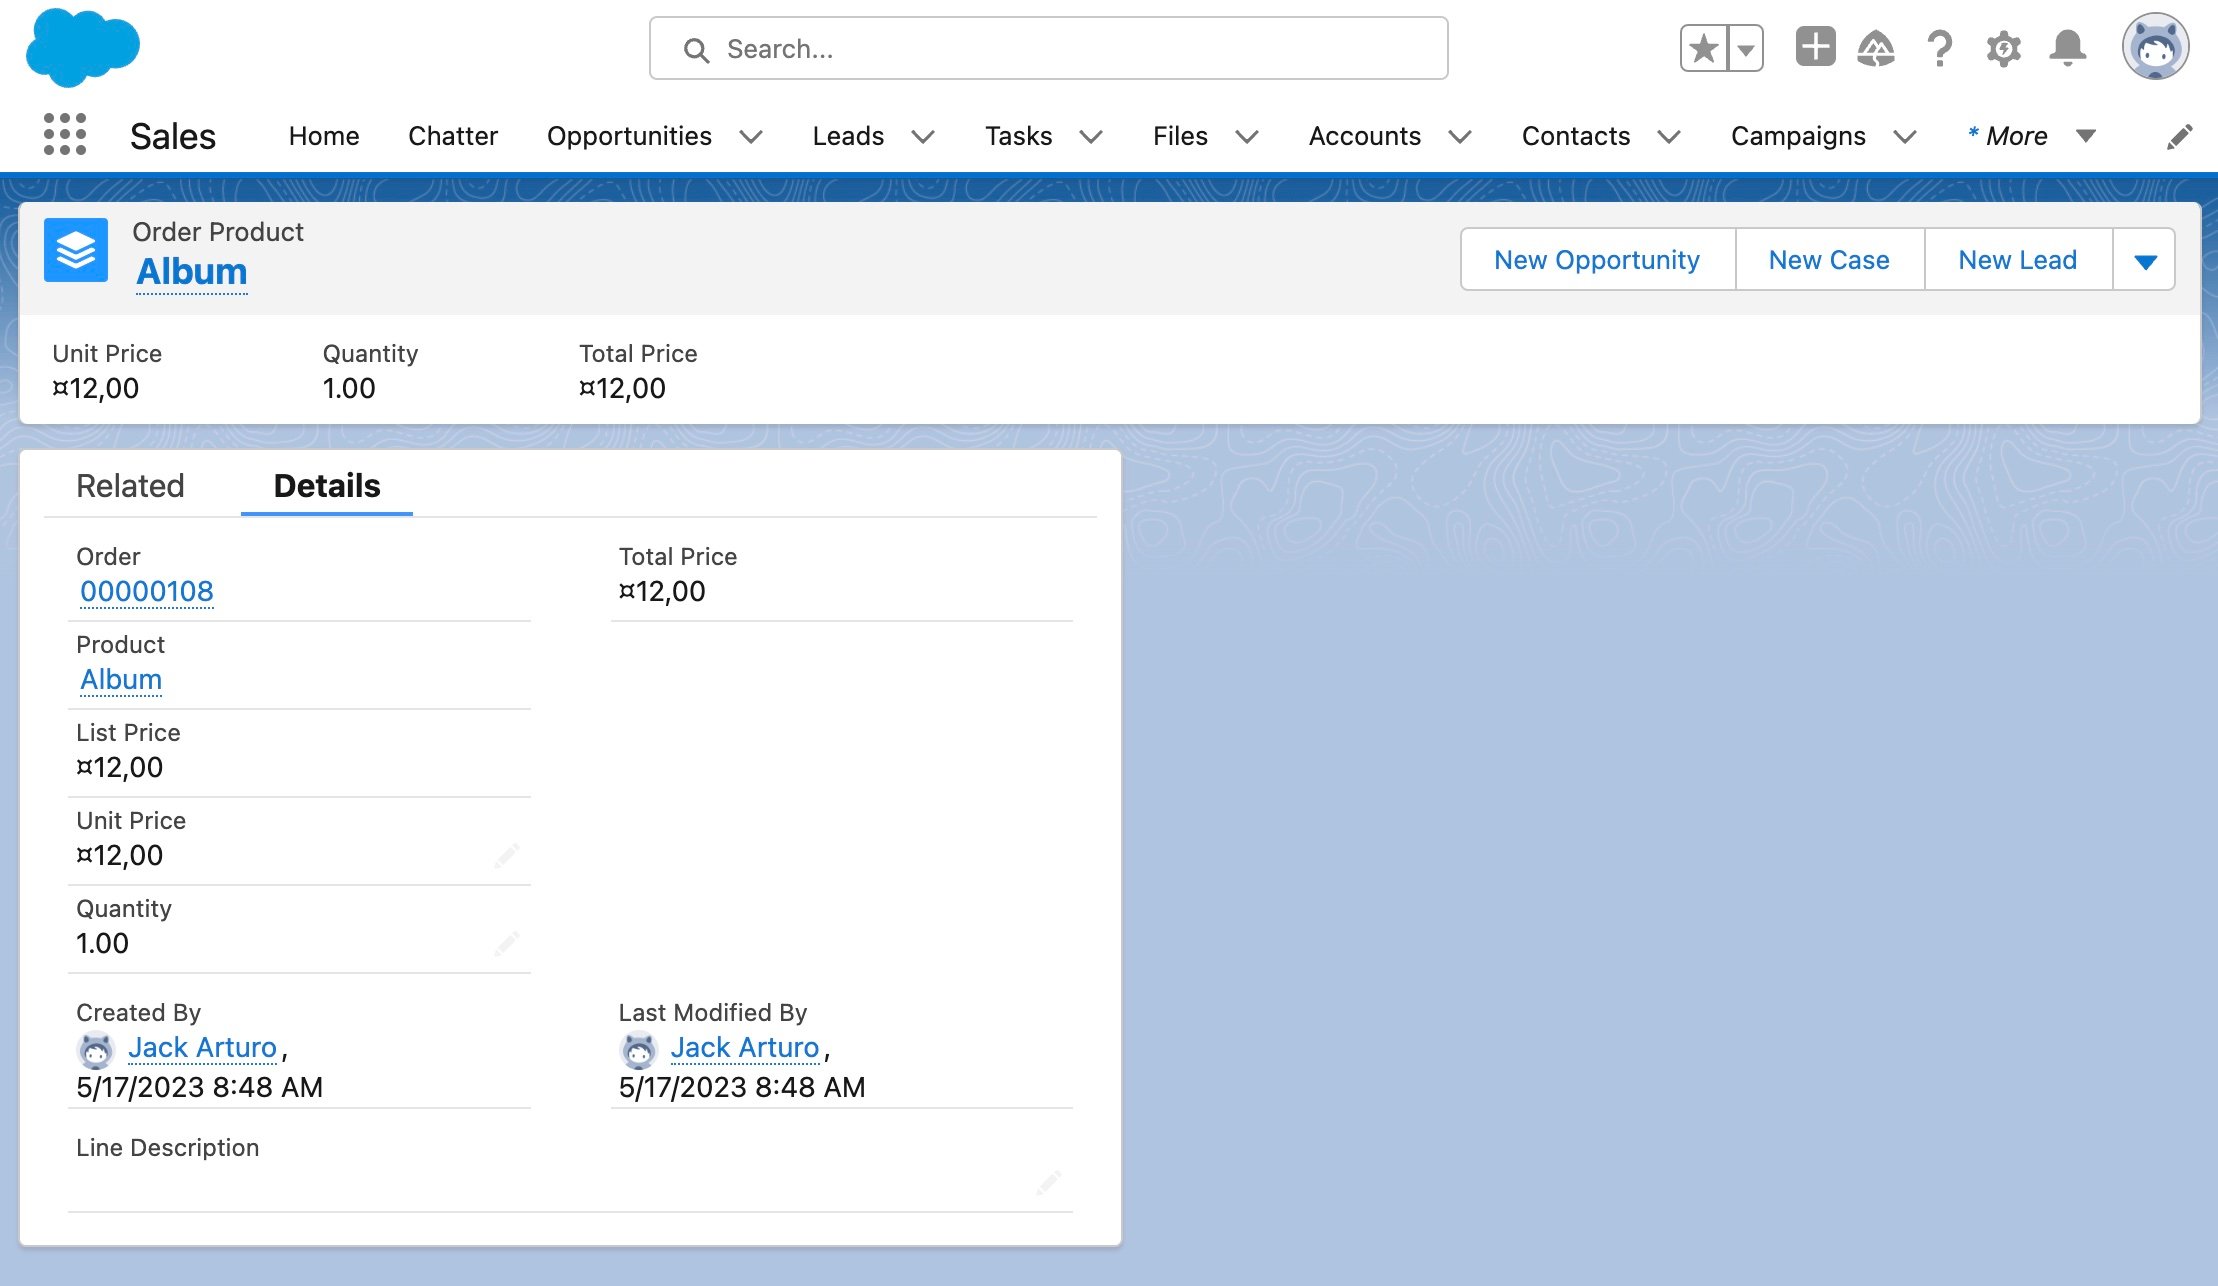
The products purchased will be added to the order as items, including their individual prices and quantities.
This order will be associated with the contact record who made the purchase.
#Associating products with Salesforce products
When editing any product, download, plan, or membership level in any of the supported Enhanced Ecommerce plugins, you will see a dropdown where you can select an associated Salesforce product.
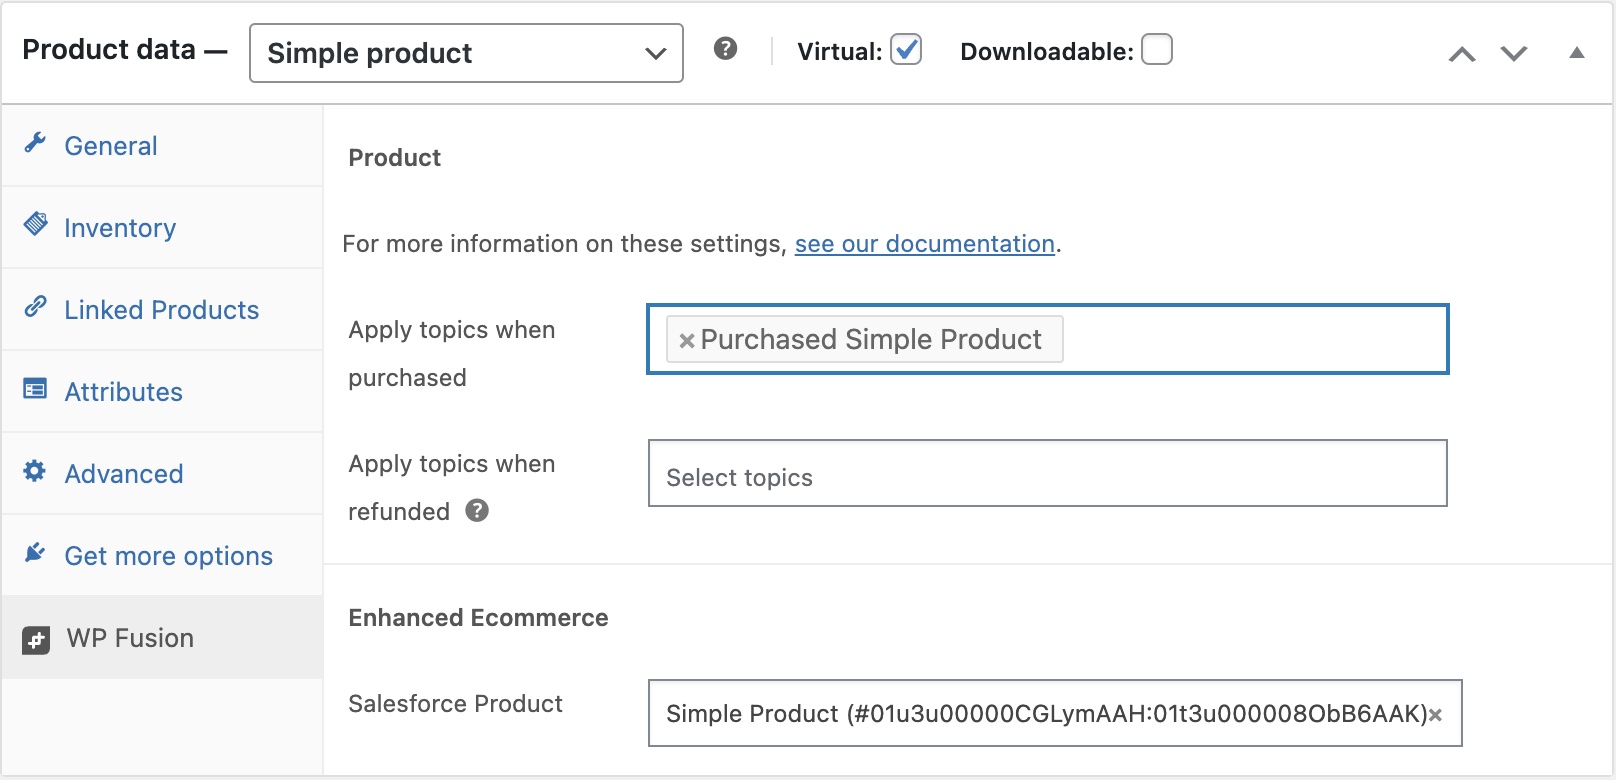
If the product you’re looking for doesn’t appear, click the Refresh Available Tags and Fields button in the WP Fusion settings to update the list.
If you don’t select a product, then at checkout WP Fusion will:
- Attempt to find a product in Salesforce by searching its name and SKU
- If no match is found, a new product will be created based on the product details in WordPress
#How it looks
#Known limitations
#Accounts
Salesforce requires an Account for all new orders. At the moment, WP Fusion associates all orders with a single account ID (set in the WP Fusion settings). We are exploring options for automatically creating Accounts based on customer data, and this will be included in a future release.
#Custom fields
The integration does not currently support updating custom fields on orders or products (though it is supported via filters, see below). We will make it a priority to find a solution for this in upcoming updates.
#Pricebooks
At the moment WP Fusion just interfaces with the standard pricebook. We will look into adding support for multiple pricebooks in a future update.
#Field security
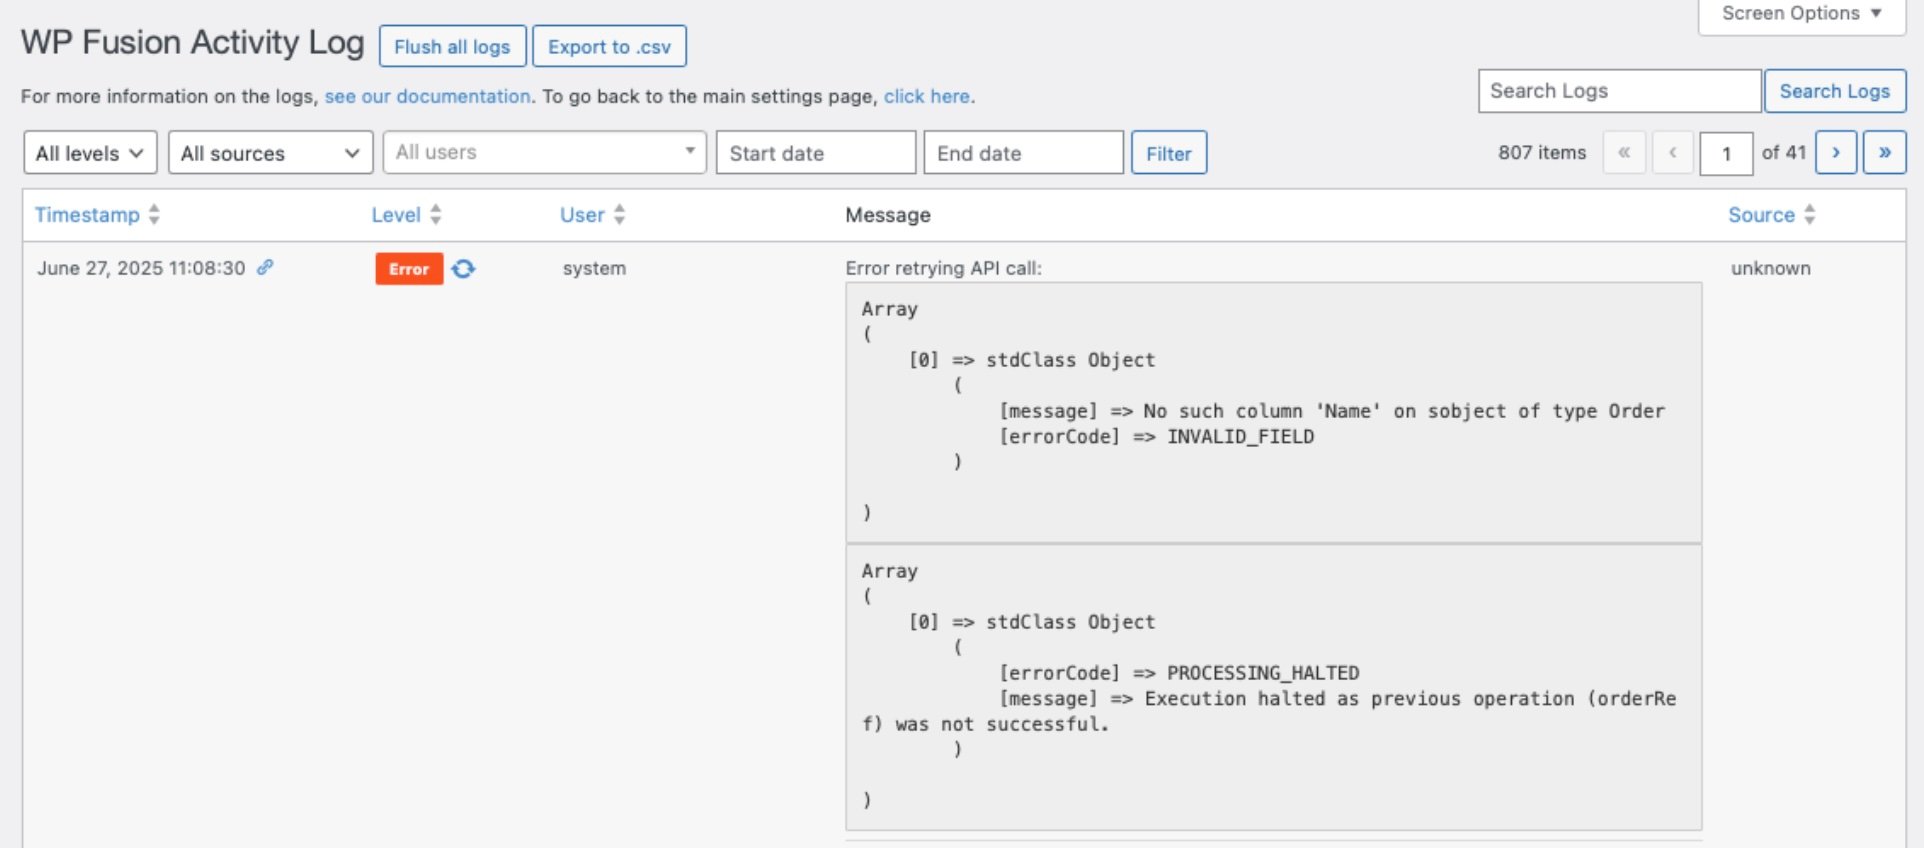
Salesforce uses a system of field-level security to control which profiles can view or edit specific fields on objects. Even if the Name field exists on the Order object, if the user profile associated with the connected Salesforce API user does not have access to it, Salesforce responds as if the field does not exist at all.
This results in WP Fusion logging an INVALID_FIELD error, and potentially halting further processing due to PROCESSING_HALTED.
To resolve this error:
-
Log in to Salesforce with an account that has administrative privileges.
-
Go to Setup → Object Manager → Order.
-
Under the Order object, click on Fields & Relationships.
-
Click on the Name field.
-
Click on Set Field-Level Security.
-
Ensure that the field is visible to the profile(s) used by your Salesforce integration (e.g., “API User”).
-
Save changes.
#Modifying the API data
WP Fusion supports using filters to modify the data sent to Salesforce with an ecommerce order.
The order data can be modified using the wpf_ecommerce_salesforce_add_deal filter.
In this example, we overwrite the order title to use a custom title, My custom order title, with the order number.
function my_custom_deal_properties( $deal, $order_id ) {

	/* $deal is structured like:

        $deal['compositeRequest'] = array(
            '0' => array(
                    'method' => 'POST',
                    'url' => '/services/data/v57.0/sobjects/Order',
                    'referenceId' => 'orderRef',
                    'body' => array(,
                        'AccountId' => '0013u00001AD9OzAAL',
                        'Name' => 'WooCommerce Order #1989',
                        'EffectiveDate' => '2023-06-06',
                        'Status' => 'Draft',
                        'Pricebook2Id' => '01s6A000001rZ0EQAU',
                        'ShipToContactId' => '0036A0000078r6QQAQ',
                        'BillToContactId' => '0036A0000078r6QQAQ',
                        'CustomerAuthorizedById' => '0036A0000078r6QQAQ',
                    ),
                ),
            '1' => array(
                    'method' => 'POST',
                    'url' => '/services/data/v57.0/sobjects/OrderItem',
                    'referenceId' => 'orderItemRef0',
                    'body' => array(,
                        'OrderId' => '@{orderRef.id}',
                        'PricebookEntryId' => '01u3u00000CGLymAAH',
                        'Quantity' => '1',
                        'UnitPrice' => '99.00',
                    ),
                )
            )
        ); */

	$deal['compositeRequest'][0]['body']['Name'] = 'My custom order title #' . $order_id;

	return $deal;

}

add_filter( 'wpf_ecommerce_salesforce_add_deal', 'my_custom_deal_properties', 10, 2 );