#Overview
WP Fusion’s Ecommerce Addon (available for Plus and Professional license holders) allows you to track customer purchases and lifetime revenue in ActiveCampaign for sales made in:
- WooCommerce
- Easy Digital Downloads
- Event Espresso
- GiveWP
- SureCart
- Gravity Forms
- LifterLMS
- MemberPress
- and Restrict Content Pro
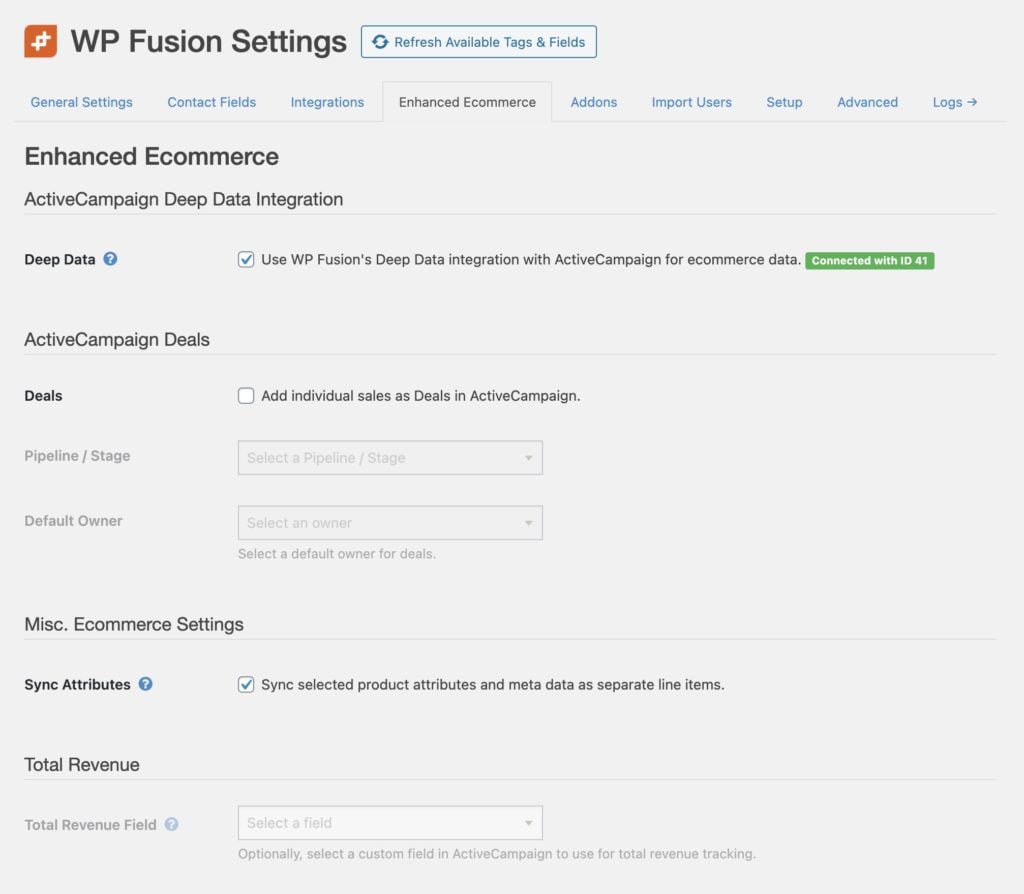
After installing the plugin, go to the WP Fusion settings page and click on the Enhanced Ecommerce tab to see the configurable options.
#Deep Data
WP Fusion includes support for ActiveCampaign’s Deep Data API. On the Enhanced Ecommerce tab in the WP Fusion settings, check the box next to Deep Data and save the settings to initialize the connection.
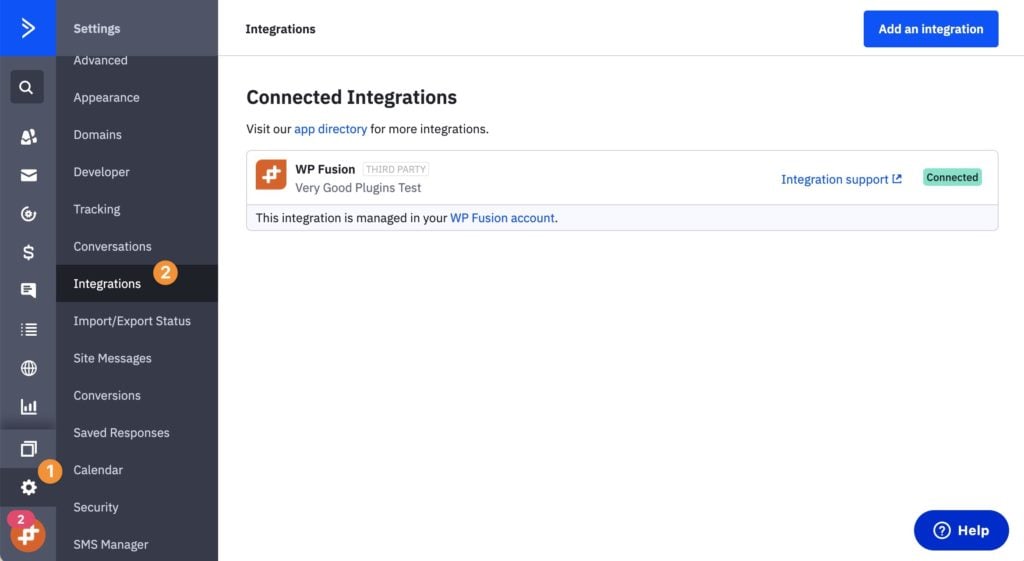
In your ActiveCampaign account, navigate to the settings and click on the Integrations tab. You should see WP Fusion listed.
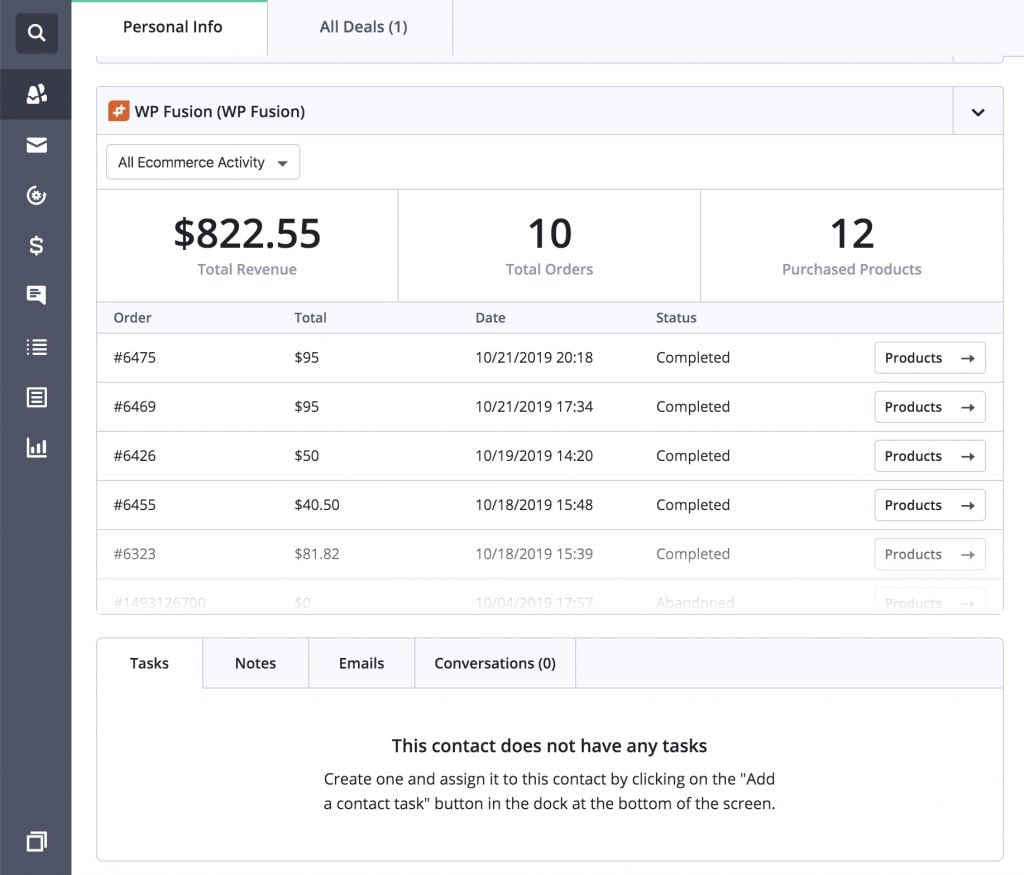
Any sales made in any of the supported plugins will be added to the corresponding contact record using the new deep data display. ActiveCampaign will automatically track lifetime revenue, total orders, and total products purchased for the contact.
#How it looks
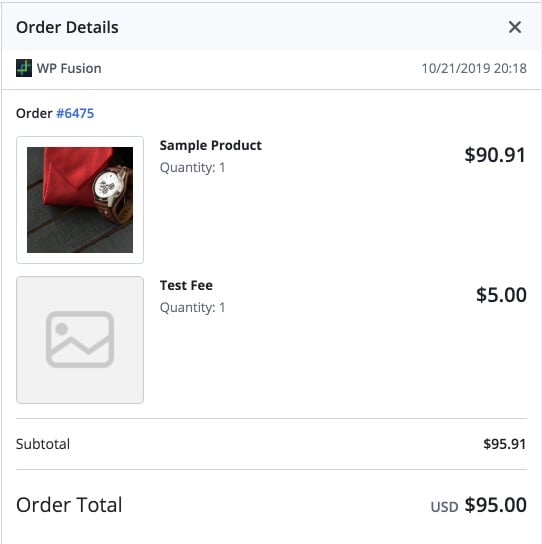
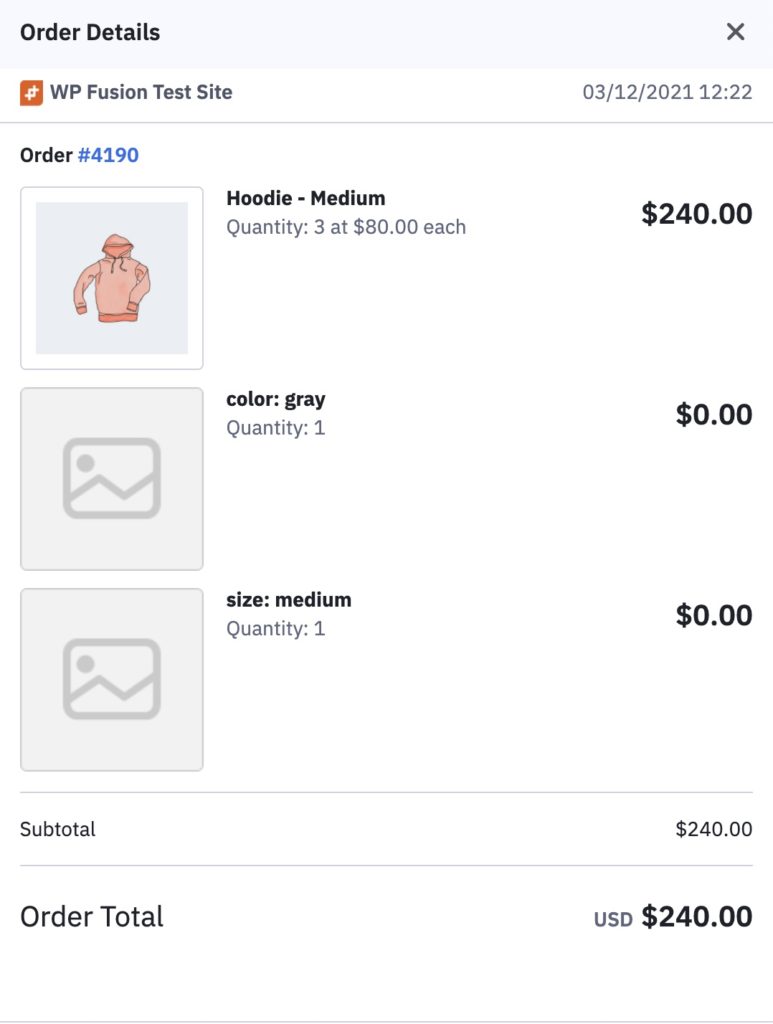
#Refunds
ActiveCampaign doesn’t have a specific order state for “refunded”. However, when Deep Data is enabled, if an order is refunded or cancelled in WooCommerce the order total in ActiveCampaign will be updated to $0.00 so that lifetime values are still calculated accurately.
#Coupons
ActiveCampaign’s email editor has a coupon block that can be used to insert a WooCommerce coupon into an email campaign.
At the moment the coupon block is not supported with WP Fusion. Since the coupon is not unique per contact (i.e. everyone who receives the campaign receives the same coupon), we’ve found it’s just as easy to create the coupon in WooCommerce and copy the code into the campaign email.
However, if you would prefer to have access to the coupon block, you can disable the Enhanced Ecommerce addon for WP Fusion, and instead use ActiveCampaign’s WooCommerce plugin.
#Revenue Tracking
To set up revenue tracking, first create a new contact custom field in ActiveCampaign. This field will be used to track the total amount spent by a customer in your store. If the field doesn’t appear in the Total Revenue Field dropdown, begin typing the name and click “Resynchronize” at the prompt to load the new custom field from ActiveCampaign.
Whenever a customer checks out on your store, this field will be incremented with the total value of their purchase.
#Deals Tracking
For more advanced ecommerce automation, ActiveCampaign’s Deals system is one of the best systems available. Using the Enhanced Ecommerce Addon, WP Fusion can create deals in ActiveCampaign with the order value and other details, and associate those deals with the originating customer.
#How to Enable Deals
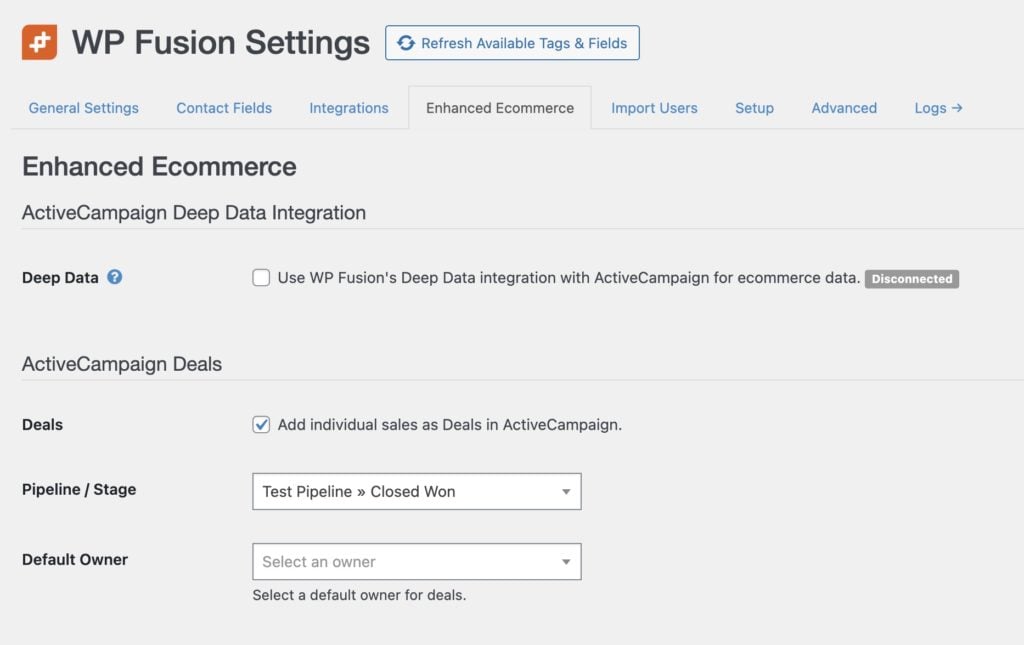
To enable deals tracking, first check the box next to Deals in the Ecommerce Tracking settings. Next select a pipeline and stage where new deals will be inserted (deals can later be moved using automations).
If you’ve just created a pipeline or stage and it doesn’t appear in the list, go to the Setup tab and the Refresh Available Tags & Fields button to reset the list of available pipelines and stages.
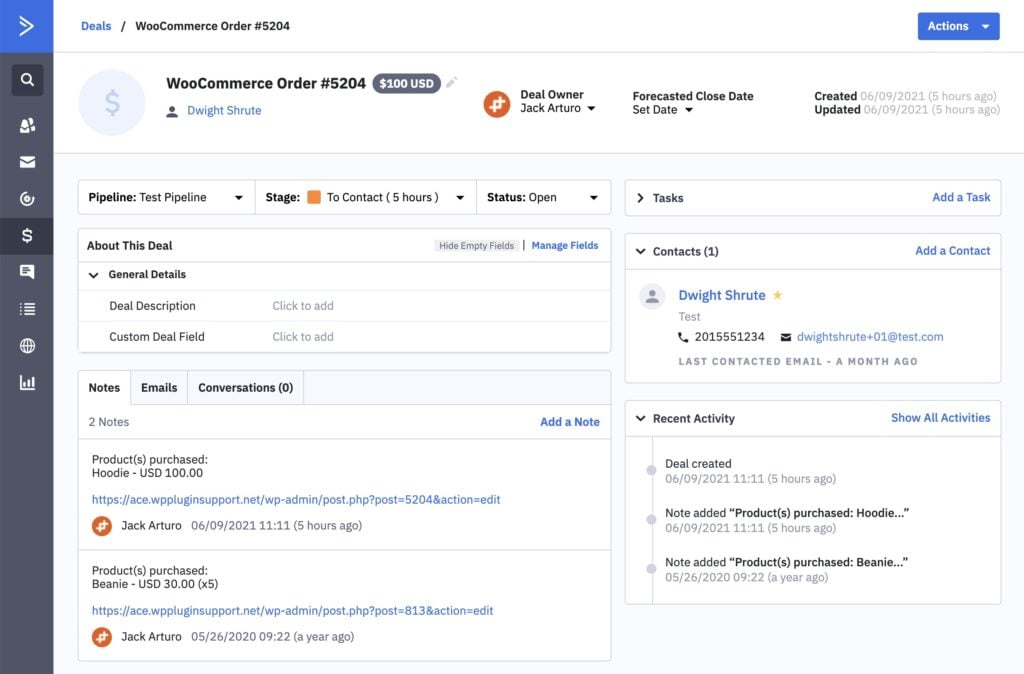
Once enabled, deals will be added to ActiveCampaign like in the screenshot below.
Each deal will have a title indicating the plugin that created the deal and order number. The deal value will be set to the total value of the purchase, and the deal will be assigned to the contact record who made the order.
A note will be attached to the deal containing the products purchased and a link to view the associated order in your WordPress admin.
Using ActiveCampaign’s Automations you can then move deals between stages, create followup tasks, set deal statuses, and much more.
#Custom deal fields
WP Fusion does not have the ability to directly map custom order fields with custom deal fields (for example options collected by WooCommerce Product Options).
However, you can use an automation to copy the values from the contact record to custom deal fields.
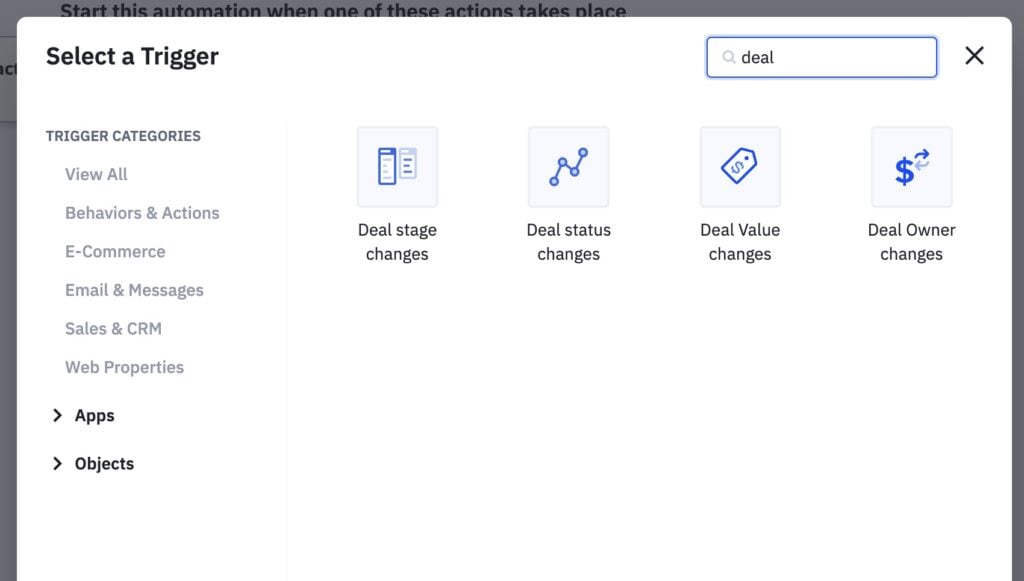
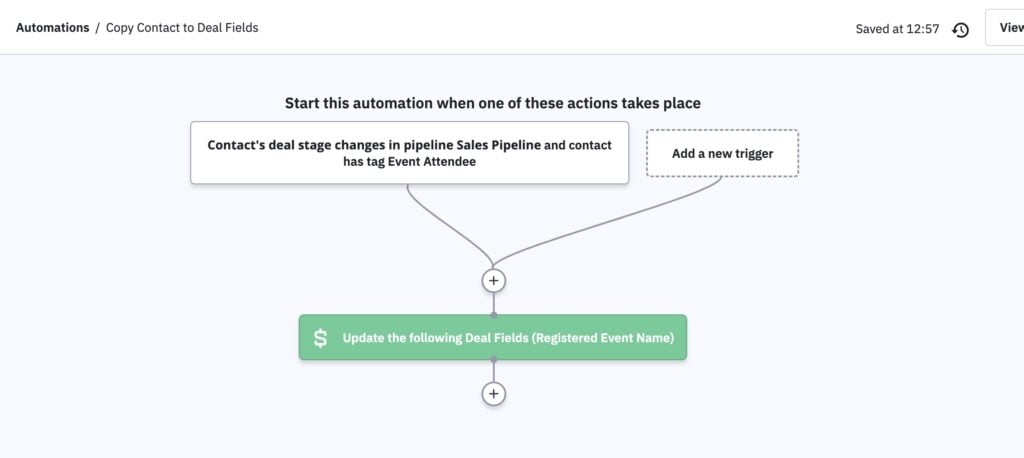
Since WP Fusion creates the contact at checkout before the deal, we will use Contact’s deal stage changes as the start trigger for the automation, to ensure the contact is fully saved.
Next, set any entry criteria, for example you can limit the trigger to only a specific stage, or to only contact’s with a specific tag.
Connect the trigger to an Update a custom deal field action.
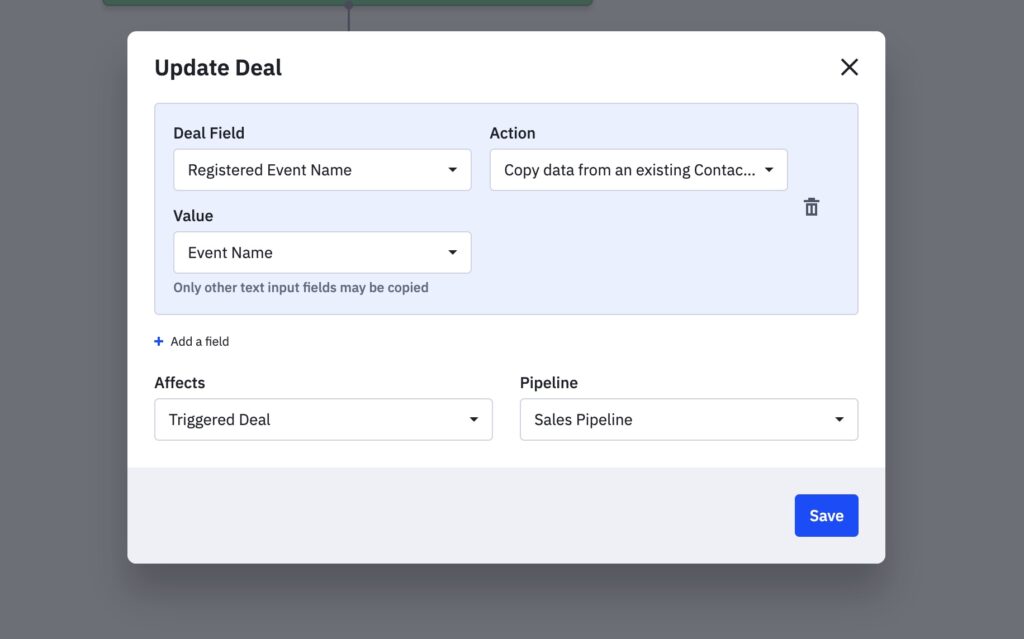
And in the settings, select your custom deal field, and choose Copy data from an existing Contact as the action. For the Value, select the custom field on the contact to copy the value from.
You can add multiple fields by clicking the Add a field link.
Finally, for Affects, select Triggered Deal, to ensure that only the deal that was just created is updated.
In the example above, we have an automation that is triggered whenever a deal is created in the Order Placed deal stage, by contacts who have the tag Event Attendee.
The action copies the value of Event Name from the contact to the Registered Event Name on the deal. This lets us see the name of the ticket the contact registered for (for example with The Events Calendar / Event Tickets).
#Video – Enhanced Ecommerce – ActiveCampaign
#Developers
The Enhanced Ecommerce addon has three filters specific to ActiveCampaign, wpf_ecommerce_activecampaign_add_deal, wpf_ecommerce_activecampaign_add_deal_note and wpf_ecommerce_activecampaign_add_deep_data depending on whether you’re syncing Deals or Deep Data.
#Deal Filter
For example to modify the deal title:
function my_custom_deal_properties( $deal, $order_id ) {

	/* $deal is structured like (see https://developers.activecampaign.com/reference#create-a-deal-new)

	$deal = array(
		'title'     => 'WooCommerce Order #XXX',
		'value'     => 100,
		'currency'  => 'usd',
		'pipeline'  => '1',
		'stage'     => '1',
		'contactid' => '123',
		'owner'     => '1',
	); */

	$deal['title'] = 'My Order #' . $order_id; // Change the title

	return $deal;

}

add_filter( 'wpf_ecommerce_activecampaign_add_deal', 'my_custom_deal_properties', 10, 2 );#Deal Note Filter
For example to modify the note description:
function my_custom_note( $note, $order_id ) {

	$note = 'My custom note for order #' . $order_id;

	return $note;

}

add_filter( 'wpf_ecommerce_activecampaign_add_deal_note', 'my_custom_note', 10, 2 );#Deep Data Filter
For example to record the use of a WooCommerce coupon:
function my_custom_deep_data_properties( $data, $order_id ) {

	/* $data is structured like below (for more info https://developers.activecampaign.com/reference#create-order)

	$data = array(
		'ecomOrder' => array(
			'externalid'    => '123',
			'source'        => '1',
			'email'         => '[email protected]',
			'orderNumber'   => '123',
			'orderProducts' => array(
				'externalid'  => 'PROD12345',
				'name'        => 'Pogo Stick',
				'price'       => 4900,
				'quantity'    => 1,
				'category'    => 'Toys',
				'sku'         => 'POGO-12',
				'description' => 'lorem ipsum...',
				'imageUrl'    => 'https://example.com/product.jpg',
				'productUrl'  => 'https://store.example.com/product12345'
			),
			'orderUrl'      => 'https://store.example.com/wp-admin/edit.php?post_id=123',
			'orderDate'     => '2016-09-13T17:41:39-04:00',
			'totalPrice'    => 4900,
			'currency'      => 'USD',
			'connectionid'  => '1',
			'customerid'    => '123',
		),
	); */

	$order = wc_get_order( $order_id );

	$coupons = $order->get_coupon_codes(); // See if a coupon was used

	if ( ! empty( $coupons ) ) {

		// Add it to the deep data

		$data['orderDiscounts'] = array(
			array(
				'name'           => $coupons[0],
				'type'           => 'order',
				'discountAmount' => $order->get_total_discount(),
			),
		);
	}

	return $data;

}

add_filter( 'wpf_ecommerce_activecampaign_add_deep_data', 'my_custom_deep_data_properties', 10, 2 );