#Overview
WP Fusion’s Enhanced Ecommerce Addon (available for Plus and Professional license holders) supports sending ecommerce transaction data as Deals to your HubSpot account for sales made in:
- WooCommerce
- Easy Digital Downloads
- Event Espresso
- GiveWP
- SureCart
- Gravity Forms
- LifterLMS
- MemberPress
- and Restrict Content Pro
#Getting started
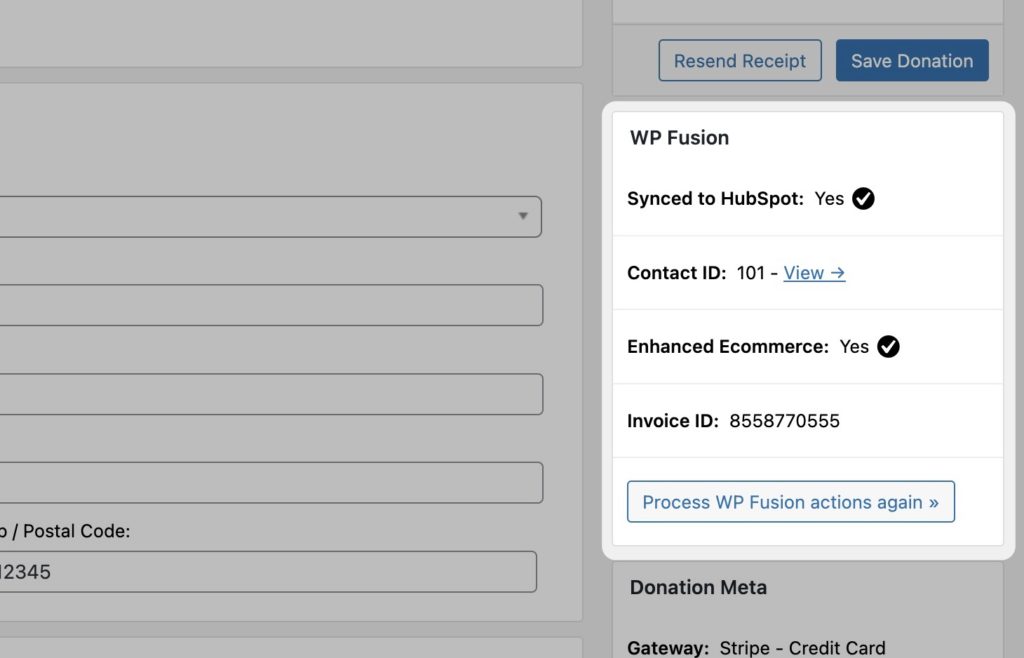
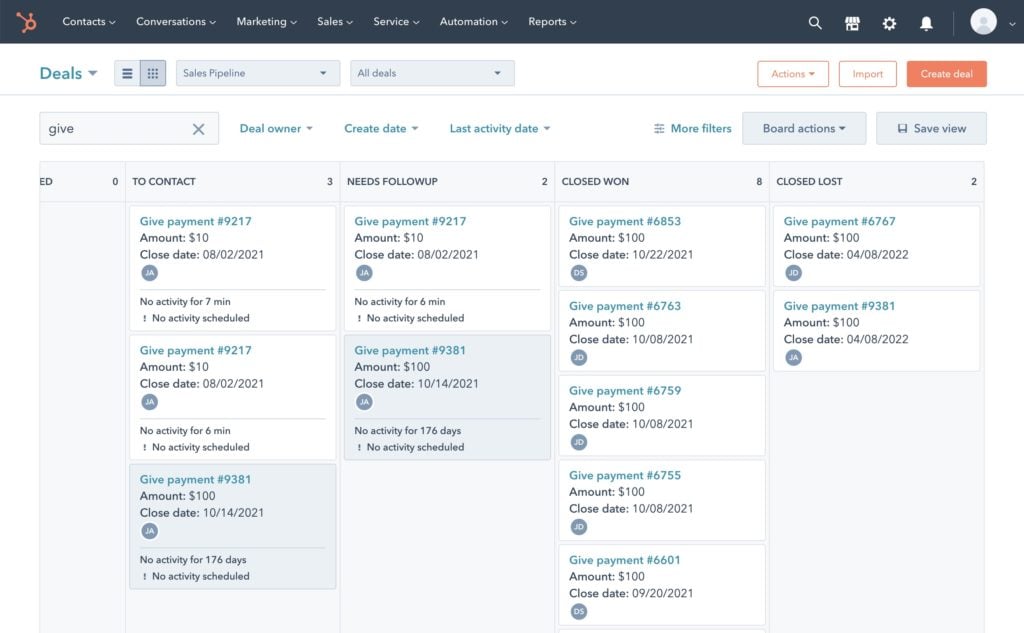
Once you install the addon, Deals will automatically be added to Hubspot when someone makes a purchase on your site.
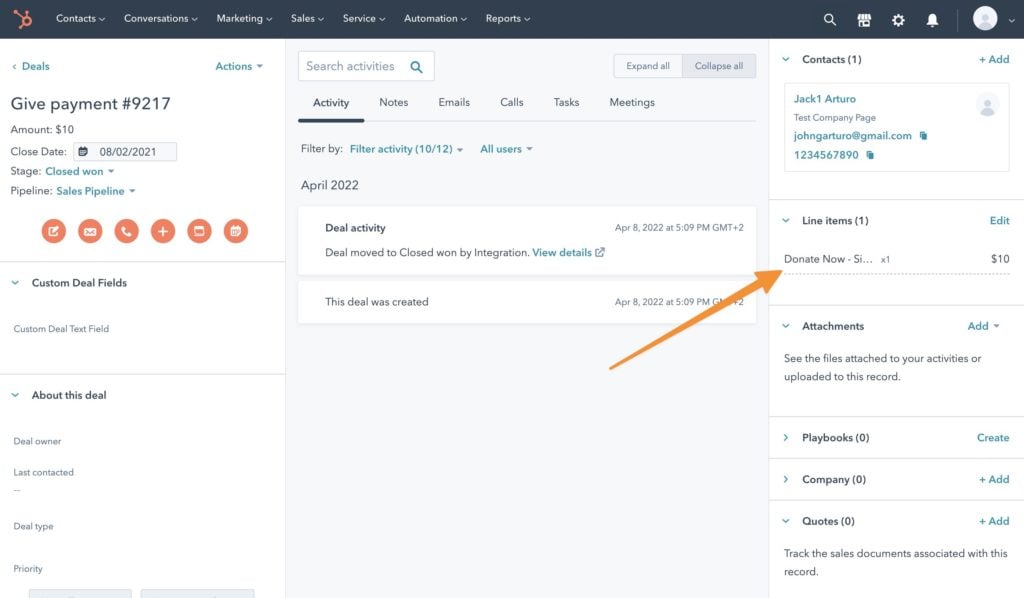
The deal title will be name of the order in WooCommerce (or other supported ecommerce plugin), and the deal value will be set to the total amount of the sale.
The default stage for new deals is Sales Pipeline » Closed Won, but you can change this via the Enhanced Ecommerce tab in the WP Fusion settings.
If you’ve just added a new pipeline or stage, click Resynchronize Available Lists and Fields on the Setup tab to load the latest values.
#Products
Optionally you can have WP Fusion sync products from WooCommerce (or any other supported ecommerce plugin) to HubSpot, and add those products as line items on deals.
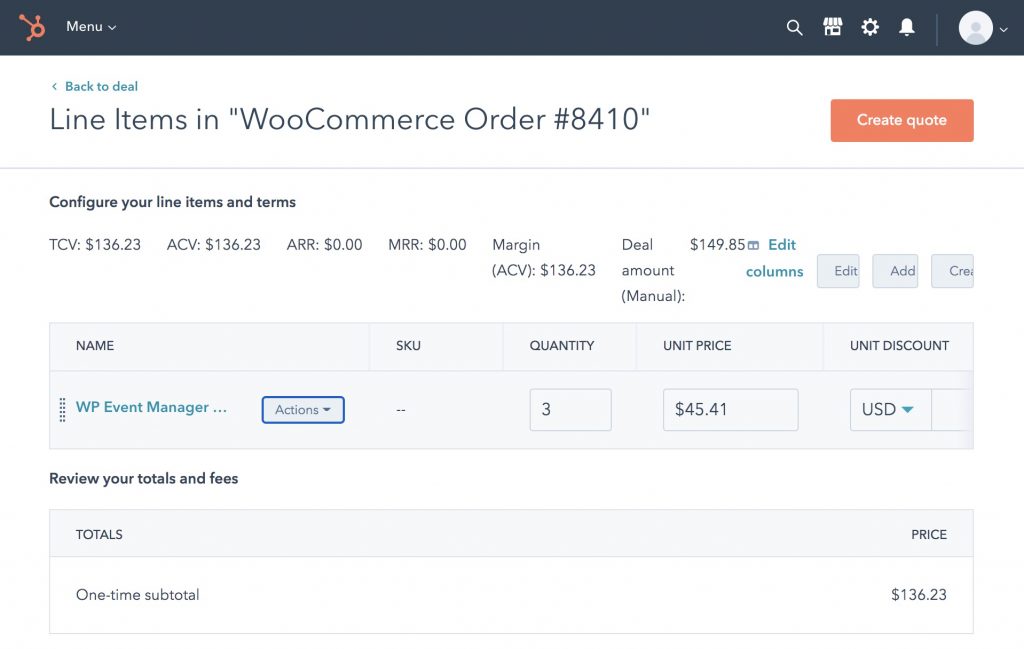
When you’ve enabled Sync Products, products will automatically be created in HubSpot as people check out in WordPress.
You can also manually associate WooCommerce and other products with HubSpot product IDs. For more info see the Enhanced Ecommerce Overview documentation.
#Line items
With Sync Products enabled, line items will also be synced to the HubSpot deal (but not created as HubSpot products).
HubSpot supports line items for shipping, taxes, and fees. HubSpot does not support line items for discounts.
#Deals vs. Orders
By default, WP Fusion creates Deals in HubSpot for each purchase or transaction in WordPress.
Orders are a new feature, which work very similarly to deals at the moment, but we hope will eventually be connected to the new HubSpot Commerce portal for enhanced reporting and inventory management.
Orders are optimized for storing ecommerce data collected by third-party platforms, like Shopify or WordPress (via WP Fusion).
#Deals
Pros:
- Well tested with WP Fusion, in use for many years.
Cons:
- Some terminology like “Deal” and “Close date” don’t match the terminology in WordPress.
- Deals cannot be associated with Carts.
- New ecommerce reporting features in HubSpot will be created for Orders and Carts, not deals.
- No native support for tax or shipping.
- Does not support discounts at all.
#Orders
Pros:
- Will eventually have better reporting features than Deals.
- Better optimized for ecommerce orders placed via outside systems.
- Can be associated with Carts via the Abandoned Cart Addon (work in progress).
- Native support for tax, shipping, and discounts.
Cons:
- Relatively untested with WP Fusion, may still be bugs.
- At the moment functionally very similar to Deals, most reporting enhancements have yet to be released.
Which should you choose? We recommend existing stores to stick with Deals, however if you’re setting up a new site and want to (eventually) benefit from the enhanced reporting capabilities of Orders, then give Orders a try.

You can also switch the record type from the WP Fusion settings and export your orders in bulk to create new Orders in HubSpot for all your historical orders in WordPress, when/if you eventually decide to switch.
#How it works
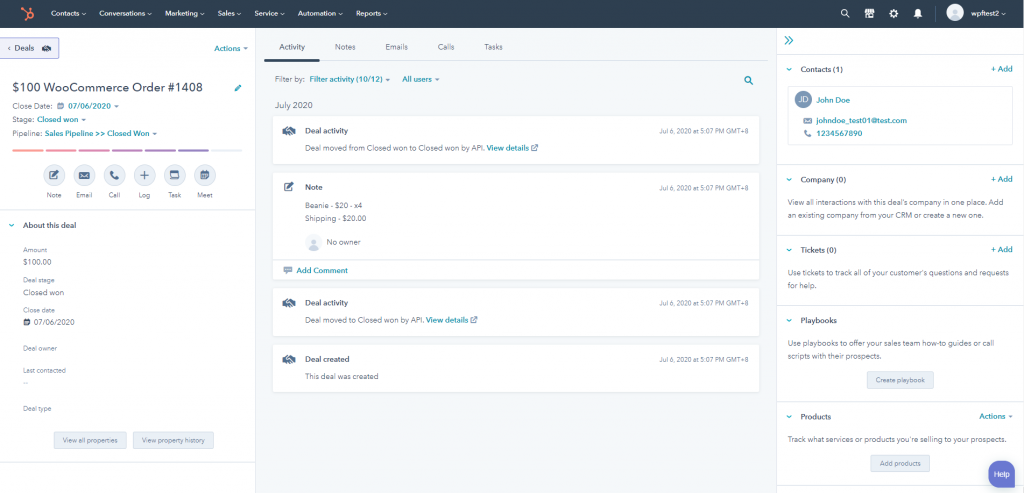
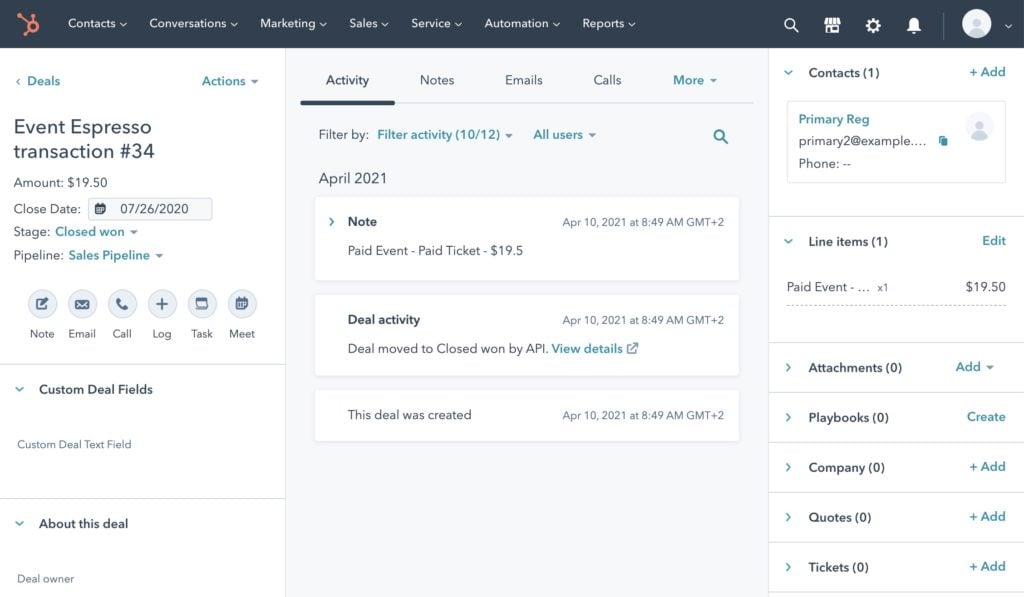
When a customer checks out on your site, WP Fusion will create a new deal in Hubspot with the order label, date, and invoice total. This sale data will be associated with the contact record who made the purchase.
If you’ve enabled Sync Products, then each of the products from the order will be synced to HubSpot with their name, price, and SKU. Each product will then be associated with the deal.
#Multi-currency
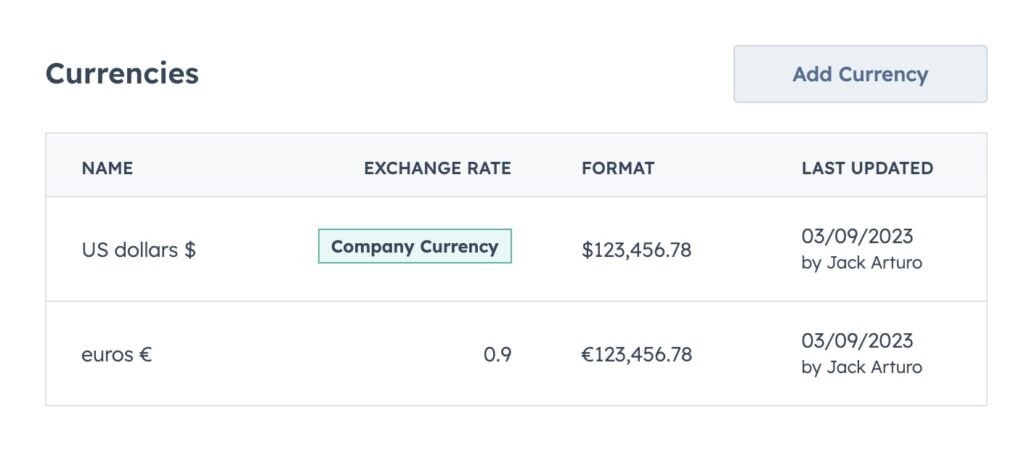
If you’re selling in multiple currencies, for example using WooCommerce Multi-Currency, WP Fusion can sync order totals to HubSpot in the currency used at checkout.
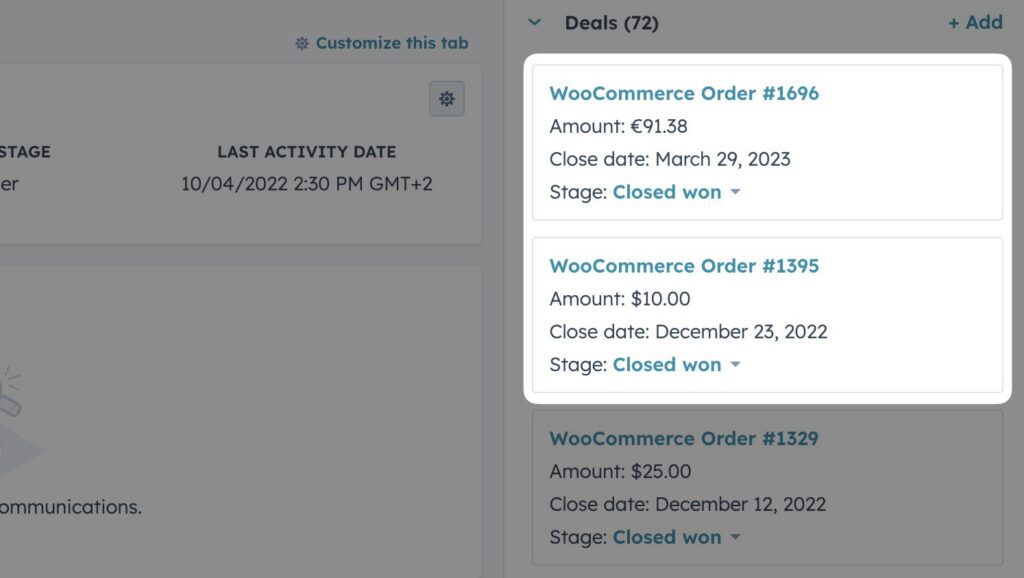
To set this up you will first need to add any desired currencies to HubSpot by going to Settings » Account Defaults » Currencies.
#How it looks
#WooCommerce
#Event Espresso
#GiveWP
#SureCart

#Video – Enhanced Ecommerce – Hubspot
#WooCommerce order statuses
If you’re using WooCommerce you can also associate WooCommerce order statuses with deal stages in HubSpot. This setting appears under the Enhanced Ecommerce tab in the WP Fusion settings.
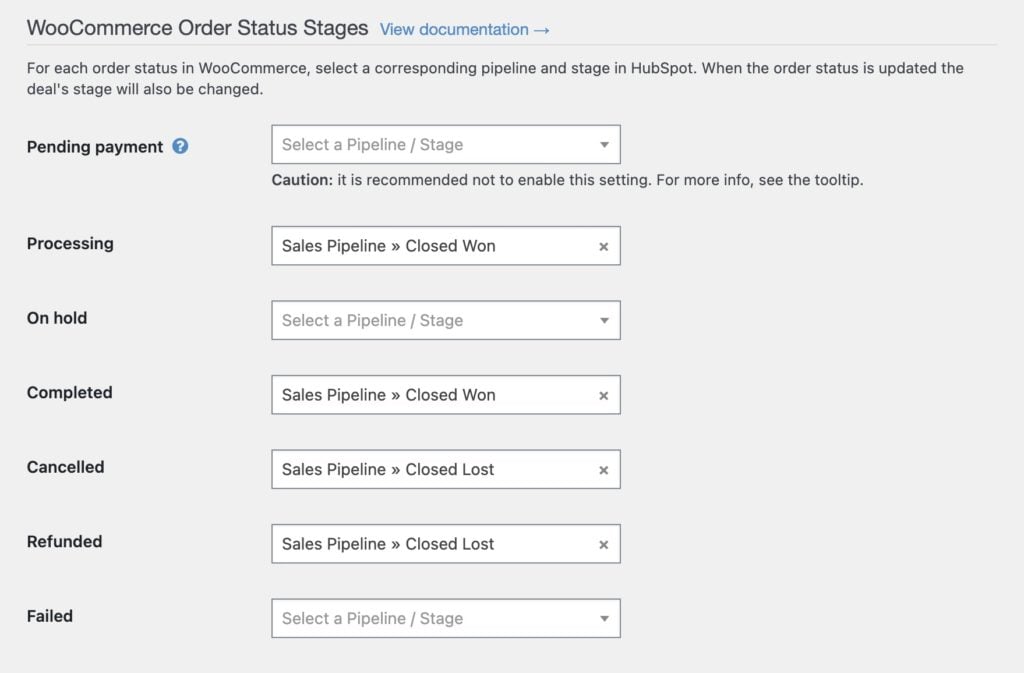
When the order status is updated in WooCommerce, the deal stage will be updated in HubSpot.
Warning: It is recommended not to sync Pending payment orders with HubSpot. When this is enabled, WP Fusion needs to create a contact record and a deal in HubSpot as soon as the pending order is created in WooCommerce, and then update it less than a second later when the payment is processed.
This slows down your checkout with many duplicate API calls and in most cases isn’t necessary. A more performant method of tracking incomplete payments is to use Abandoned Cart Tracking.
Note: By default, running a WooCommerce Orders (Ecommerce addon) export operation from the Advanced settings tab will only export “paid” orders (Processing or Completed). However, if you have enabled additional order statuses for sync to a HubSpot pipeline, then running the export will process those additional statuses as well.
This can be used to export refunded or cancelled orders to HubSpot in addition to the paid orders.
#Modifying the API data
WP Fusion supports using filters to modify the data sent to HubSpot with an ecommerce order.
#Ignore free orders
This example bypasses creating a deal for any free orders.
function ignore_free_orders( $deal, $order_id ) {

	if ( empty( $deal['properties']['amount'] ) ) {
		return false;
	}

	return $deal;

}

add_filter( 'wpf_ecommerce_hubspot_add_deal', 'ignore_free_orders', 10, 2 );#Exclude taxes
This example subtracts the amount of tax paid (if applicable) from the deal total.
function orders_tax_exclusive( $deal, $order_id ) {

	$order = wc_get_order( $order_id );

	$deal['properties']['amount'] -= $order->get_total_tax();

	return $deal;

}

add_filter( 'wpf_ecommerce_hubspot_add_deal', 'orders_tax_exclusive', 10, 2 );#Custom deal fields
At the moment WP Fusion doesn’t have a visual interface for associating WordPress data with custom deal fields in HubSpot.
However you can still make this work using the wpf_ecommerce_hubspot_add_deal filter.
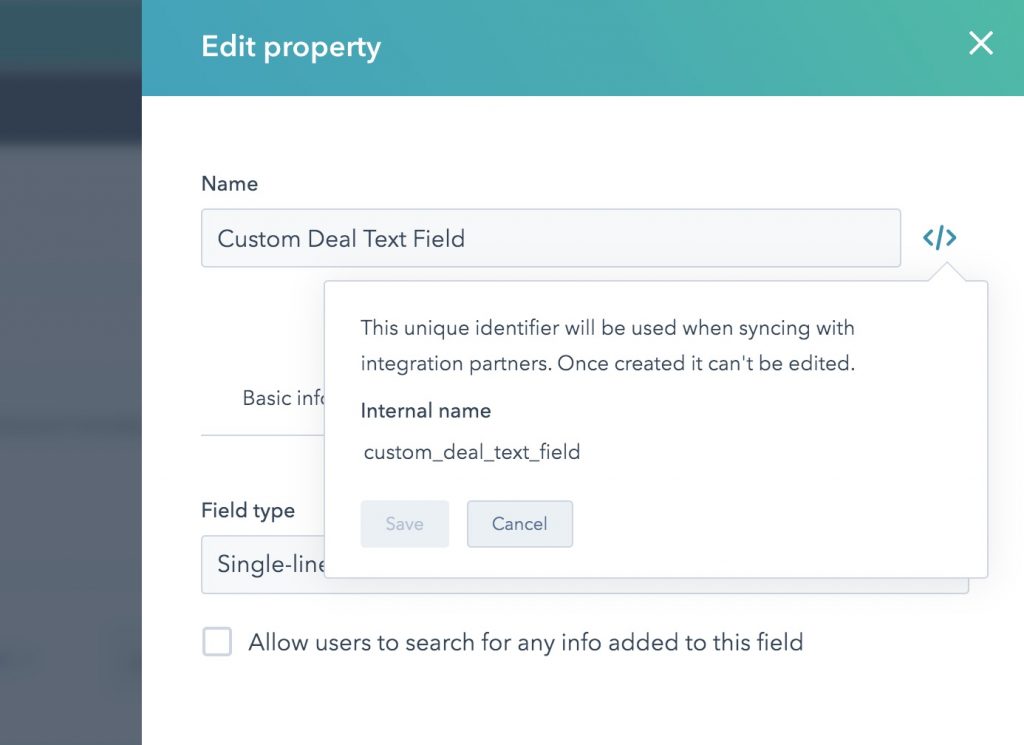
First go into the Properties editor in HubSpot and find the internal name for your property.
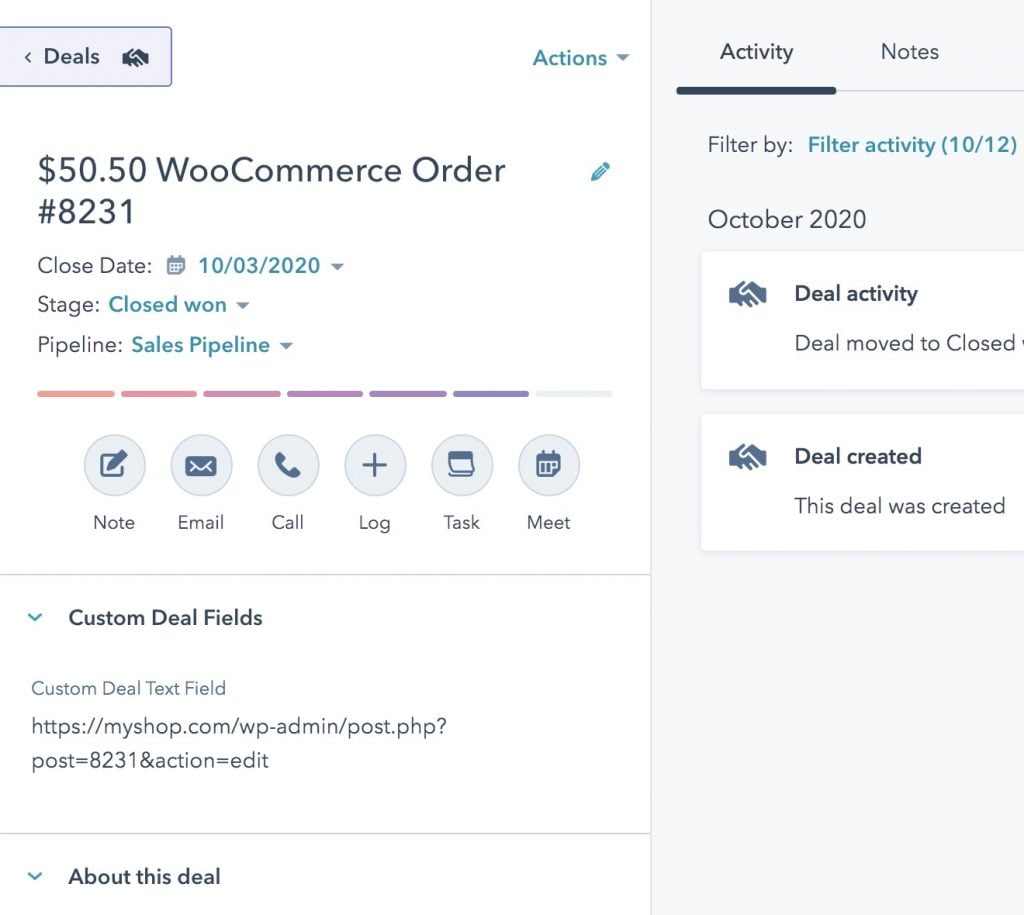
In this case we’re going to update the Custom Deal Text Field field, which has an internal name of custom_deal_text_field, and update it with the edit link to a WooCommerce order.
function my_custom_deal_properties( $deal, $order_id ) {

	/* $deal is structured like:

	$deal = array(
		'associations' => array(
			array(
				'to'    => array(
					'id' => 123, // contact ID.
				),
				'types' => array(
					array(
						'associationCategory' => 'HUBSPOT_DEFINED',
						'associationTypeId'   => 3,
					),
				),
			),
		),
		'properties'   => array(
			'deal_currency_code' => 'USD', // currency.
			'dealname'           => 'WooCommerce Order #123', // title.
			'pipeline'           => 'default', // pipeline.
			'dealstage'          => 'closedwon', // stage.
			'closedate'          => 1614617984000, // closed date - microseconds since the epoch
			'amount'             => 123.00, // total deal amount.
		),
	); */

	$deal['properties']['custom_deal_text_field'] = admin_url( 'post.php?post=' . $order_id . '&action=edit' ); // set the custom property.

	return $deal;

}

add_filter( 'wpf_ecommerce_hubspot_add_deal', 'my_custom_deal_properties', 10, 2 );
And here in HubSpot you can see that when WP Fusion creates the deal, the custom properties are automatically populated:
#Add the MemberPress transaction expiration date to a custom deal property
function wpf_add_expiration_to_deal( $deal, $transaction_id ) {

    // Get the MemberPress transaction.
    $txn = new MeprTransaction( $transaction_id );

    // Get expiration based on the membership settings
    if( $txn->expires_at && strtotime( $txn->expires_at ) > 0 ) {
       $deal['properties']['membership_expiration_date'] = $txn->expires_at;
    }

    return $deal;
}

add_filter( 'wpf_ecommerce_hubspot_add_deal', 'wpf_add_expiration_to_deal', 10, 2 );#Customize note content
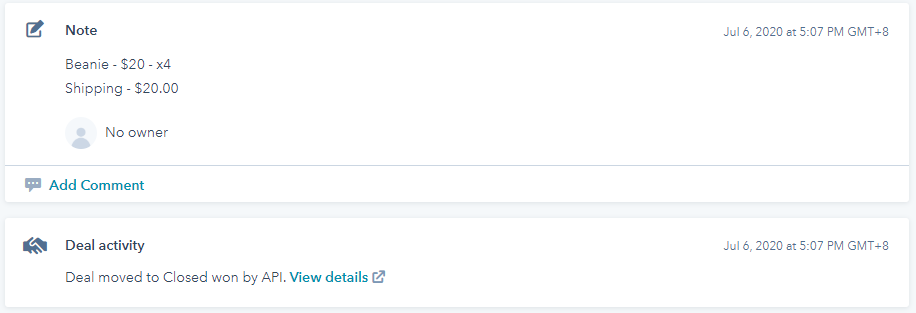
If you enable the Add Note options in the WP Fusion Enhanced Ecommerce settings, WP Fusion will attach a note (also known as an “engagement”) to your newly created deals containing the products purchased and line item totals.
It’s possible to override the contents of this note using the wpf_ecommerce_hubspot_add_engagement filter.
/**
 * Add address to HubSpot note
 */
function add_address_to_note( $engagement_data, $order_id ) {

	/* $engagement_data is structured like:

	$engagement_data = array(
		'engagement'   => array(
			'type' => 'NOTE',
		),
		'associations' => array(
			'dealIds' => array( $deal_id ),
		),
		'metadata'     => array(
			'body' => $body,
		),
	); */

	$order      = wc_get_order( $order_id );
	$order_data = $order->get_data();

	$new_text = '<br />Address:';
	$new_text .= '<ul>';
	$new_text .= '<li>Address 1: ' . $order_data['billing']['address_1'] . '</li>';
	$new_text .= '<li>Address 2: ' . $order_data['billing']['address_2'] . '</li>';
	$new_text .= '<li>City: ' . $order_data['billing']['city'] . '</li>';
	$new_text .= '<li>State: ' . $order_data['billing']['state'] . '</li>';
	$new_text .= '<li>Postcode: ' . $order_data['billing']['postcode'] . '</li>';
	$new_text .= '</ul>';

	$engagement_data['metadata']['body'] .= $new_text;

	return $engagement_data;
}

add_filter( 'wpf_ecommerce_hubspot_add_engagement', 'add_address_to_note', 10, 2 );
This example appends the customer’s billing address to the contents of the note.
For more information on engagements, see the HubSpot API documentation.

