#Overview
WP Fusion automatically syncs your BuddyBoss members with leading CRMs and marketing automation tools, and allows you to apply tags in your CRM based on member activity, as well as personalize the member experience using tags and automations in your CRM.
- This documentation covers BuddyBoss-specific functionality. For more information on syncing members with CRM contact records and applying tags based on groups and group types, see the BuddyPress documentation.
- For information on WP Fusion’s integration with BuddyBoss Forums, see our documentation on bbPress.
#Profile types auto-assignment

WP Fusion supports BuddyBoss profile types. You can specify a CRM tag to be “linked” with the profile type.
When the user is given the profile type, the tag will be applied. When the user is removed from the profile type, the tag will be removed.
Likewise, applying this tag to a user in your CRM or from another integration will automatically assign the profile type to the user, and removing the tag will un-assign it.
#Member Access Controls
The Member Access Controls feature in the BuddyBoss Platform Pro plugin allows you to control which membership components a user can interact with (such as forums, groups, private messaging, etc.) based on their membership level.
WP Fusion integrates with the Member Access Controls system to allow you to use tags (or lists / groups) in your connected CRM to personalize the member experience.
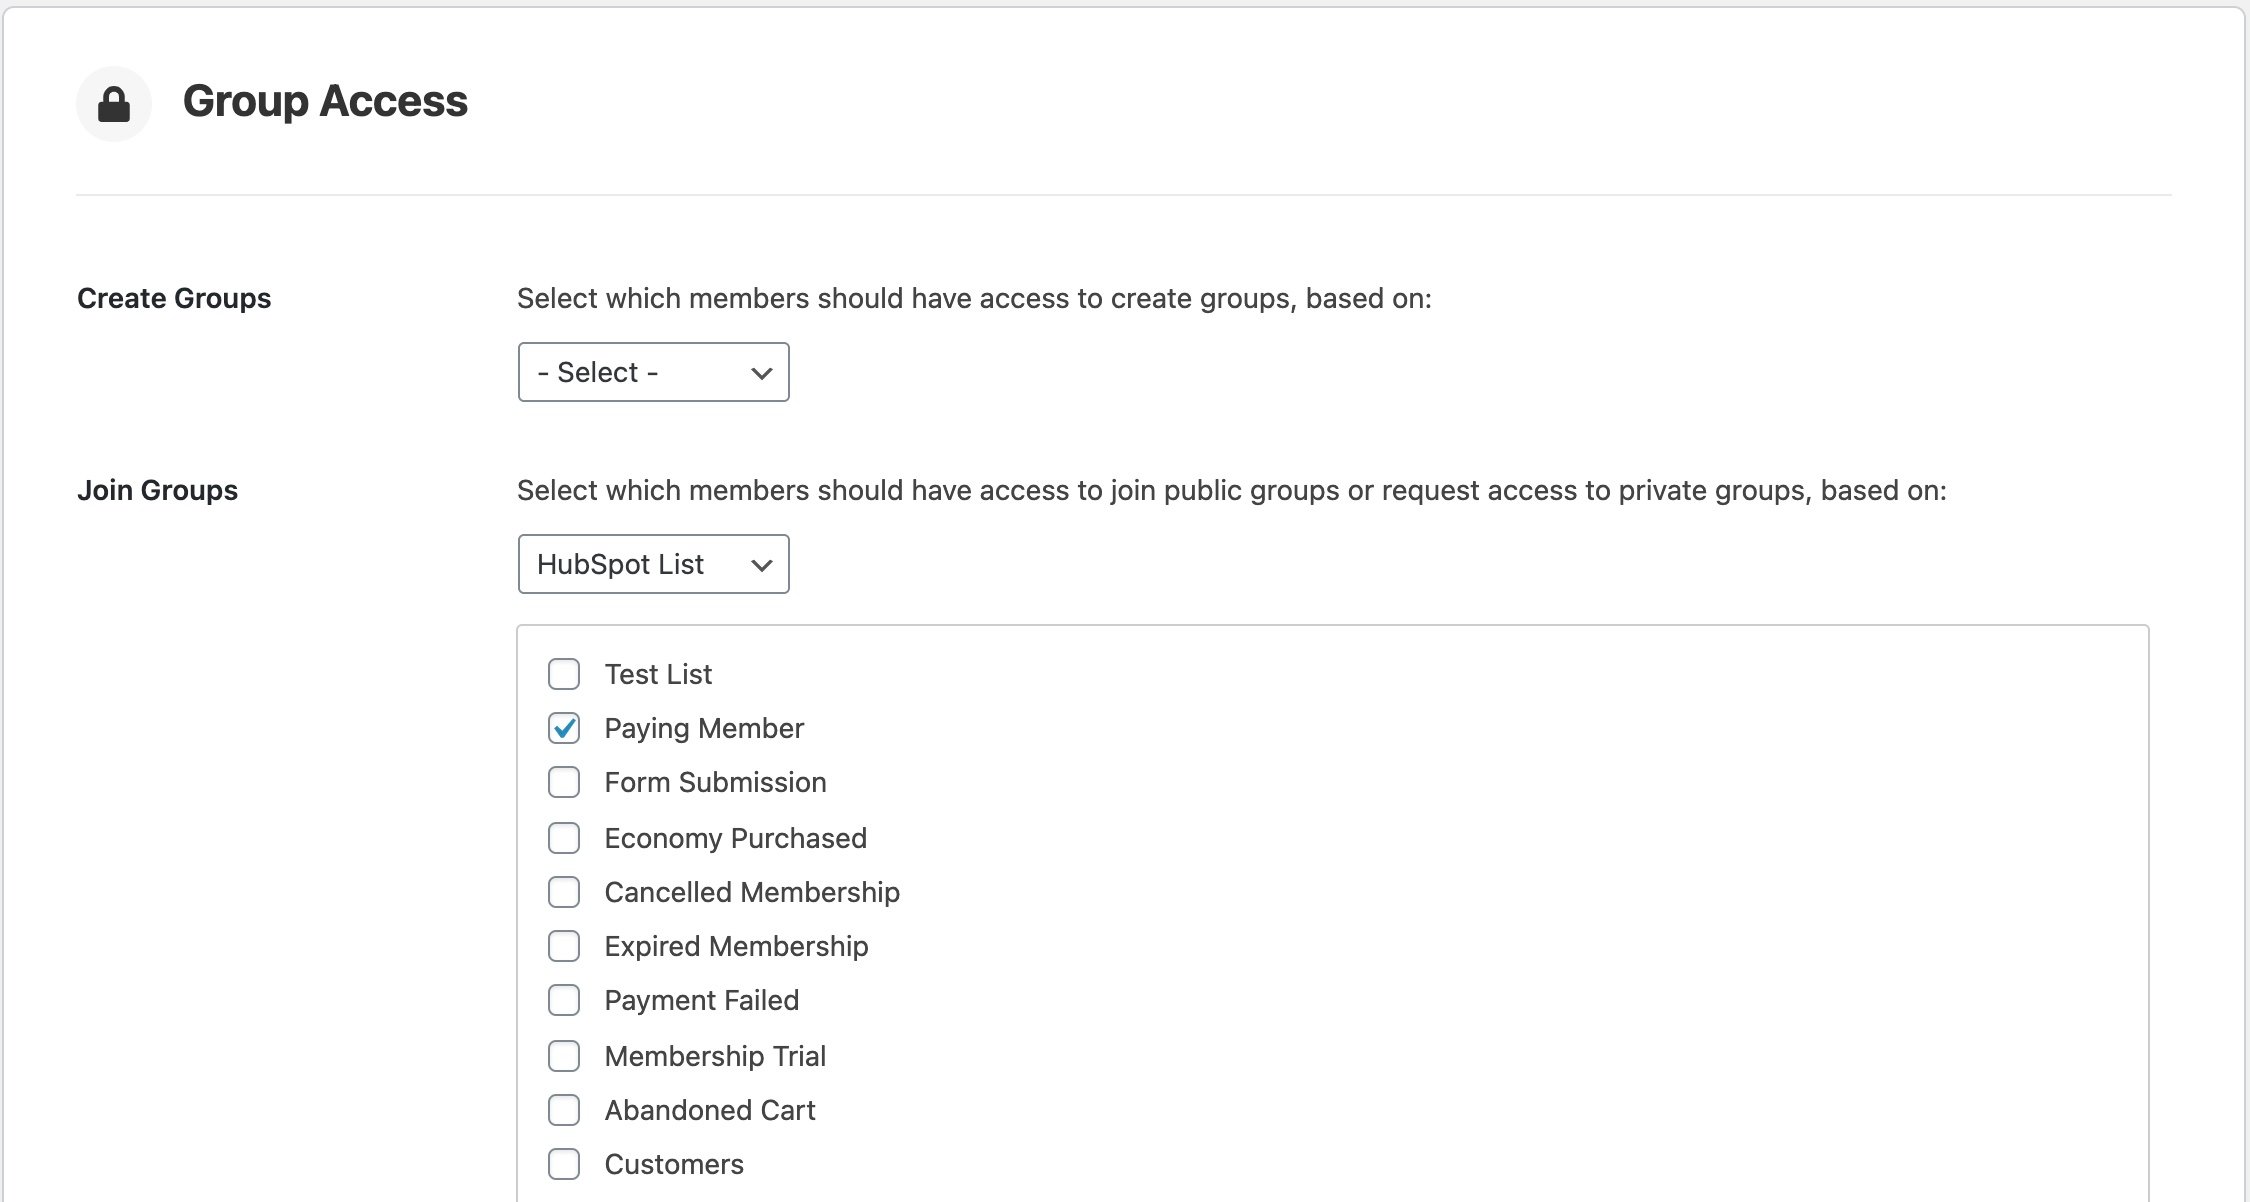
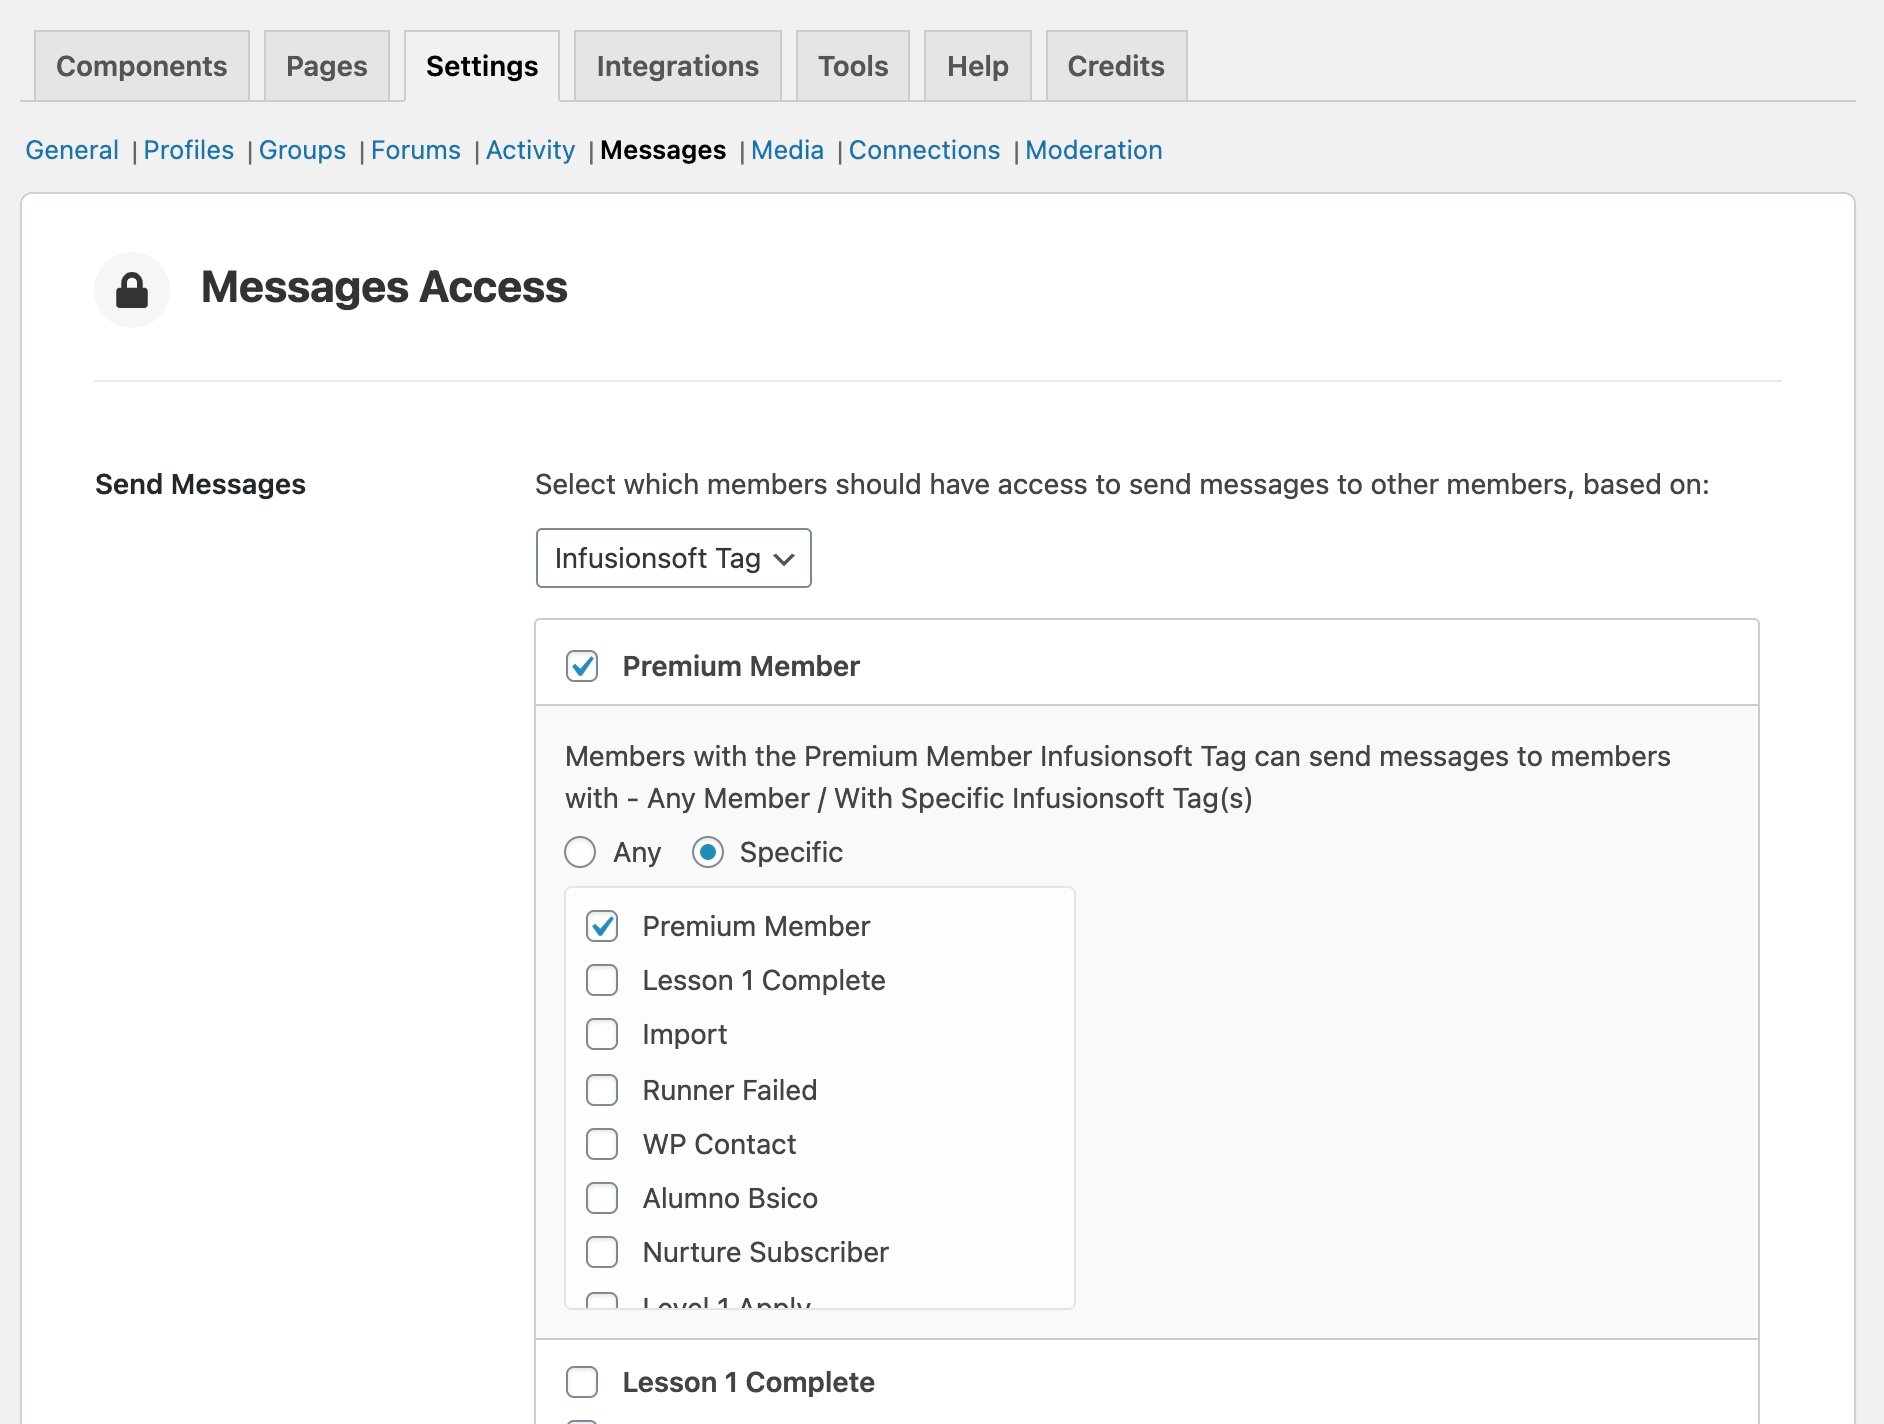
Member access controls are currently available for the Social Groups, Activity Feeds, Media Uploading, and Private Messaging components.
To set up, choose WP Fusion from the dropdown of available access conditions, and then select the required tags (or lists / segments).
Notes:
- The Member Access Controls system for social groups only prevents users from joining social groups if they don’t have the correct tag. Removing a tag will not remove anyone from a group or disable their existing group access.
- Due to the way the Messages Access settings are displayed, every available tag in your account has a “specific tags” option with every other available tag, which can potentially result in hundreds of thousands of inputs on the page. To protect the stability of your site, WP Fusion will only load the first 100 available tags. If you experience issues saving the Messages Access settings, you may need to increase your max_input_vars.
#BuddyBoss App
WP Fusion also includes some features specific to the BuddyBoss App.
#Access Controls
You can create access rules for app content based on tags in your connected CRM. This allows you to restrict parts of the app or app components based on a user’s tags, or revoke access to the app after a subscription cancellation or payment failure.
To set this up, first make sure that Access Controls are activated at BuddyBoss App » Settings » Labs » Enable Access Controls for the BuddyBoss App.
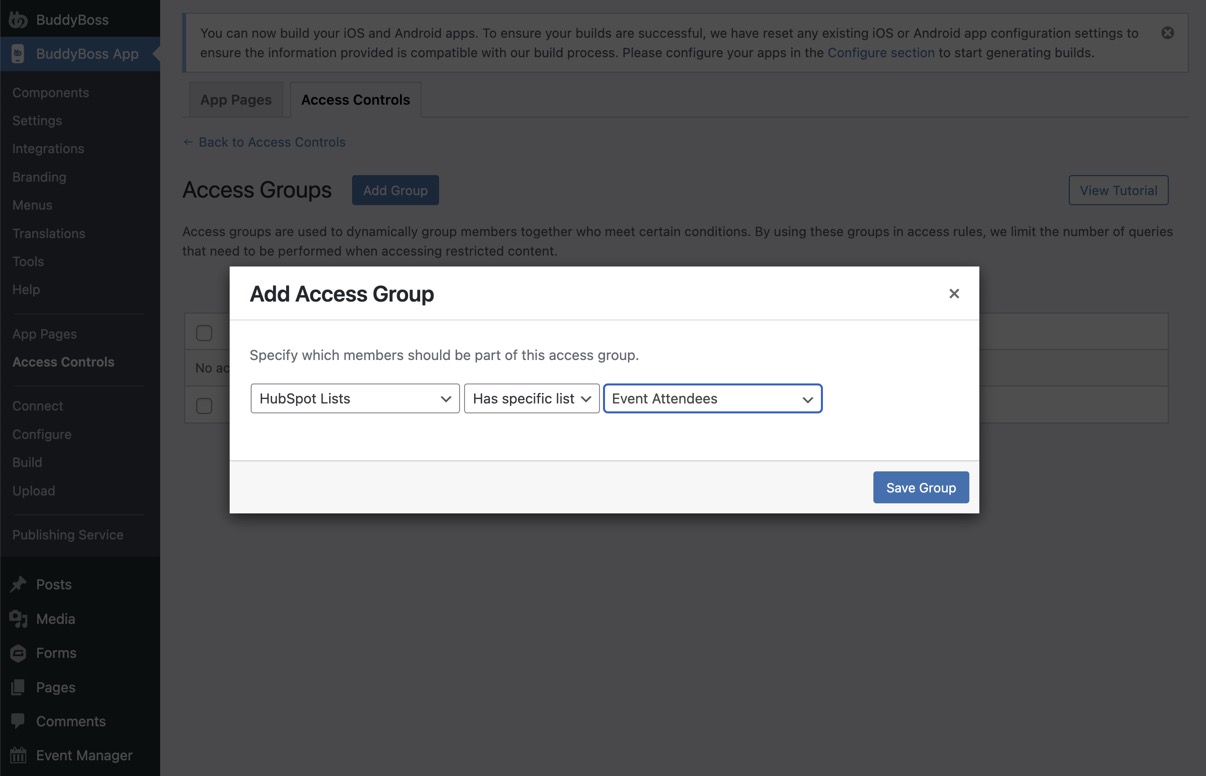
Then go to BuddyBoss App » Access Controls, and click the blue Access Groups button to reach the Access Groups page.
From here, add a new group, and for the condition, choose your CRM— in this example we’re using HubSpot lists:
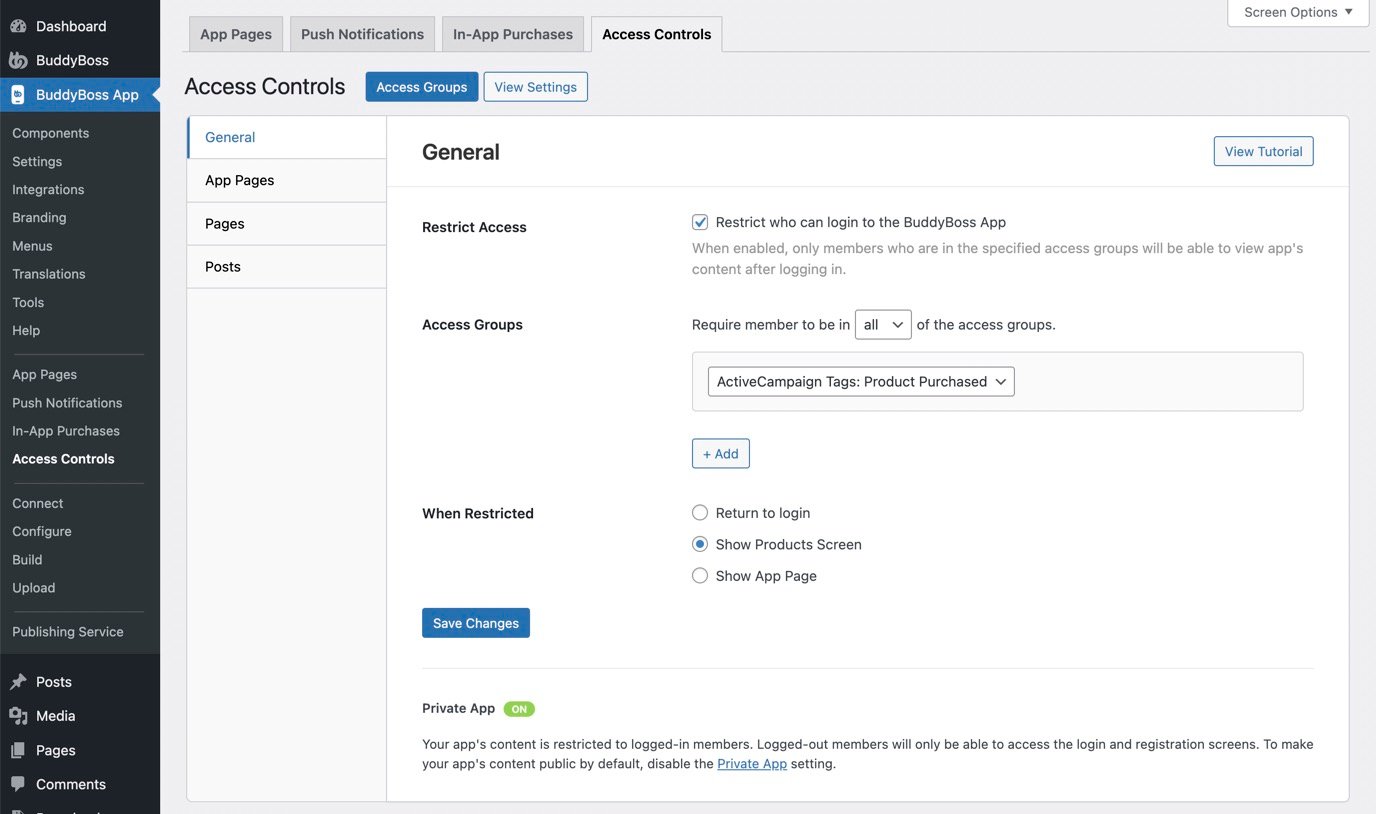
Once you’ve added the access group, BuddyBoss will search for any users on your site that have that tag, and you’ll see a count of them in the Access Groups list.
Then head back to the Access Controls settings page. You can now use the new access group as a condition for who can log into your app, or who can access specific app components.
For more information on access control, see the BuddyBoss documentation.
#In-App Purchases
You can connect in-app product purchases in the BuddyBoss App to tags (or “lists”, or “groups”) in your connected CRM.
This allows you to apply a tag when an product is purchased in your app, which can unlock content on your site, trigger automated enrollments into courses and memberships, and trigger automations in your marketing automation platform.
To set up, in the WordPress admin, head to BuddyBoss App » In-App Purchases » Products and click Edit Product on your app product.
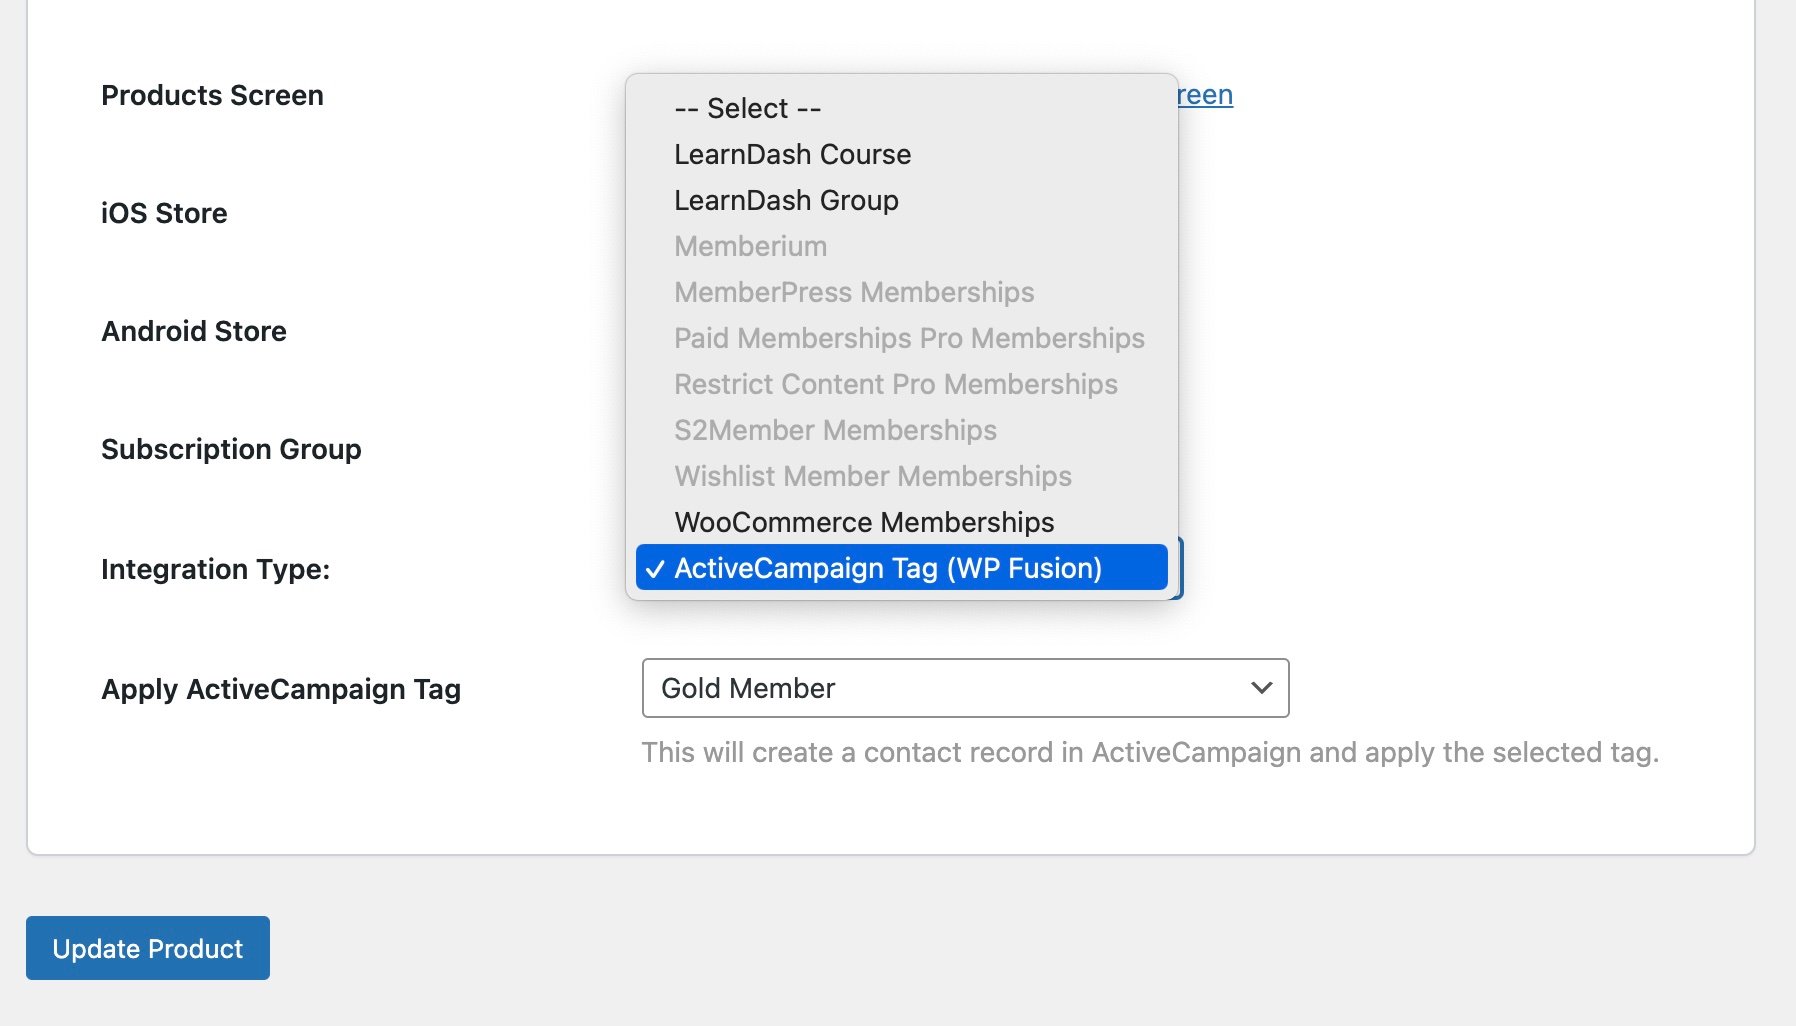
From the Integration Type menu, select your CRM, and then in the dropdown below, select the tag that should be applied at purchase.
Now when someone purchases your in-app product, a contact record will be created for them in your connected CRM, and the selected tag will be applied.
If the order is cancelled or refunded, the tag will be removed.
#Push Notifications
When sending push notifications to your members, you can segment your members using tags in your CRM.

After selecting Filter members, choose WP Fusion from the filters dropdown, and select your CRM.
You can select any number of tags (or lists, groups, or segments, depending on your CRM), and your push notification will only be sent to members who have those tags.
#What WP Fusion features work with the app?
WP Fusion is generally compatible with the BuddyBoss app because it doesn’t add anything to the frontend of your site— most of the behavior regarding access, enrollments, and personalization happens “behind the scenes”.
Here are the features we’ve tested and know work with the app:
- Anything related to syncing data or custom fields bidirectionally with your CRM
- Anything related to an event in another plugin, such as a WooCommerce purchase applying a tag, a LearnDash course completion applying a tag, a MemberPress subscription cancellation, etc.
- Any “linked tags” or automated enrollments, for example applying a CRM tag to auto-enroll a user into a social group, course, or membership level
- Protecting access to content by showing a restricted content message
- Showing and hiding content using shortcodes
- Hiding restricted items using the Filter Queries tool
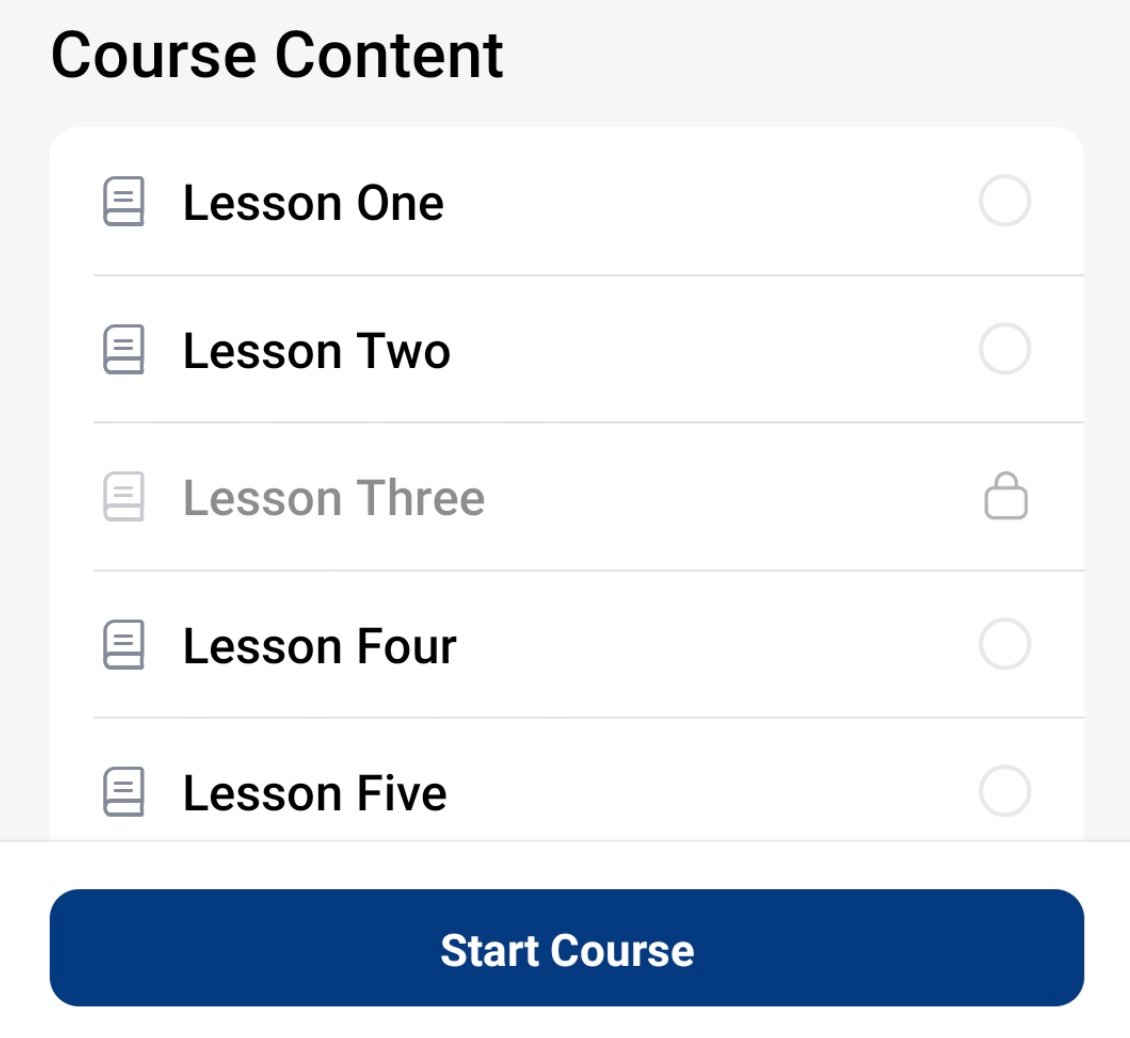
- Personalizing LearnDash course content using the Filter Course Steps feature
- Locking LearnDash lessons using the Lock Lessons feature
- Tracking login counts and login dates via the Logins Addon
The features that don’t work with the app are features that rely on a traditional “browser” experience (though they will work on web fallback pages):
- Using WP Fusion to redirect a user to another page if access to a piece of content is denied. This is because the app isn’t a web browser, so redirects won’t work
- Anything requiring JavaScript, like site tracking, applying tags when a button is clicked, or tracking media player engagement
- Login redirects with the Logins Addon
- Hiding app menu items based on the access rules for the associated content, using the Hide From Menus feature
- The Site Lockout feature does not work with the app since it relies on redirects. Instead, you can use Member Access Controls to control app access via tags