#Overview
You can use webhooks in EngageBay to send data back to your WordPress site using WP Fusion. Using webhooks you can create new users on your WordPress site based on automations in EngageBay, or update existing users’ meta data and tags.
There are two ways to manage webhooks in EngageBay, either via an Automation or in the Account Settings.
#Automation Method
(Recommended) The automation method is best if you need to send a webhook to create or update a WordPress user as part of a specific process. For example:
- Tag “Website Access” is added
- Send webhook to create WordPress user
- Send welcome email
- Wait 3 days
- Apply tag “Unlock Course Two”
- Send webhook to update tags
Using a webhook in an automation lets you easily visualize the entire automation flow, and see where individual contacts are in the process.
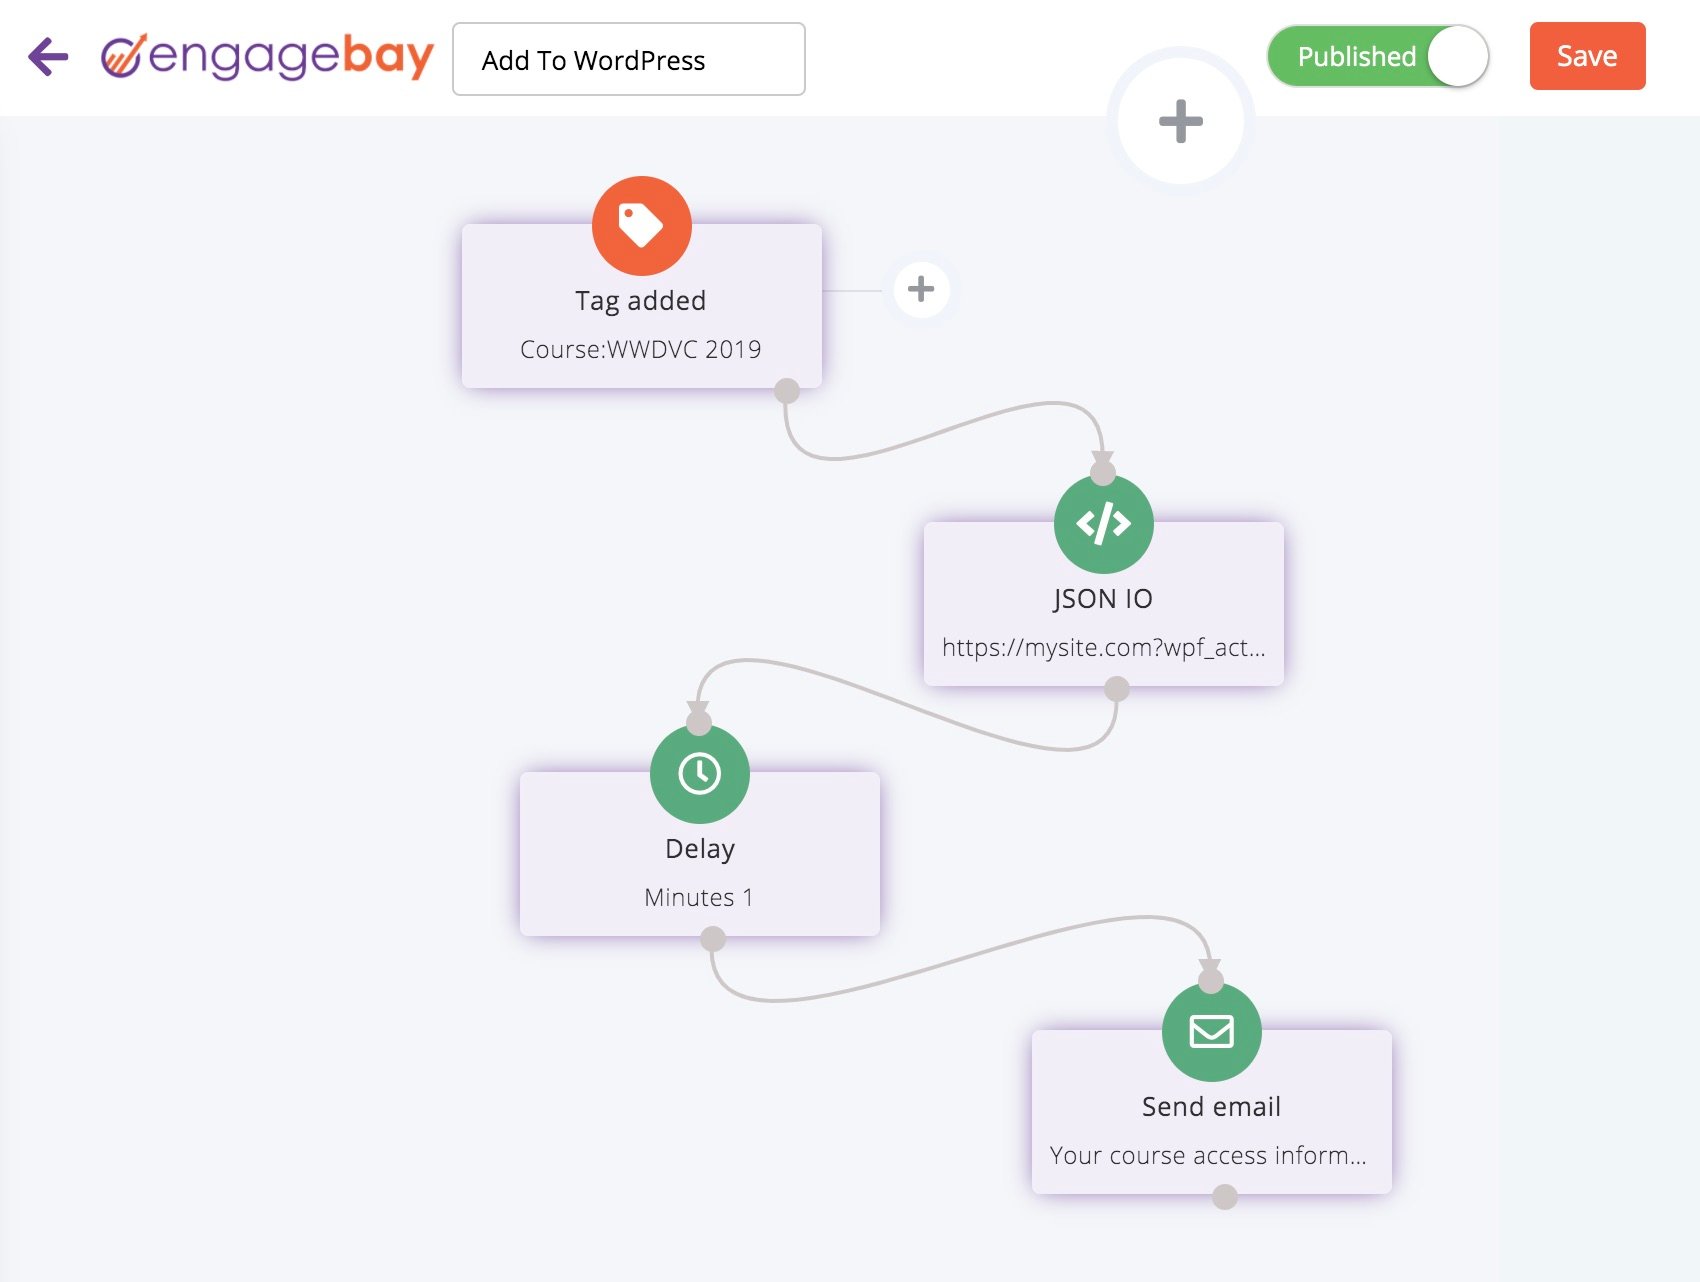
You’ll also be able to visualize where a single contact is in the automation, when the webhook was sent, and whether or not it was received successfully. Using webhooks in automations gives you a lot more control and better reporting than using Global Webhooks (see below).
To use webhooks in automations first create an automation and add JSON IO node to it, like in the example above. A modal will appear where you can configure your webhook:
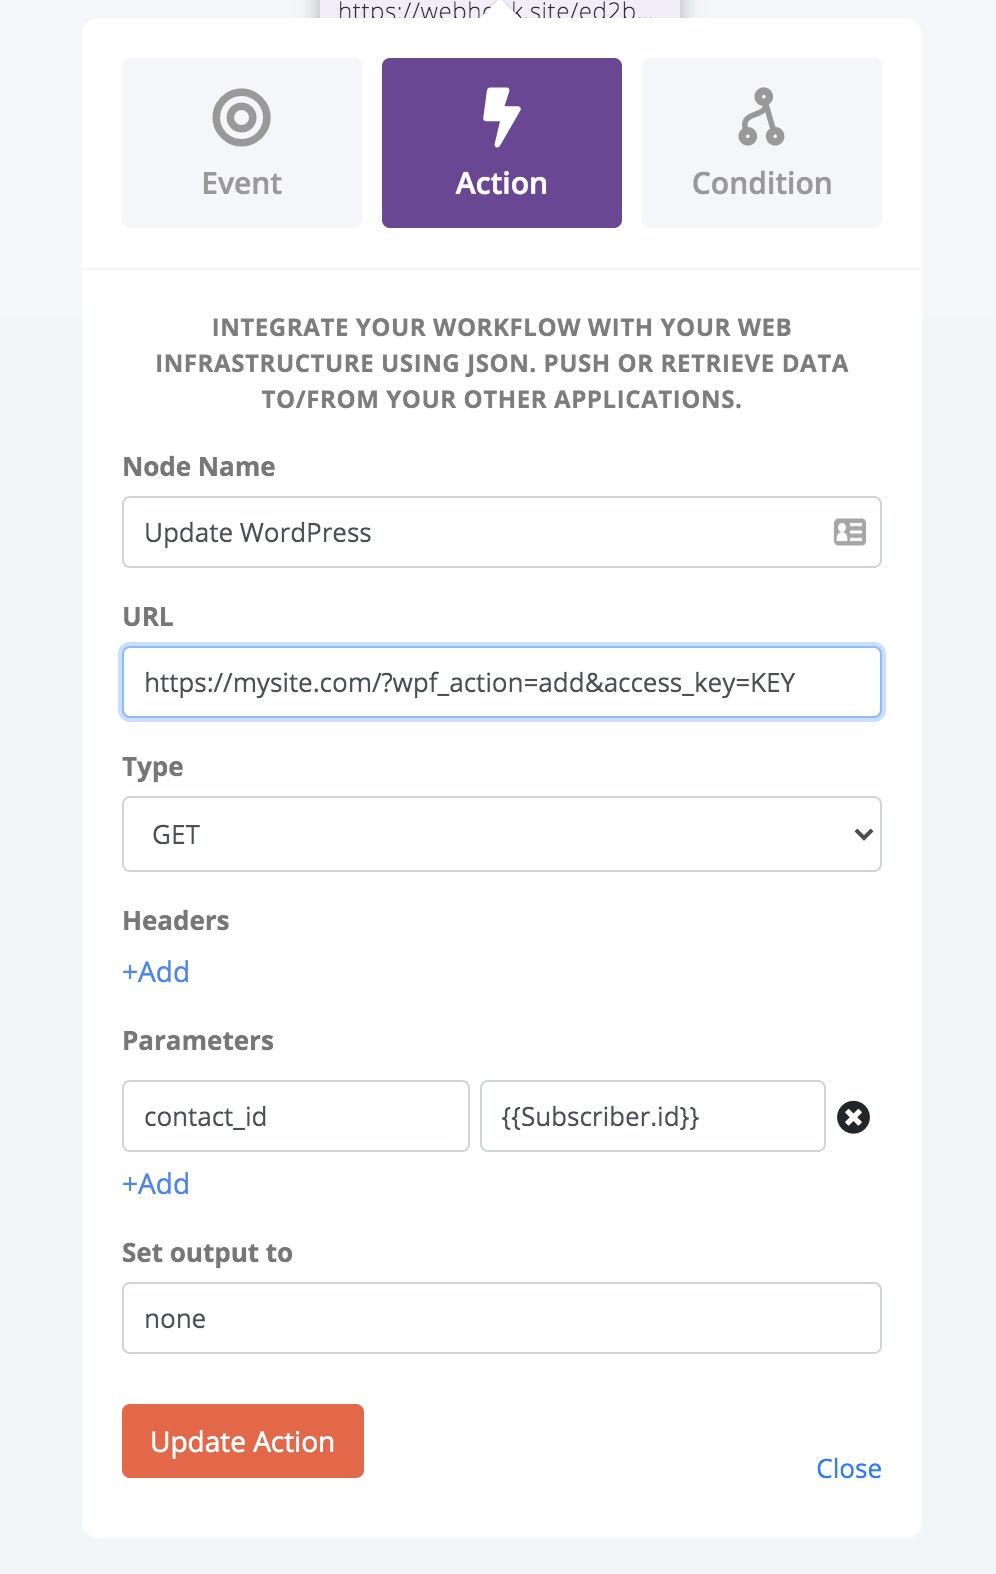
The settings are:
- Node Name: This is just a label in the automation builder, you can set it to whatever you want
- URL: This is the URL to your WordPress site. See Webhook URL Parameters below for a description of the options. Your access key can be found at the bottom of the General tab in the WP Fusion settings.
- Type: GET
- Parameters:
contact_idneeds to be set to{{Subscriber.id}}. This identifies the contact to WP Fusion - Set output to: none
Now when the contact reaches the JSON IO step in the automation EngageBay will notify WP Fusion to load the contact’s data.
#Account Settings Method
(Advanced) You can also set up webhooks which are global to your account. This is best if you’re manually editing contact records in EngageBay (outside of an automation) and need these changes synced to WordPress.
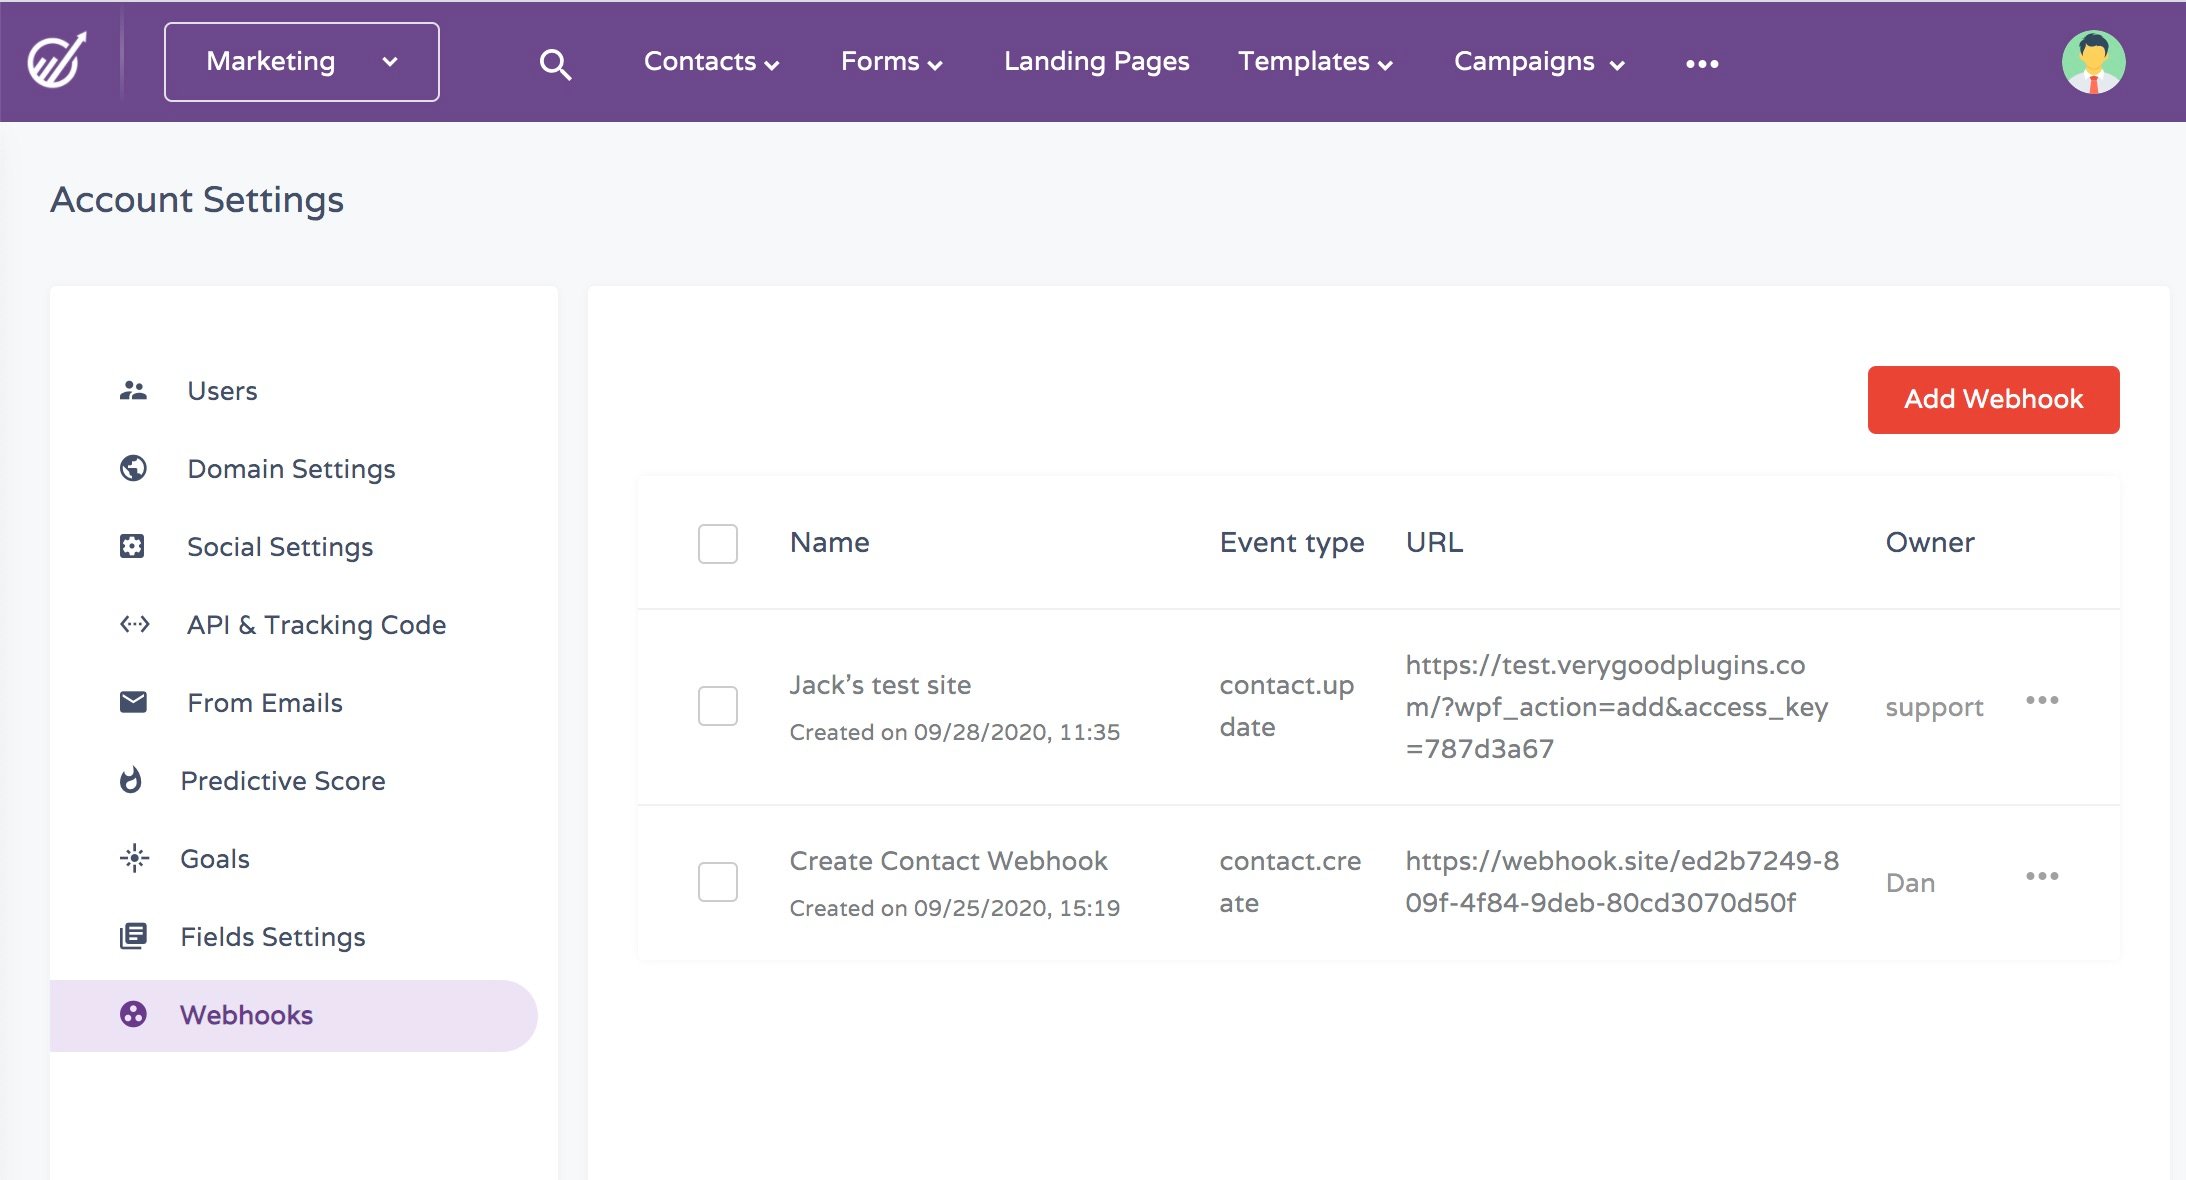
add method, as then every contact in EngageBay will be given a WordPress user account.To set up a webhook navigate to Account Settings » Webhooks in your EngageBay admin, and click Add Webhook to create a new webhook.
For the Event Type you can select either contact.update, or contact.create.
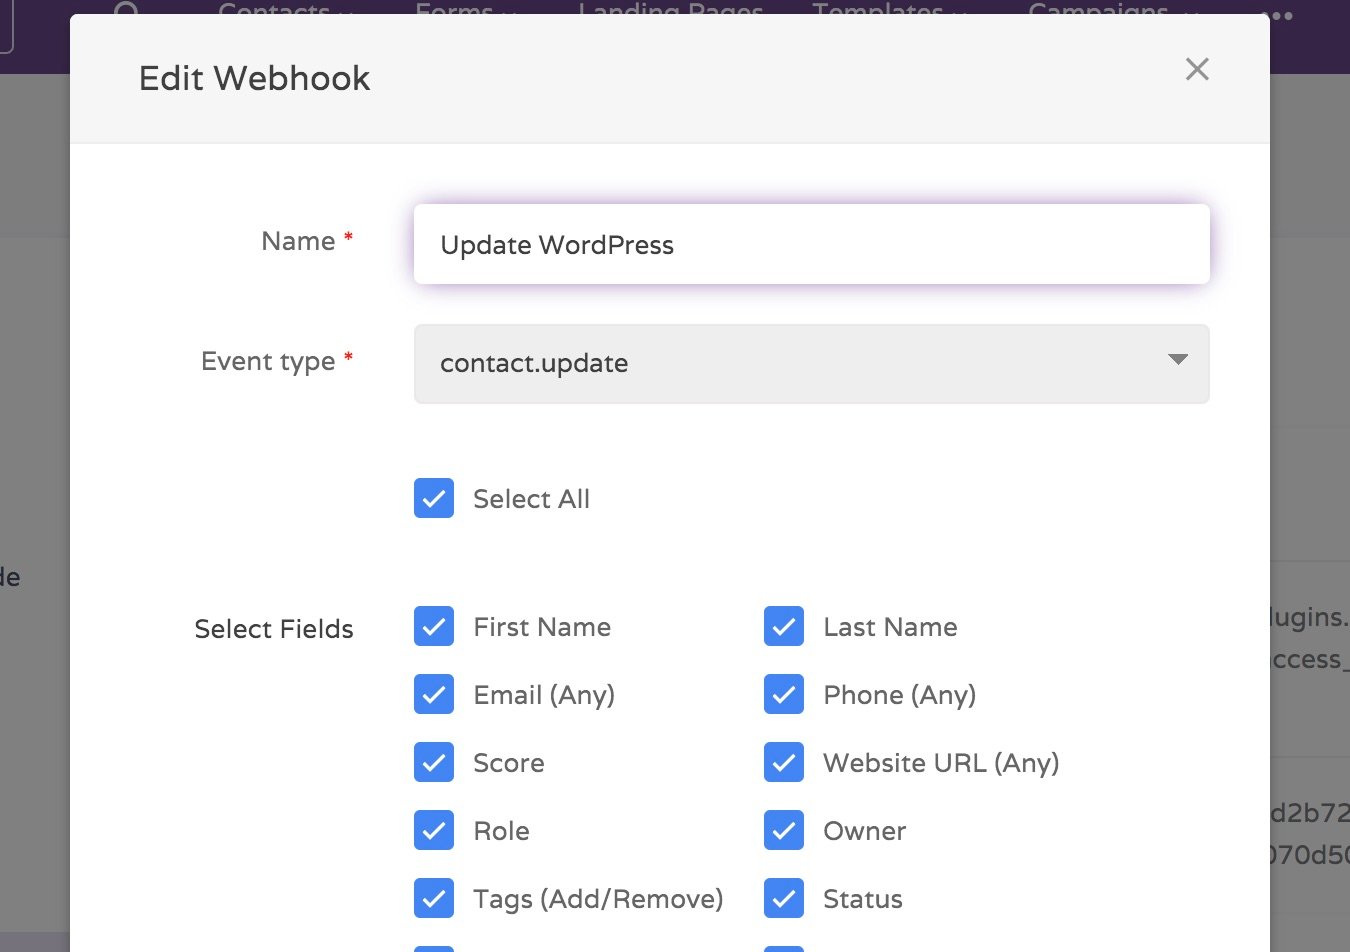
For fields, choose Select All.
Keep in mind that, because these webhooks are global to your EngageBay account, bulk editing contacts will trigger webhooks to be sent to your site for every edited contact, which may make your WordPress site temporarily unstable.
update or update_tags method it’s not necessary to also include those same webhooks in automations.#Webhook URL parameters
You can format your webhook URL in a few different ways to customize the behavior:
#To update a user’s tags
To update an existing WordPress user’s tags from the contact record, the URL for the webhook should look like the following:
https://mydomain.com/?wpf_action=update_tags&access_key=YOURACCESSKEY
#To update a user’s tags and meta data
To update a user’s tags and pull any new meta data from EngageBay for that contact, the URL for the webhook should look like the following:
https://mydomain.com/?wpf_action=update&access_key=YOURACCESSKEY
#Create a new user
To create a new user, use the following URL:
https://mydomain.com/?wpf_action=add&access_key=YOURACCESSKEY
You can also specify additional parameters in user creation. For example, to send the user a welcome email containing a link to log in on your site, use the following:
https://mydomain.com/?wpf_action=add&access_key=YOURACCESSKEY&send_notification=true
You can also specify a specific user role to be assigned to the new user. For example, to set the new user to the “customer” role, use the following:
https://mydomain.com/?wpf_action=add&access_key=YOURACCESSKEY&role=customer
Note that you have to have registered a “customer” role on your site for this to work. By default users will be assigned the role of “subscriber”.
The add method will update a user if an existing user already exists. It will not create a duplicate user.
user_login and user_pass on your website, the new users will be given the usernames and passwords stored in their EngageBay contact record.#User passwords
New user accounts will be created with an automatically generated password. If you’d like to use this password in your email marketing, you can send the password back to EngageBay after it has been generated.
In the Webhooks section of the General settings tab, check the box for Return Password, and select a field in EngageBay where the password should be stored.
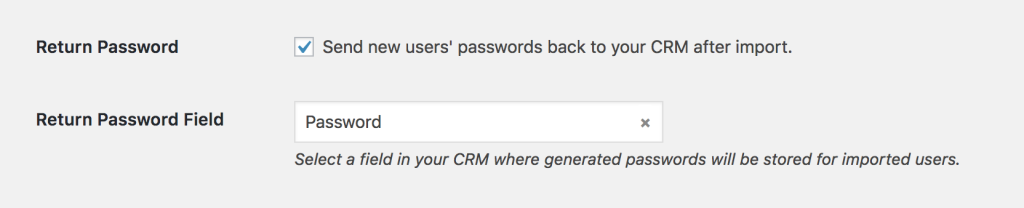
After a new user is created, their automatically generated password will now be saved back to their contact record, and you can use a merge field to include it in an email. The username will be the contact’s email address.