#Overview
You can use webhooks in Maropost to send data back to your WordPress site using WP Fusion. Using webhooks you can create new users on your WordPress site based on rules in Maropost, or update existing users’ meta data and tags.
Webhooks can either be configured globally to your account, or as part of an automation.
#Global webhooks
Global webhooks in Maropost are configured by clicking your user name in the top right of the app, and navigating to Settings » HTTP Post URL.

Enter the URL to your site, following the examples in Webhook URL parameters section below.
Every time a contact is added or updated in Maropost, the webhook will be triggered, and their updated data will be synced back to WordPress.
Note that global webhooks should be used with caution— bulk editing contacts could cause hundreds of webhooks to be sent to your site simultaneously, resulting in instability, or even taking your site offline. In many cases it’s more practical to create a webhook in an automation, which is triggered only by a specific tag or property update.
#Webhooks in automations
Webhooks in automations are ideal when you need to trigger an update in WordPress after a specific event in Maropost— for example, applying a tag in Maropost to import a new WordPress user.
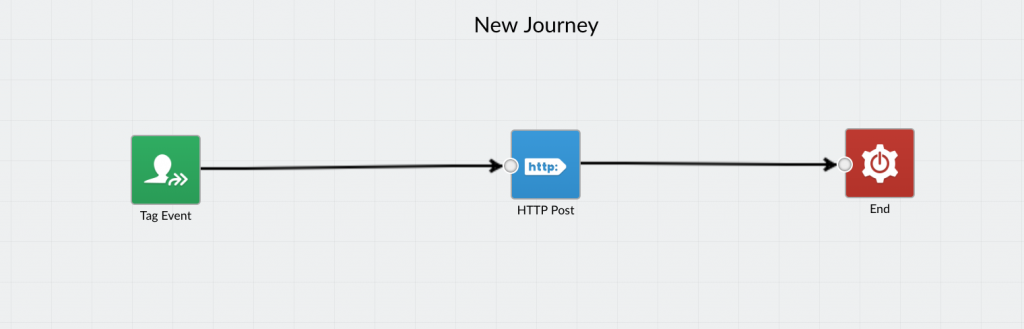
To create a webhook in an automation, go to the Manage Automations page by hovering over the Maropost Cloud icon in the upper left-hand corner of your screen and then select Automation from the menu. Click the blue New Journey button to create a new rule. Select a trigger for the rule, such as when a page is visited, a field is modified, or a user is added to a tag.
In the screenshots below we’ve configured the rule to be triggered whenever a user is added to the “Add User to WP” tag.
You can also specify any conditions you’d like to be met, or leave this section blank.

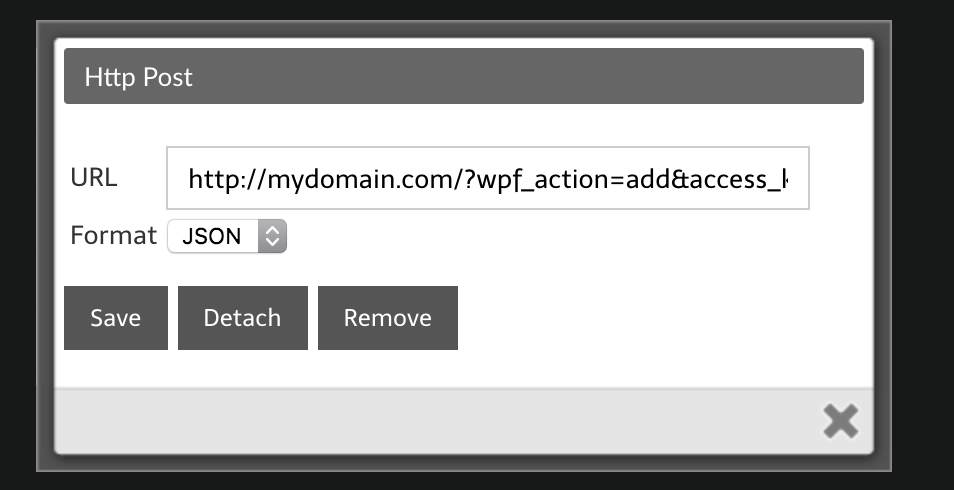
Under “Actions”, choose “HTTP Post” from the menu. Enter the URL to your site following the examples in the next sections. You can get your site’s unique access key from the bottom of the main WP Fusion settings page.
#Webhook URL parameters
#To update a user’s tags
To update an existing WordPress user’s tags from the contact record, the URL for the webhook should look like the following:
https://mydomain.com/?wpf_action=update_tags&access_key=YOURACCESSKEY
#To update a user’s tags and meta data
To update a user’s tags and pull any new meta data from Maropost for that contact, the URL for the webhook should look like the following:
https://mydomain.com/?wpf_action=update&access_key=YOURACCESSKEY
#Create a new user
To create a new user, use the following URL:
https://mydomain.com/?wpf_action=add&access_key=YOURACCESSKEY
You can also specify additional parameters in user creation. For example, to send the user a welcome email containing a link to log in on your site, use the following:
https://mydomain.com/?wpf_action=add&access_key=YOURACCESSKEY&send_notification=true
You can also specify a specific user role to be assigned to the new user. For example, to set the new user to the “customer” role, use the following:
https://mydomain.com/?wpf_action=add&access_key=YOURACCESSKEY&role=customer
Note that you have to have registered a “customer” role on your site for this to work. By default users will be assigned the role of “subscriber”.
The add method will update a user if an existing user already exists. It will not create a duplicate user.
user_login and user_pass on your website, the new users will be given the usernames and passwords stored in their Maropost contact record.