
#Overview
You can use webhooks in Pipedrive to automatically send data back to your WP Fusion powered WordPress site.
Using webhooks, you can import new users on your WordPress site based on changes in Pipedrive, or update existing users’ meta data and tags.
#Automatic Setup (Recommended)
WP Fusion now provides an easier way to configure Pipedrive webhooks directly from your WordPress admin panel. This method automatically creates and manages webhooks for you.
After connecting your Pipedrive account to WP Fusion, navigate to Settings » WP Fusion » General, and you’ll see new webhook configuration options:
#Update Trigger
Enable this option to automatically sync changes from Pipedrive back to WordPress when a person is updated in Pipedrive. This includes changes to custom fields, tags, and other contact data.
#Add Trigger
Enable this option to automatically create new WordPress users when new persons are added to Pipedrive. This is useful for automatically importing leads or contacts as WordPress users.
#Enable Notifications
When creating new users via the Add Trigger, you can optionally send them a welcome email containing their username and a password reset link.
When you enable these options, WP Fusion will automatically:
- Create the necessary webhooks in your Pipedrive account
- Configure the correct webhook URLs and parameters
- Handle webhook authentication using your site’s access key
- Clean up webhooks when the options are disabled
#Manual Setup
If you prefer to set up webhooks manually, or need more customization, you can still configure webhooks directly in Pipedrive.
In Pipedrive, head to Tools and Integrations » Webhooks, and click Create new webhook.
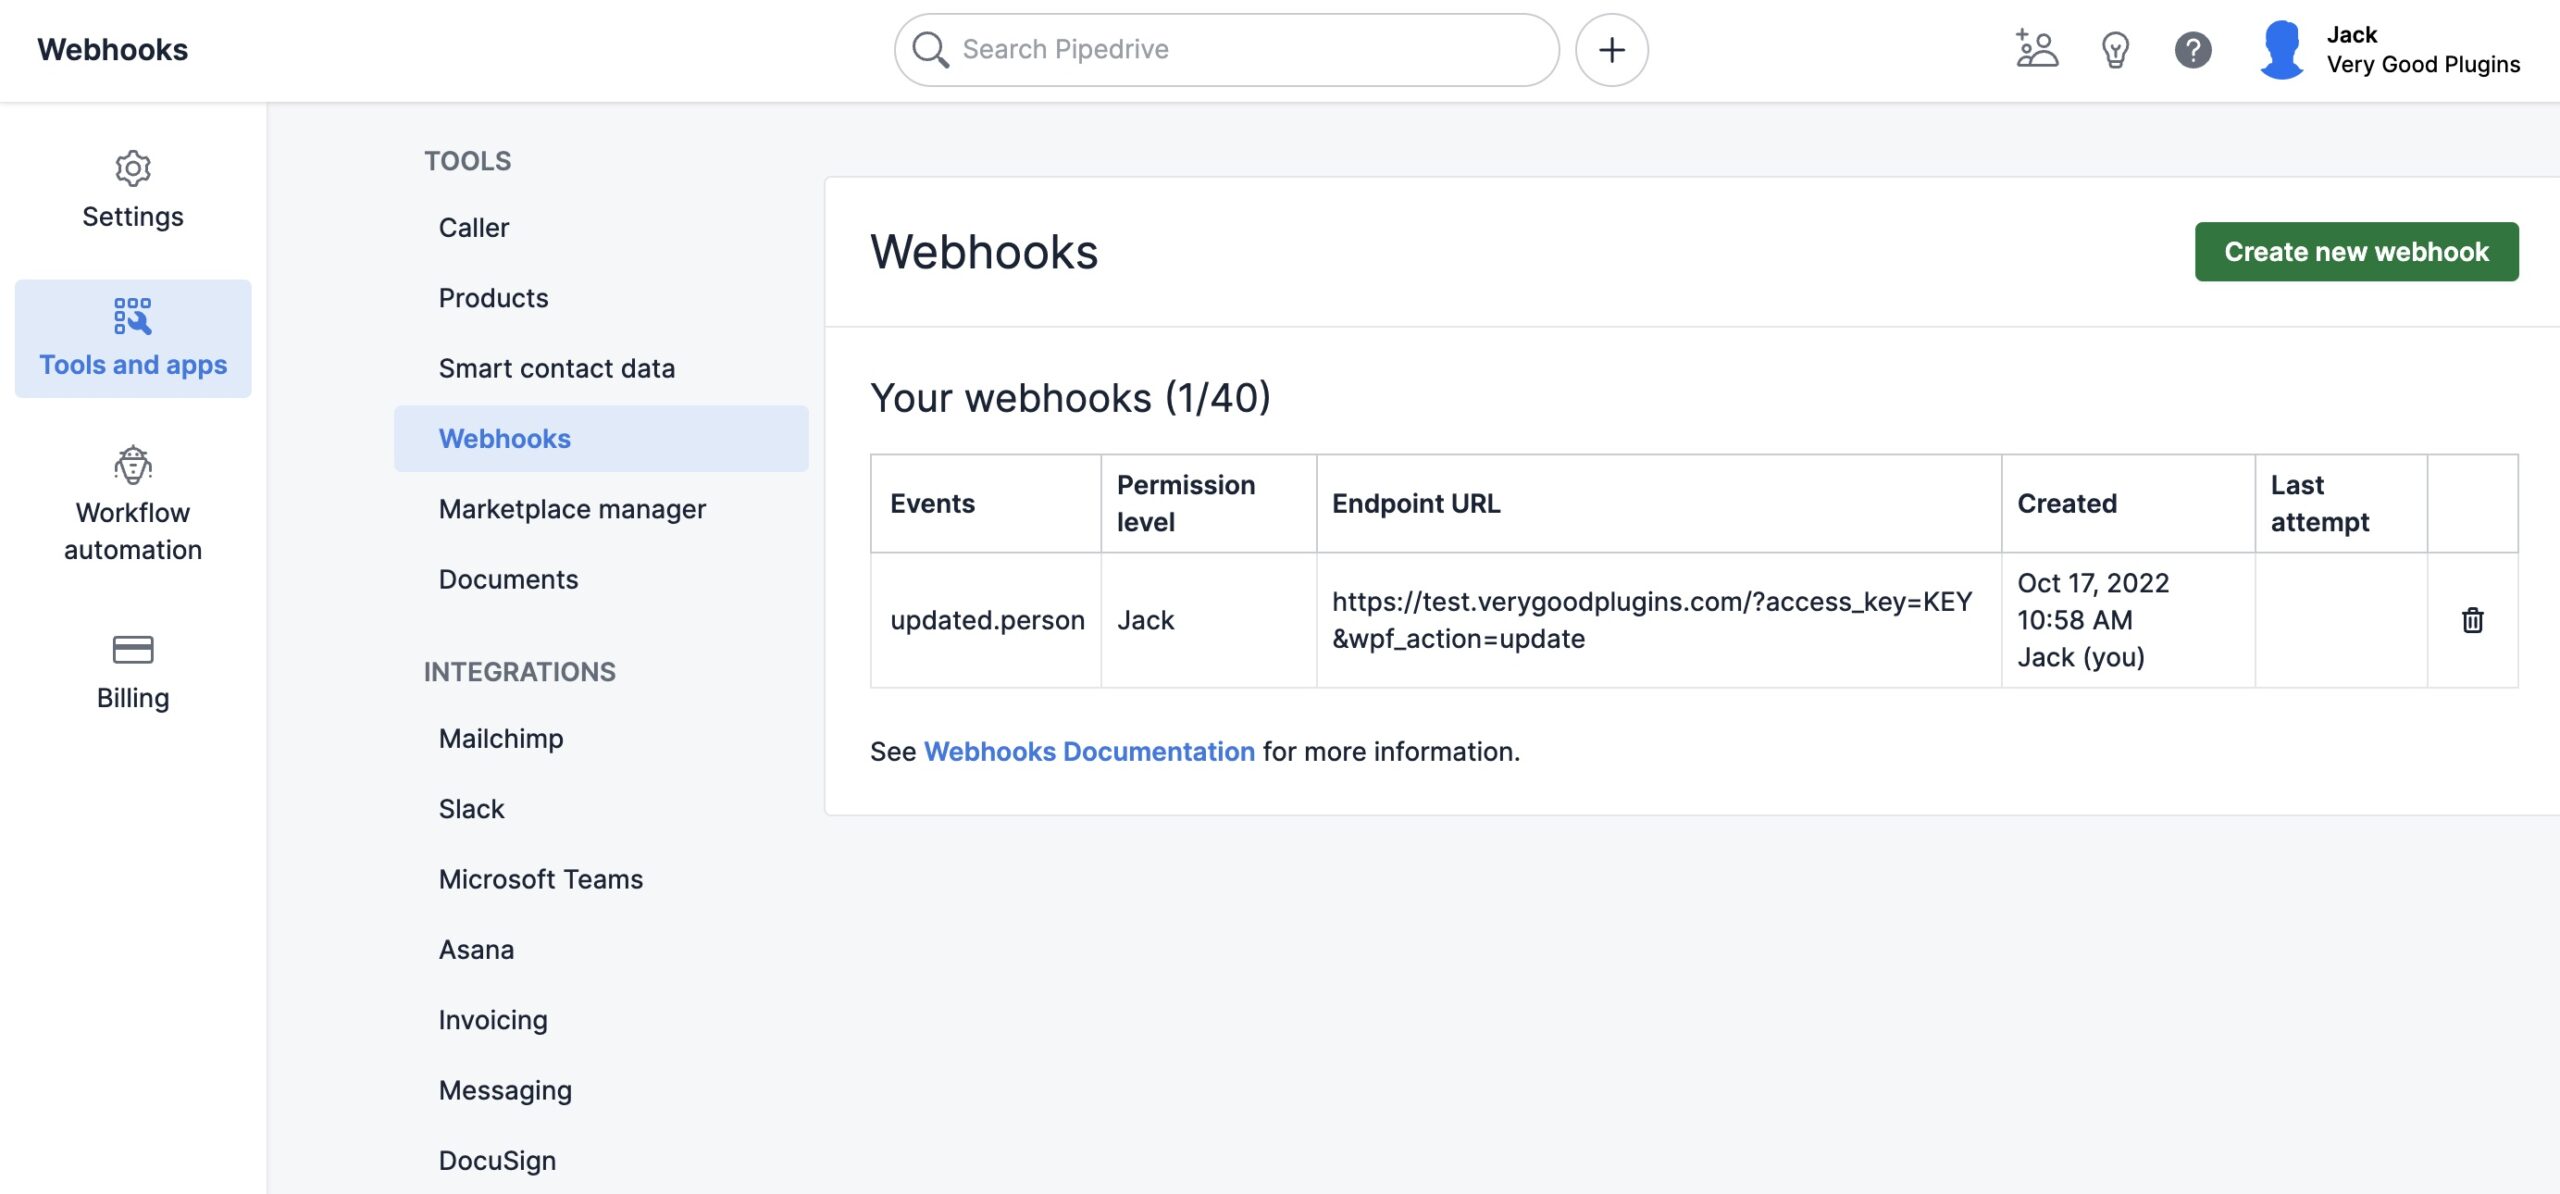
For the event action, select which action you’d like to trigger the webhook.
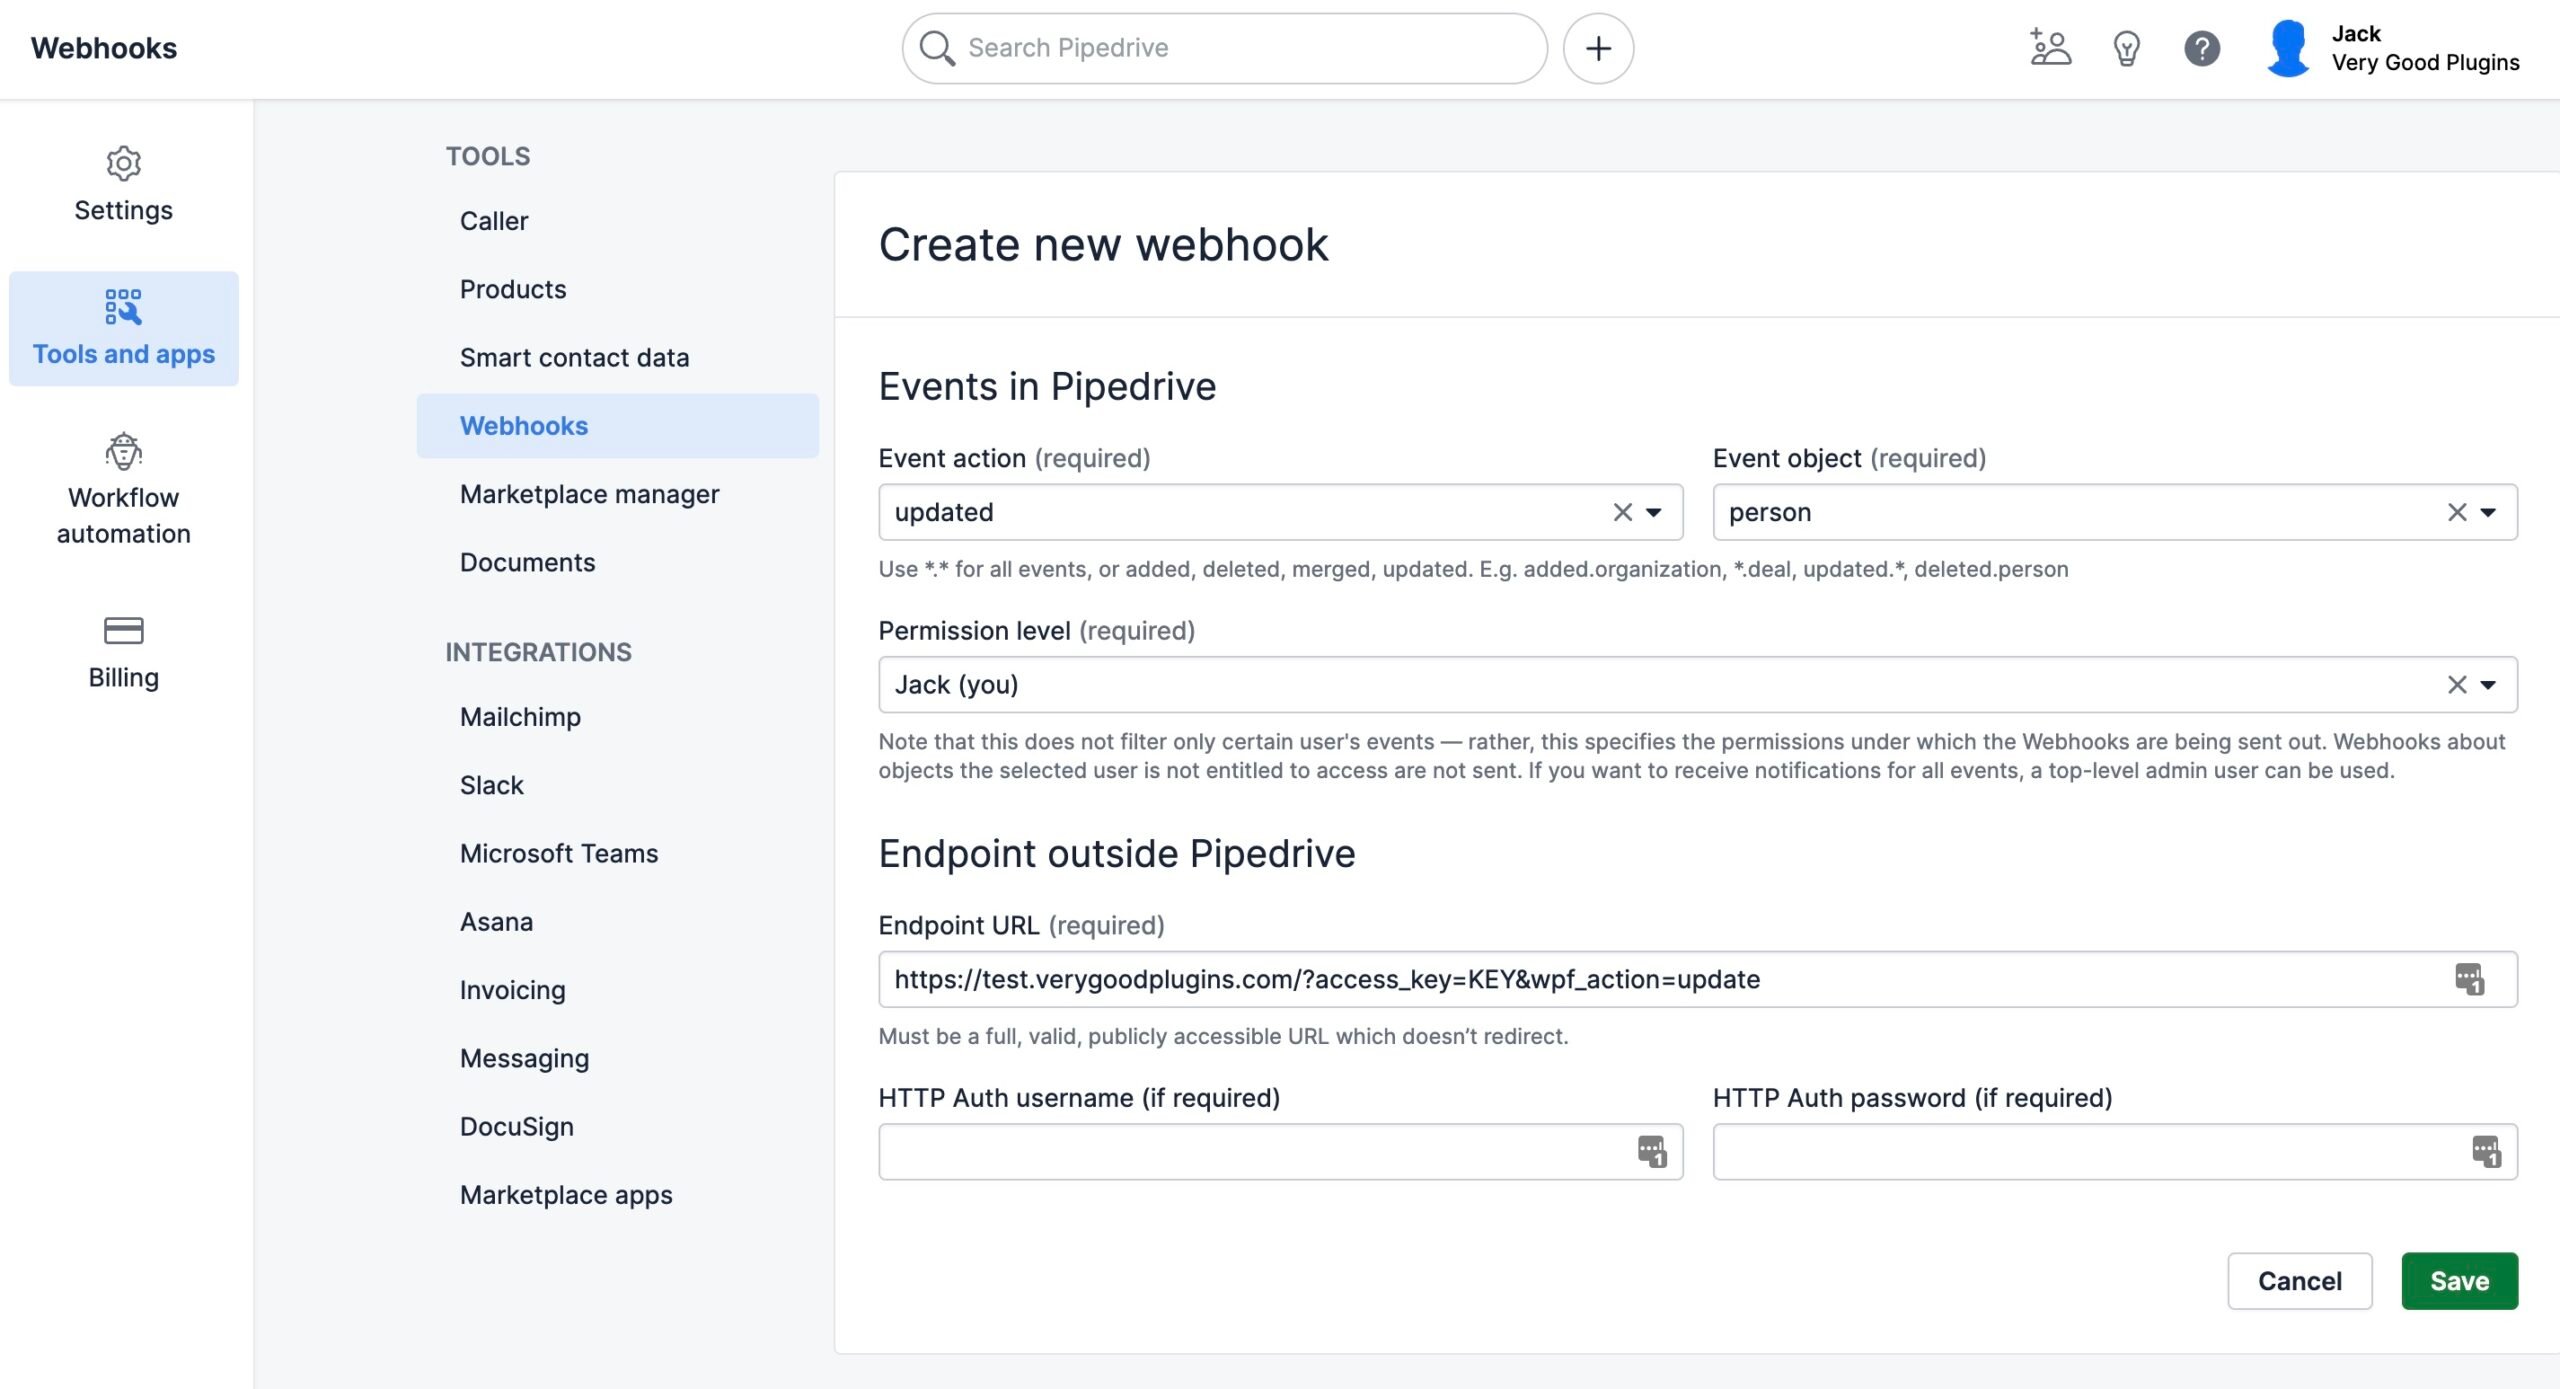
In this case, we have selected updated, to trigger the webhook whenever a Contact is edited.
For the Event object field, select person.
Set the Endpoint URL following the examples below.
#Webhook URL parameters
You can format your webhook URL in a few different ways to customize the behavior. For each you will need to supply your access key, which can be obtained from the bottom of the main settings panel in your WP Fusion settings.
#To update a user’s tags
To update an existing WordPress user’s tags from the contact record, the URL for the webhook should look like the following:
https://mydomain.com/?wpf_action=update_tags&access_key=YOURACCESSKEY
#To update a user’s tags and meta data
To update a user’s tags and pull any new meta data from Pipedrive for that contact, the URL for the webhook should look like the following:
https://mydomain.com/?wpf_action=update&access_key=YOURACCESSKEY
#Create a new user
To create a new user, use the following URL:
https://mydomain.com/?wpf_action=add&access_key=YOURACCESSKEY
You can also specify additional parameters in user creation. For example, to send the user a welcome email containing a link to log in on your site, use the following:
https://mydomain.com/?wpf_action=add&access_key=YOURACCESSKEY&send_notification=true
You can also specify a specific user role to be assigned to the new user. For example, to set the new user to the “customer” role, use the following:
https://mydomain.com/?wpf_action=add&access_key=YOURACCESSKEY&role=customer
Note that you have to have registered a “customer” role on your site for this to work. By default users will be assigned the role of “subscriber”.
The add method will update a user if an existing user already exists. It will not create a duplicate user.
user_login and user_pass on your website, the new users will be given the usernames and passwords stored in their Pipedrive contact record.#User passwords
New user accounts will be created with an automatically generated password. If you’d like to use this password in your email marketing, you can send the password back to Pipedrive after it has been generated.
In the Webhooks section of the General settings tab, check the box for Return Password, and select a field in Pipedrive where the password should be stored.
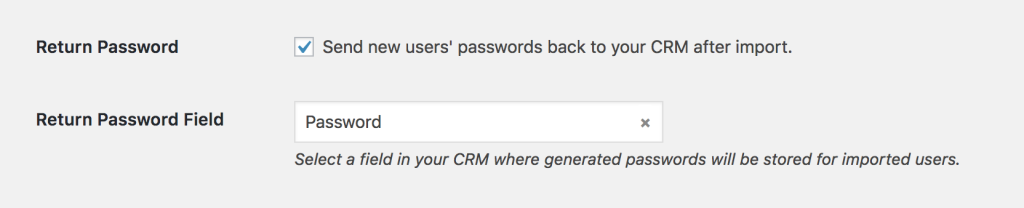
After a new user is created, their automatically generated password will now be saved back to their contact record, and you can use a merge field to include it in an email. The username will be the contact’s email address.