#Overview
You can use webhooks in Klaviyo to send data back to your WordPress site using WP Fusion. Using webhooks you can create new users on your WordPress site based on workflows in Klaviyo, or update existing users’ meta data and lists.
#Creating webhooks
Webhooks in Klaviyo are managed in Flows. Flows allow you to send webhooks to create or update WordPress users as part of a specific process. For example:
- List “Website Access” is added
- Send webhook to create WordPress user
- Send welcome email
- Wait 3 days
- Apply list “Unlock Course Two”
- Send webhook to update lists
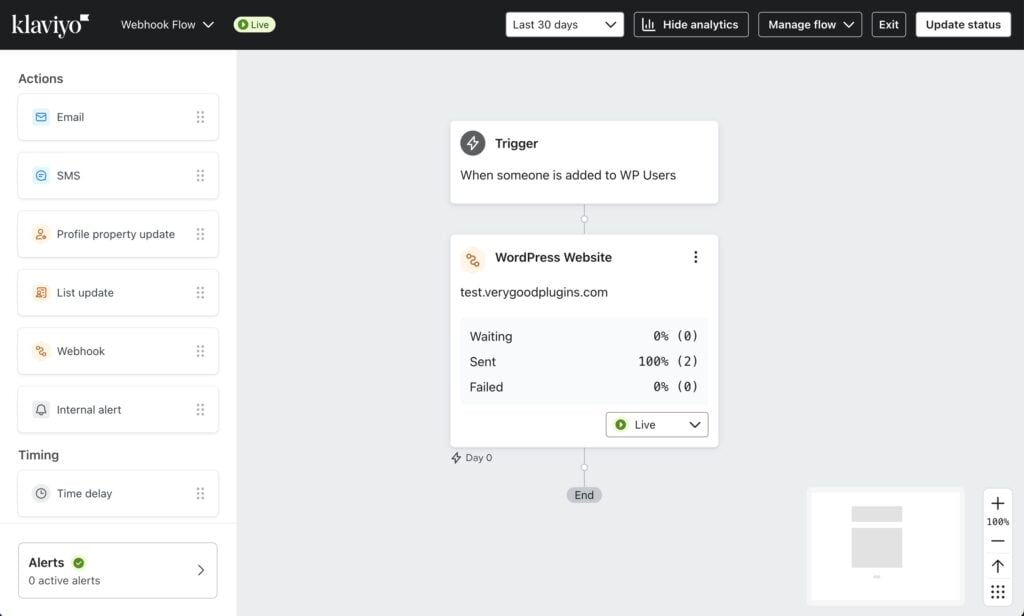
To create a webhook, first create a flow, and then select a trigger. In this example we are triggering the flow for anyone who is added to the WP Users list, the webhook will import a new WordPress user based on the Klaviyo subscriber.
In addition to the trigger when someone is added to a list, you can also trigger flows when someone is added to a segment, or based on a date field in a custom profile property.
After adding your trigger, add a Webhook action from the panel on the left.
The only setting you need to update is the Destination URL. You can find the webhook URL to your site on the General tab in the WP Fusion settings.
You have three options for the wpf_action= part of the webhook URL: update, update_tags and add (explained below).
After configuring the webhook, make sure to set the Status to Live, and publish the Flow.
That’s it! When the subscriber reaches the webhook step in the flow, Klaviyo will notify WP Fusion to load their data back into WordPress.
#Webhook URL parameters
You can format your webhook URL in a few different ways to customize the behavior:
#To update a user’s lists
To update an existing WordPress user’s lists from the contact record, the URL for the webhook should look like the following:
https://mydomain.com/?wpf_action=update_tags&access_key=YOURACCESSKEY
#To update a user’s lists and meta data
To update a user’s lists and pull any new meta data from Klaviyo for that contact, the URL for the webhook should look like the following:
https://mydomain.com/?wpf_action=update&access_key=YOURACCESSKEY
#Create a new user
To create a new user, use the following URL:
https://mydomain.com/?wpf_action=add&access_key=YOURACCESSKEY
You can also specify additional parameters in user creation. For example, to send the user a welcome email containing a link to log in on your site, use the following:
https://mydomain.com/?wpf_action=add&access_key=YOURACCESSKEY&send_notification=true
You can also specify a specific user role to be assigned to the new user. For example, to set the new user to the “customer” role, use the following:
https://mydomain.com/?wpf_action=add&access_key=YOURACCESSKEY&role=customer
Note that you have to have registered a “customer” role on your site for this to work. By default users will be assigned the role of “subscriber”.
The add method will update a user if an existing user already exists. It will not create a duplicate user.
user_login and user_pass on your website, the new users will be given the usernames and passwords stored in their Klaviyo contact record.#User passwords
New user accounts will be created with an automatically generated password. If you’d like to use this password in your email marketing, you can send the password back to Klaviyo after it has been generated.
In the Webhooks section of the General settings tab, check the box for Return Password, and select a field in Klaviyo where the password should be stored.
After a new user is created, their automatically generated password will now be saved back to their contact record, and you can use a merge field to include it in an email. The username will be the contact’s email address.


