#Overview
You can use webhooks in HubSpot to send data back to your WordPress site using WP Fusion. Using these webhooks, you can create new users on your WordPress site, or update existing users’ meta data and lists.
#Webhooks in Workflows
Workflows offer a visual way to configure your webhooks, and allow for custom triggers such as list assignment changes. Workflows are available in the following HubSpot editions:
- Marketing Hub Professional
- Marketing Hub Enterprise
- Sales Hub Enterprise
Webhooks are managed in HubSpot by going to Automation » Workflows from the top navigation menu.
For this tutorial, we’ll be showing you how to create a new WordPress user when a contact is added to a specific HubSpot list. See below for additional options when configuring the workflow action.
First create a new workflow, and then add an enrollment trigger. Here we’ve set workflow to run whenever someone is added to the static list “Membership Trial.”

Click the + symbol to add a new action to the workflow, and from the Actions panel, select Update WordPress.
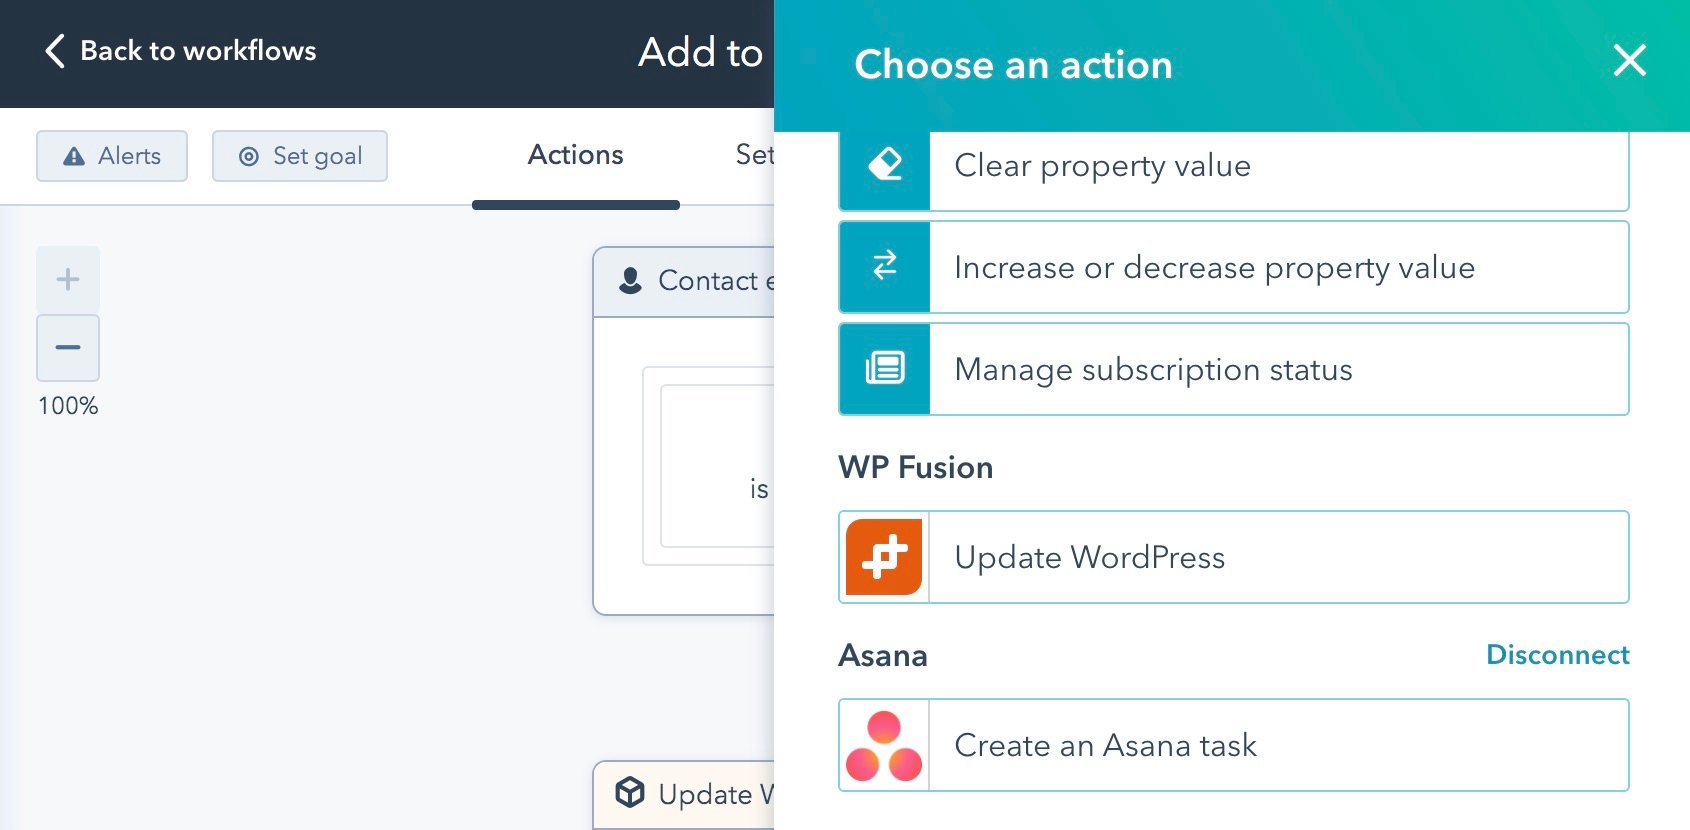
A panel will appear where you can configure the webhook to your WordPress site.
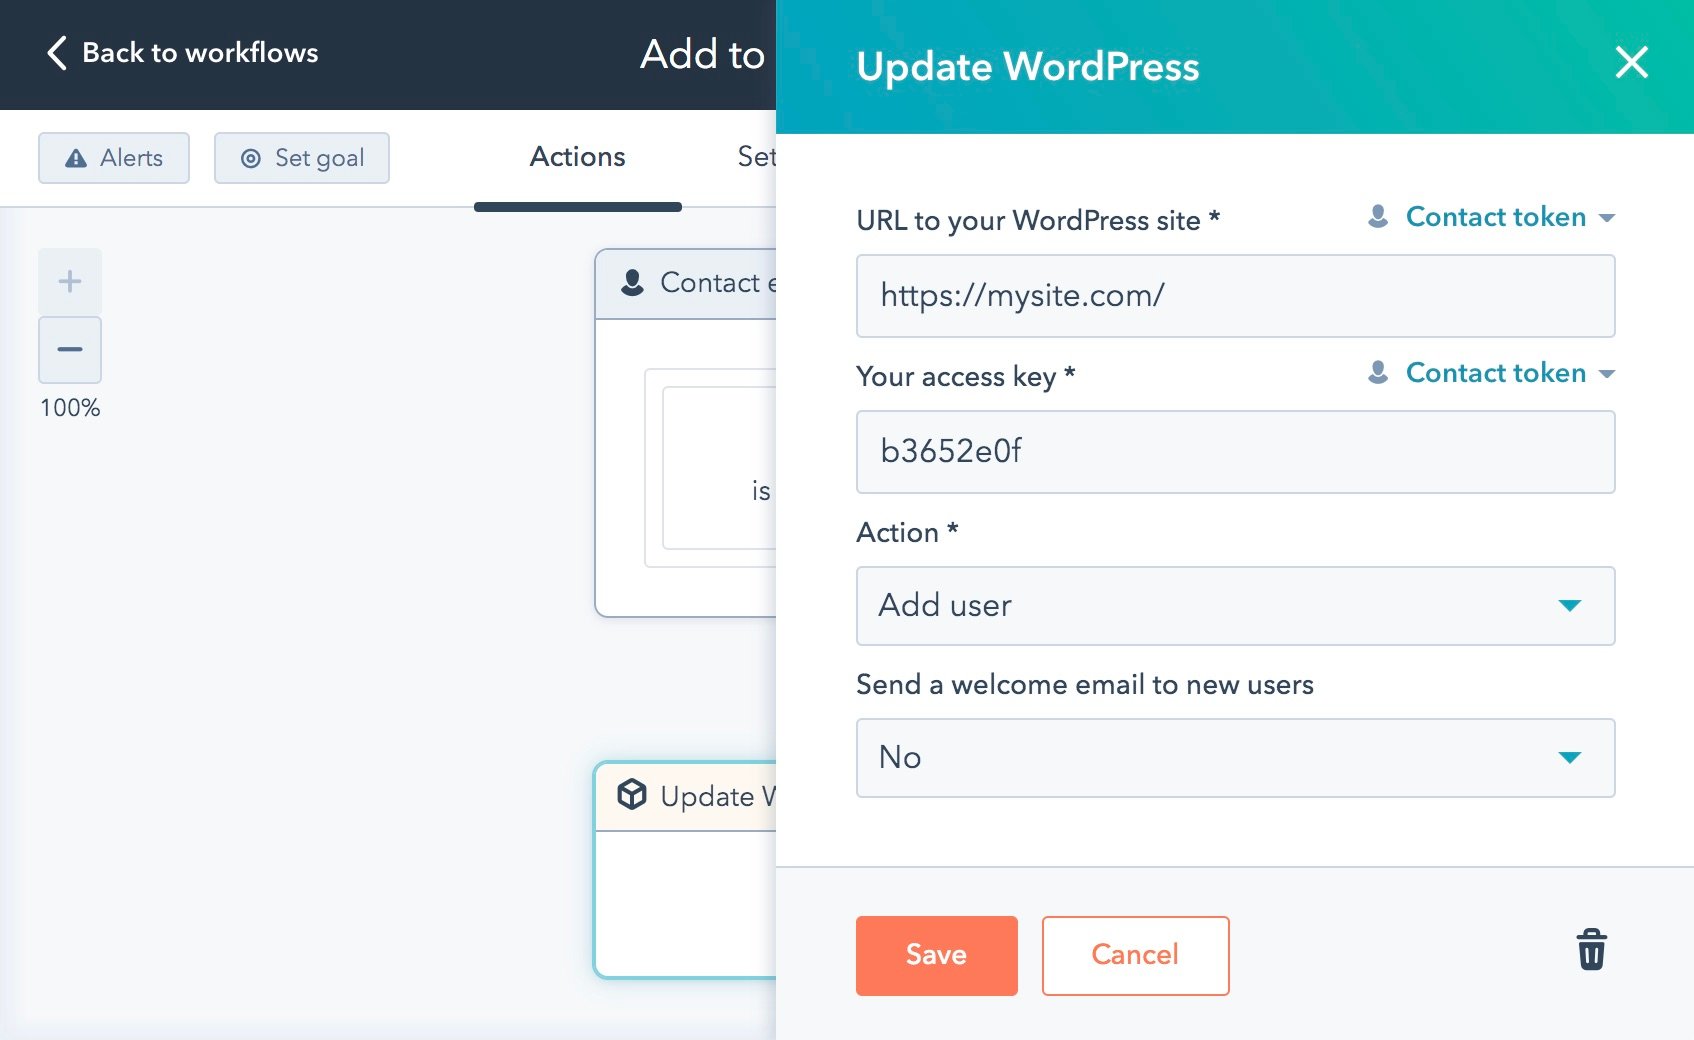
In this example, we’ve set the action to Add user, and disabled the welcome email that is sent to new users.
Now, every time a contact is added to this list, a new WordPress user will be created based on their contact data in HubSpot. If the user already exists on the site, they will be updated (no duplicate users will be created).
The available options in the workflow action are:
URL to your WordPress site: This is the URL to the site where you have WP Fusion installed.
Your access key: This is the access key from the bottom of the General tab in the WP Fusion settings. This helps to secure your webhook URL.
Action: There are three options:
- Update user’s lists: If a user already exists on your site for this contact, their lists will be loaded from their HubSpot contact record.
- Update user’s metadata lists: If a user already exists on your site for this contact, their lists and custom field values will be loaded from their HubSpot contact record.
- Add user: This will import the contact as a new WordPress user. If a user already exists with that contact ID, their lists and custom field values will be loaded from HubSpot.
Send a welcome email to new users: If your webhook action is set to Add, you can choose whether or not to send a welcome email to new users. If you select Yes, the default WordPress welcome email will be sent to any newly imported users, containing a link to reset their password.
&role= parameter.user_login and user_pass on your website, the new users will be given the usernames and passwords stored in their HubSpot contact record.#Example – syncing changed email addresses
As an example, to sync changes in a contact’s email address (or any other custom field) back to WordPress automatically, choose Contact properties for the trigger filter type, and then choose Email and is known.
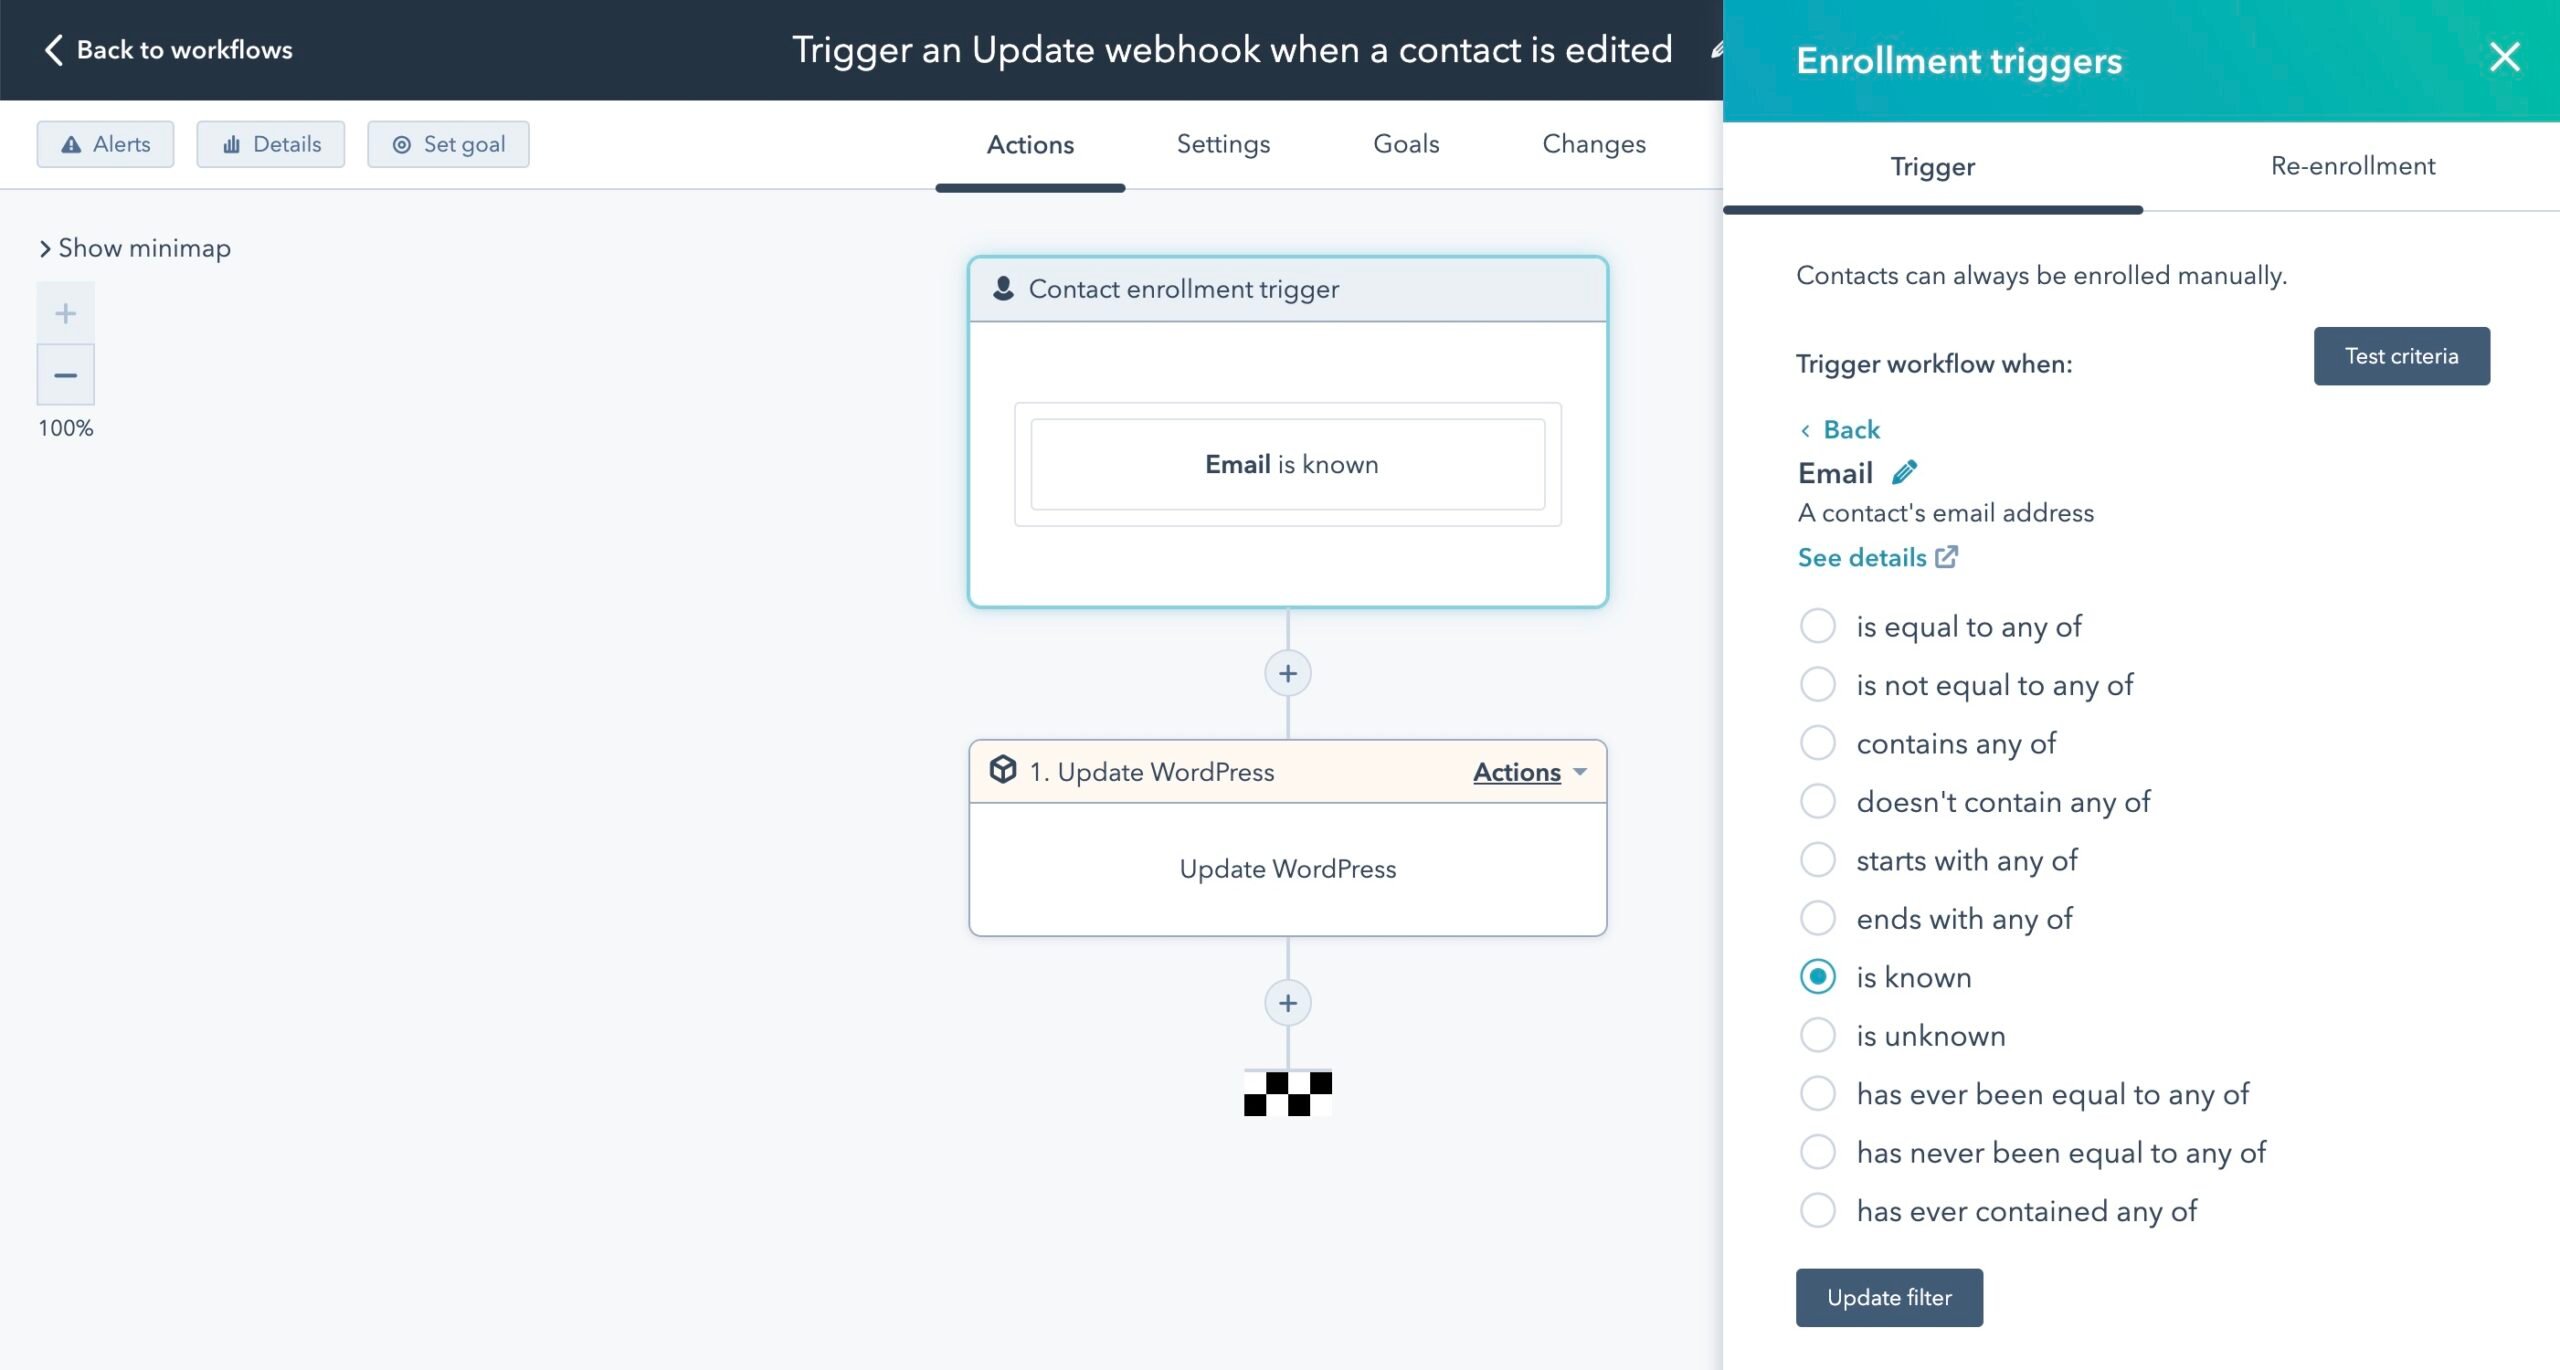
Then click on the Re-enrollment tab, and select Email is known as a re-enrollment trigger.
 Finally, add an Update WordPress action following the guide above, and select Update user’s metadata lists as the webhook action.
Now, any time a contact’s email address is updated, the workflow will be triggered and the new address will be synced back to WordPress automatically.
For more information on re-enrollment triggers and the is known condition, see the HubSpot documentation.
#Webhooks in private apps
Another option for configuring webhooks with WP Fusion is to use a private app. Private apps are supported on all HubSpot plans, though they are less flexible than workflows since they can only be triggered when a contact is created or updated (whereas workflows can use conditional logic, and list-based triggers).
To set up a private app and configure webhooks, navigate to Settings » Integrations » Private Apps and create a new private app.

Give your app a descriptive name, and click on the Scopes tab to add scopes.

The only required scope for the webhook is crm.objects.contacts.read, you can select it from the Scopes list under the CRM header. Then click the Webhooks tab to configure your webhook.

Enter the URL to your site, following the URL parameters guide in the next section. In this example we are using &wpf_action=update to update the corresponding WordPress user whenever a contact’s properties are updated in HubSpot.
Click Create subscription to select the triggers for the webhook.

For the object type, select Contact.
For Listen for which events? you can either choose Contact created or Property changed. In this example we’ve chosen Property changed.
For Which properties? select the property updates you’d like to trigger the webhook. In this case we will trigger an update in WordPress when the contact’s address, “checkbox_field”, or “membership_level” are changed.
Save and publish the private app, and then proceed to edit one of the selected properties on one of your contacts.

Under Logs » Webhooks in the private app settings, you should see the outgoing webhooks triggered by your contact property updates.
In the WP Fusion logs on your WordPress site you will see the incoming webhook, as well as the updated data that was loaded from HubSpot.

That’s it! Contact property updates in HubSpot will now sync back to WordPress automatically 🎉
#Webhook URL parameters
You can format your webhook URL in a few different ways to customize the behavior. Your access key can be found in the Webhooks settings section on the General tab in the WP Fusion settings.
#To update a user’s lists
To update an existing WordPress user’s lists from the contact record, the URL for the webhook should look like the following:
https://mydomain.com/?wpf_action=update_tags&access_key=YOURACCESSKEY
#To update a user’s lists and meta data
To update a user’s lists and pull any new meta data from HubSpot for that contact, the URL for the webhook should look like the following:
https://mydomain.com/?wpf_action=update&access_key=YOURACCESSKEY
#Create a new user
To create a new user, use the following URL:
https://mydomain.com/?wpf_action=add&access_key=YOURACCESSKEY
You can also specify additional parameters in user creation. For example, to send the user a welcome email containing a link to log in on your site, use the following:
https://mydomain.com/?wpf_action=add&access_key=YOURACCESSKEY&send_notification=true
You can also specify a specific user role to be assigned to the new user. For example, to set the new user to the “customer” role, use the following:
https://mydomain.com/?wpf_action=add&access_key=YOURACCESSKEY&role=customer
Note that you have to have registered a “customer” role on your site for this to work. By default users will be assigned the role of “subscriber”.
The add method will update a user if an existing user already exists. It will not create a duplicate user.
user_login and user_pass on your website, the new users will be given the usernames and passwords stored in their HubSpot contact record.#User passwords
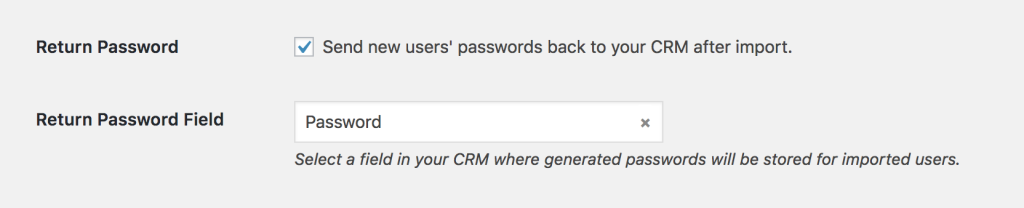
New user accounts will be created with an automatically generated password. If you’d like to use this password in your email marketing, you can send the password back to HubSpot after it has been generated.
In the Webhooks section of the General settings tab, check the box for Return Password, and select a field in HubSpot where the password should be stored.
After a new user is created, their automatically generated password will now be saved back to their contact record, and you can use a merge field to include it in an email. The username will be the contact’s email address.
