How to Connect Capsule to WordPress


In this video, you will learn how to install WP Fusion and set up a direct connection to your Capsule account.

To get started install and activate the plugin, then navigate to settings -> WP Fusion.

From the ‘Select Your CRM List’ choose ‘Capsule’

To enable the connection to Capsule we need to locate your API key.

This can be found by logging into your account and clickin on the profile link in the top right hand corner.

Choose ‘My Preferences’
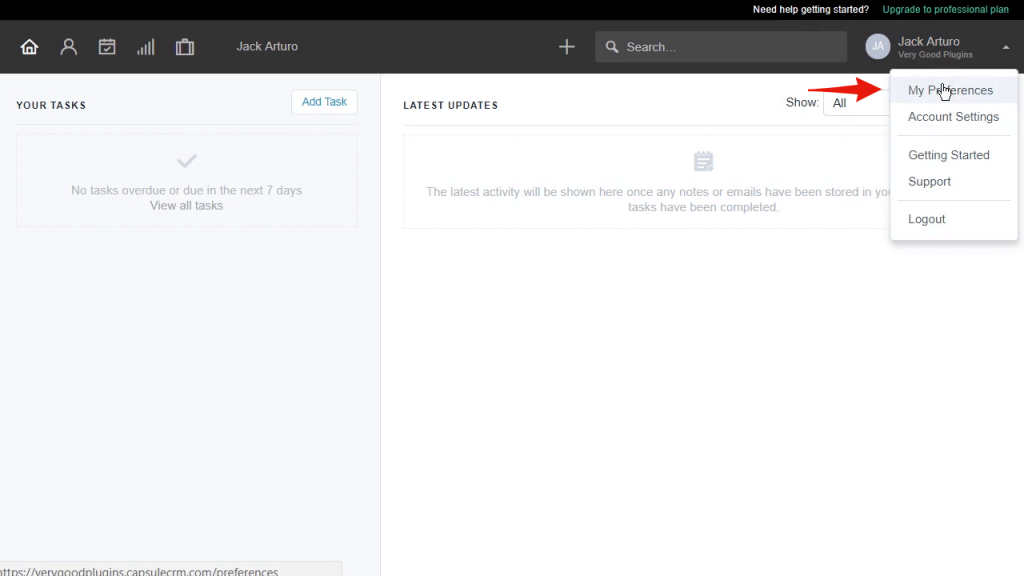
A webpage interface crafted with WordPress displays a task management tool. In the top right corner, a dropdown menu featuring options like My Preferences and Logout is open. The page shows no tasks under “Your Tasks” and “Latest Updates,” inviting you to Connect Capsule for streamlined productivity.

And click on ‘API Authentication Tokens’
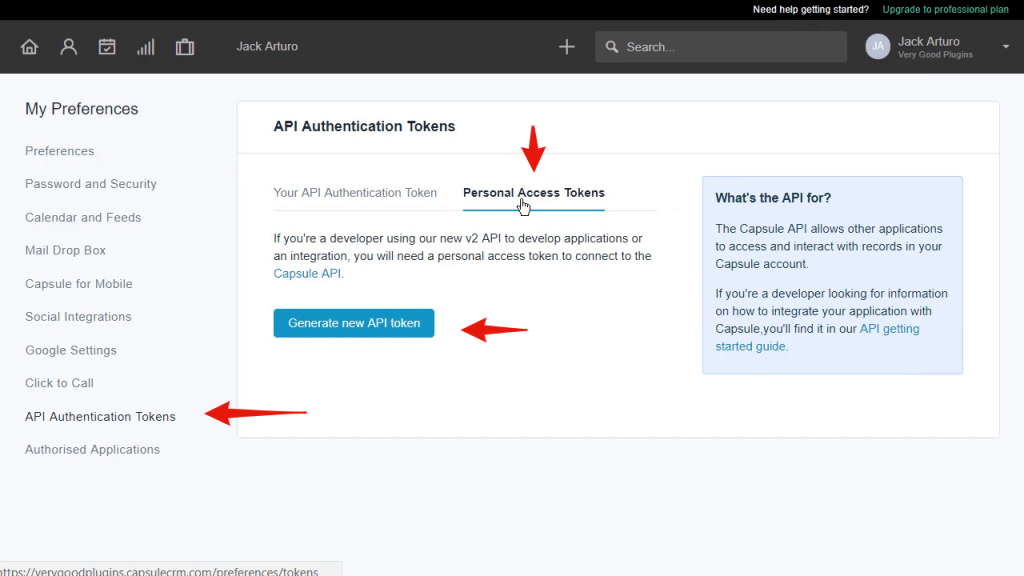
Screenshot of a webpage for managing API authentication tokens. It features options to generate a new API token via a blue button. Arrows point to API Authentication Tokens on the menu and the Personal Access Tokens tab, essential for Connect Capsule integration. A sidebar lists various preferences.

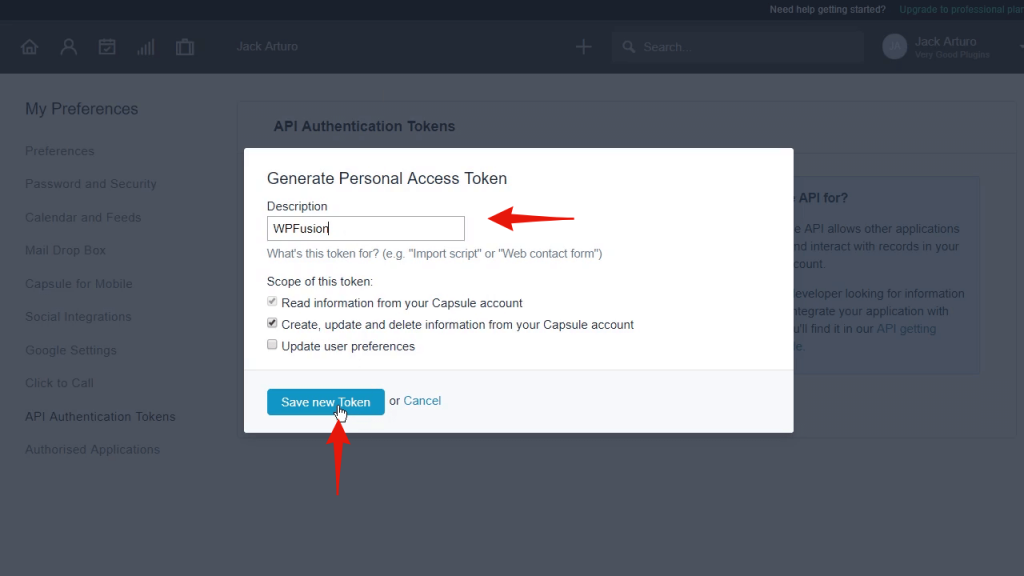
Screenshot of a WordPress webpage showing a dialog box for generating a personal access token. It includes fields for description and token scope, with options to save or cancel. A red arrow highlights the Save New Token button, ensuring easy connection to your Capsule project.

Copy the API token and paste into the appropriate field in WP Fusion.

Then click on ‘Connect’.
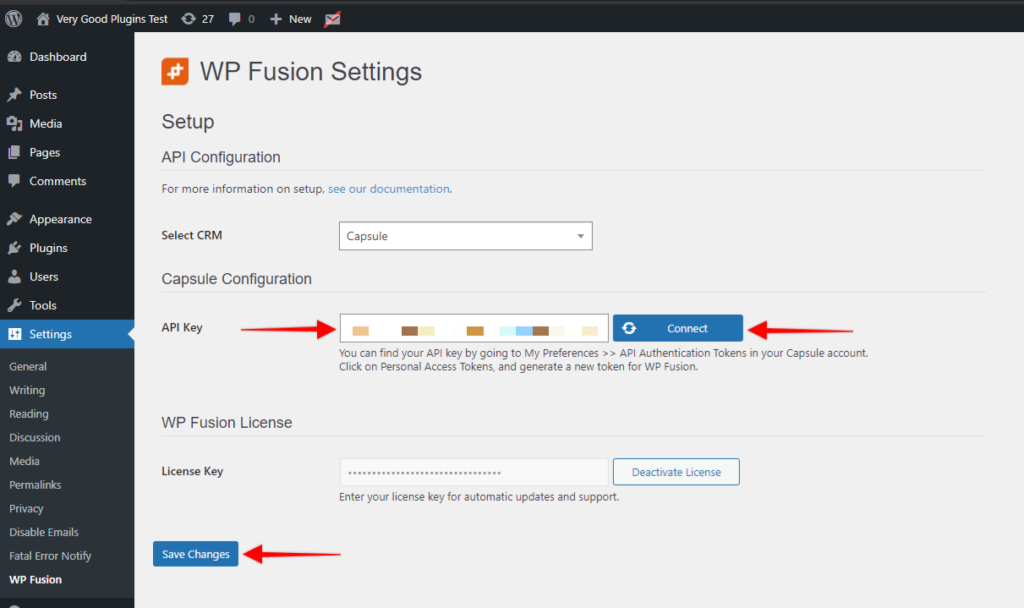
Screenshot of WP Fusion CRM integration settings page showing API configuration. It includes options to select CRM, enter API key, and connect. A blue Connect button and a Save Changes button are highlighted with red arrows.

WP Fusion will now establish a direct connection to your Capsule account and import your tags and custom fields.

To finalize the process click on ‘Save Changes’.

Was this helpful?