How to Connect Intercom to WordPress

In this video, you will learn how to install WP Fusion and set up a direct connection to your Intercom account.

To get started, install and activate the WP Fusion plugin, then navigate to Settings -> WP Fusion. From the ‘Select Your CRM’ dropdown choose ‘Intercom’. To enable the connection to Intercom we need to locate your Access Token.

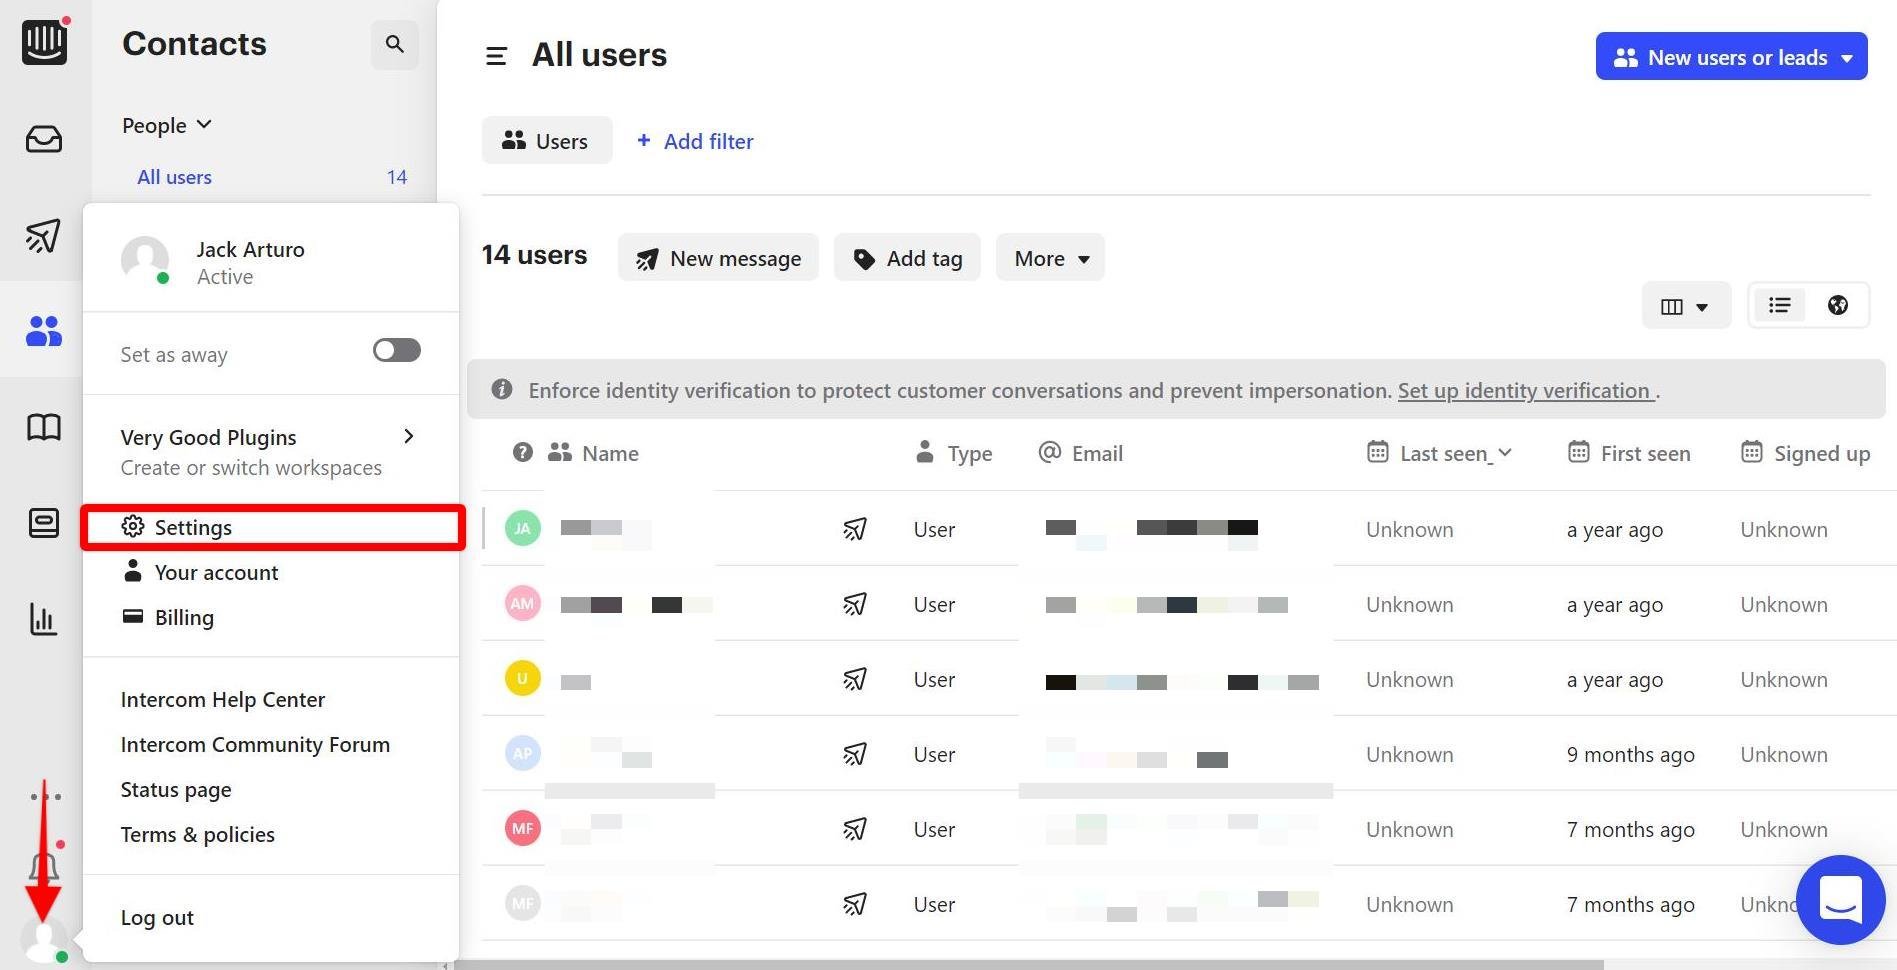
This can be found by logging into your Intercom account and clicking on profile icon in the bottom left corner and choosing ‘Settings’.

Screenshot of a contact management dashboard with WP Fusion CRM integration, displaying a list of users with names blurred. A menu on the left highlights the Settings option. Options include adding users, messaging, and managing tags. User details include name, type, and email.

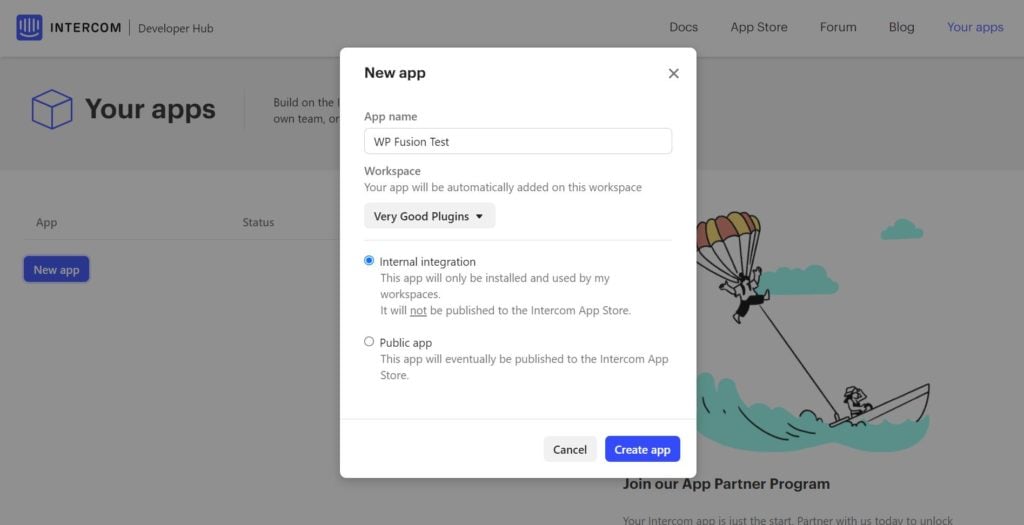
And go to Developers » Developers Hub and create a new App.

Screenshot of a New app creation window on Intercom for WP Fusion CRM integration. The window shows fields for App name and Workspace, with options for Internal integration and Public app. A Create app button is at the bottom. An illustration of a person parasailing is on the right.

Inside your App, go to Configure » Authentication » Access Token

Screenshot of the Intercom Developer Hub page showing the Authentication section, perfect for those exploring WP Fusion CRM integration. It includes an Access token labeled Very Good Plugins with a partially obscured token code below a yellow caution note. An OAuth section follows.

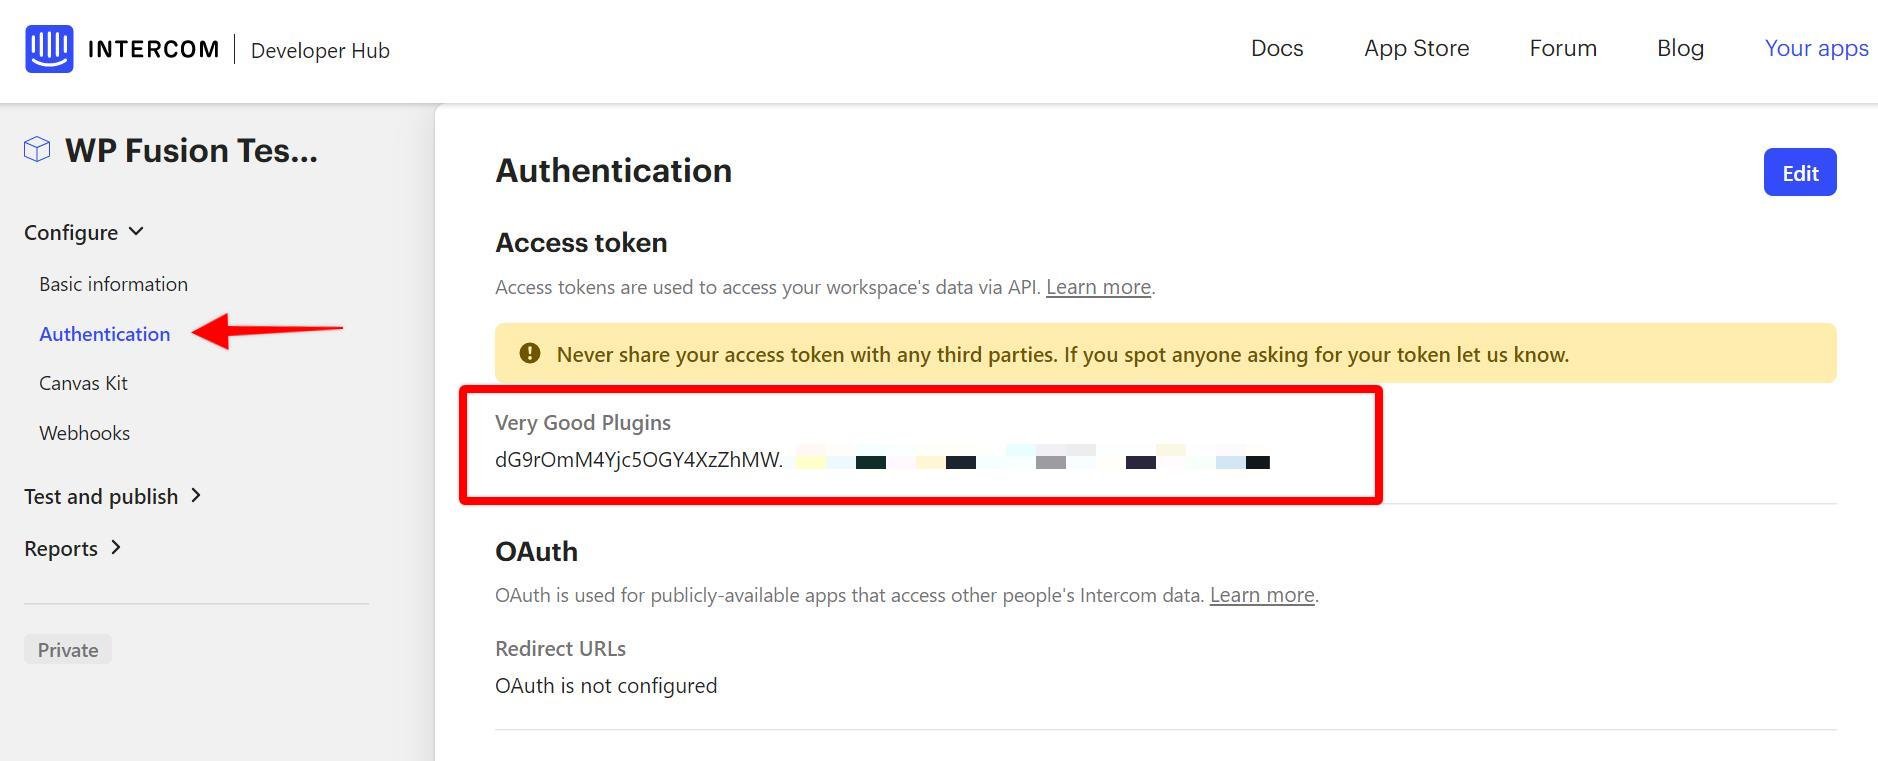
Copy the Access Token and paste it into the appropriate field in WP Fusion.

Screenshot of WP Fusion Settings interface featuring the CRM integration options. Select CRM is set to Intercom, with a blurred Access Token field highlighted by a red arrow and a Connect button beside it. Below, find the field for your License Key.
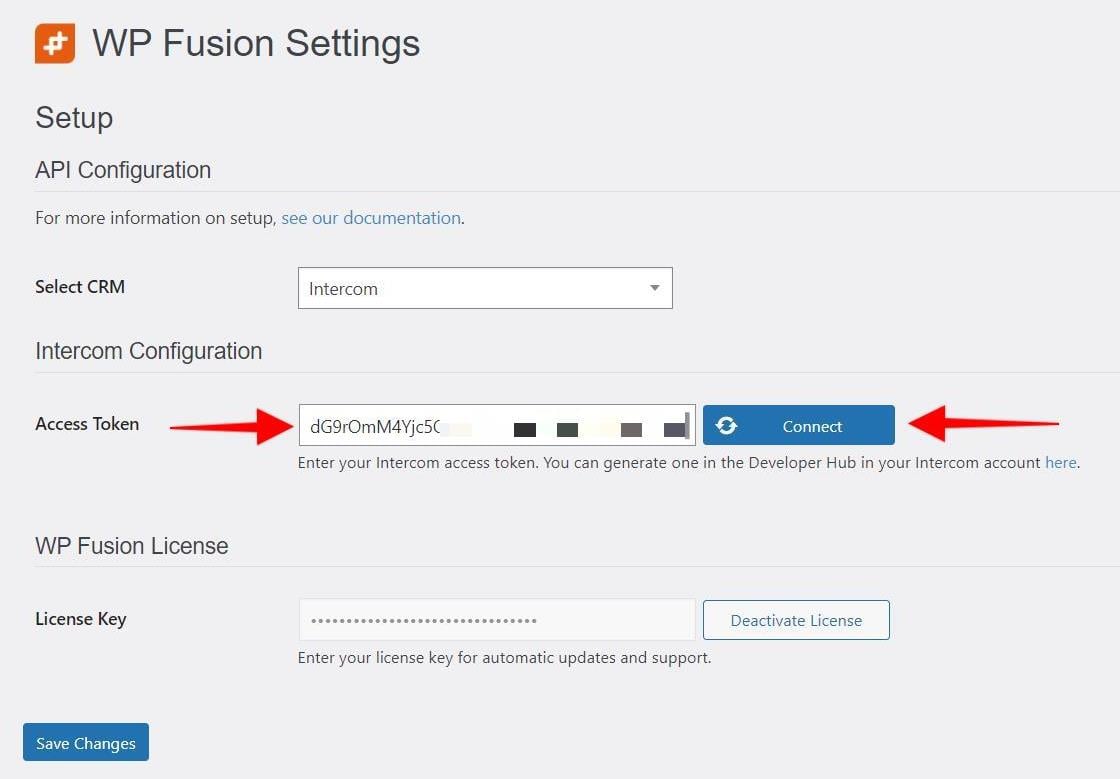
Then, click on ‘Connect’.

WP Fusion will now establish a direct connection to your Intercom account and import your tags and custom fields.

To finalize the process click on ‘Save Changes’.

Was this helpful?