
In this video, you will learn how to install WP Fusion and set up a direct connection to your Intercom account.
To get started install and activate the plugin, then navigate to settings -> WP Fusion.
From the ‘Select Your CRM’ dropdown choose ‘Intercom’.
To enable the connection we need to locate your Access Token.
This can be found by clicking this link and logging into your Intercom account.
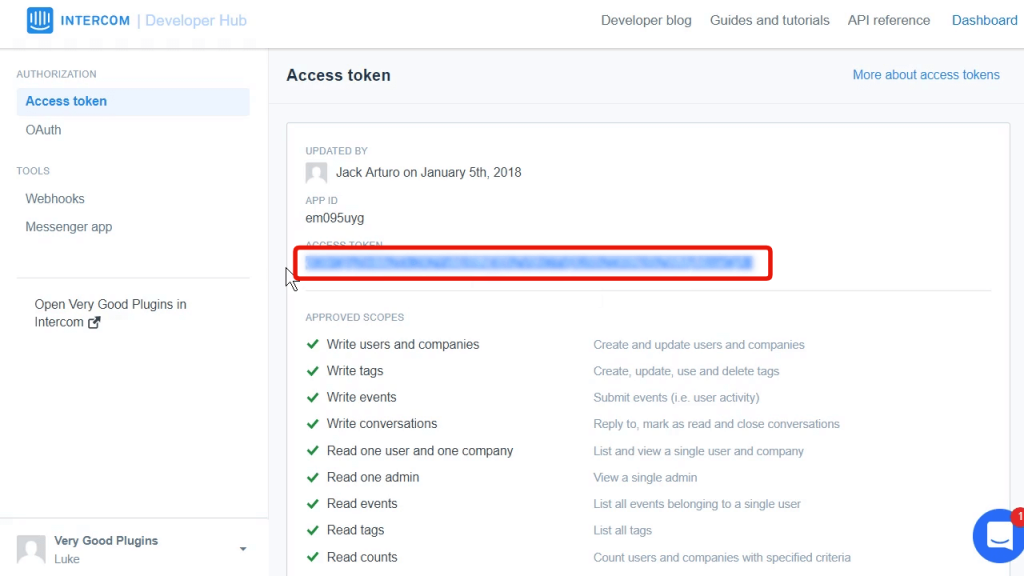
Copy the access token and paste it into the appropriate field in WP Fusion.
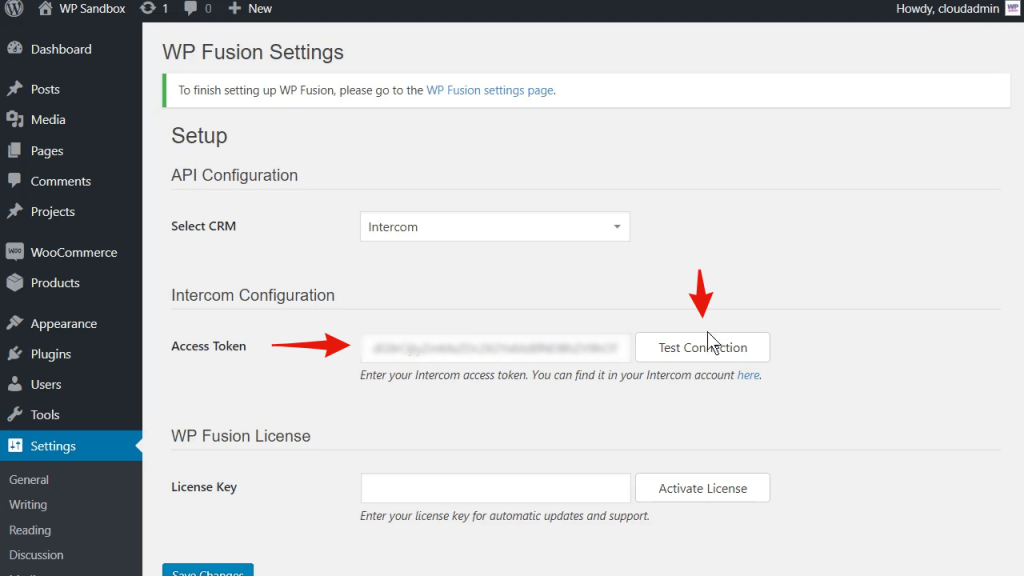
Then click on ‘Test Connection’.
WP Fusion will now establish a direct connection to your Intercom account and import your tags and custom fields.
To finalize the process click on ‘Save Changes’.
Was this helpful?
Let us know if you liked the post. That’s the only way we can improve.