#Overview
In this guide, you will learn how to install WP Fusion and set up a direct connection to integrate your WordPress website with your FluentCRM (REST API) account.
To get started install and activate the WP Fusion plugin, then navigate to Settings » WP Fusion.
From the ‘Select Your CRM’ list choose ‘FluentCRM (REST API)’.
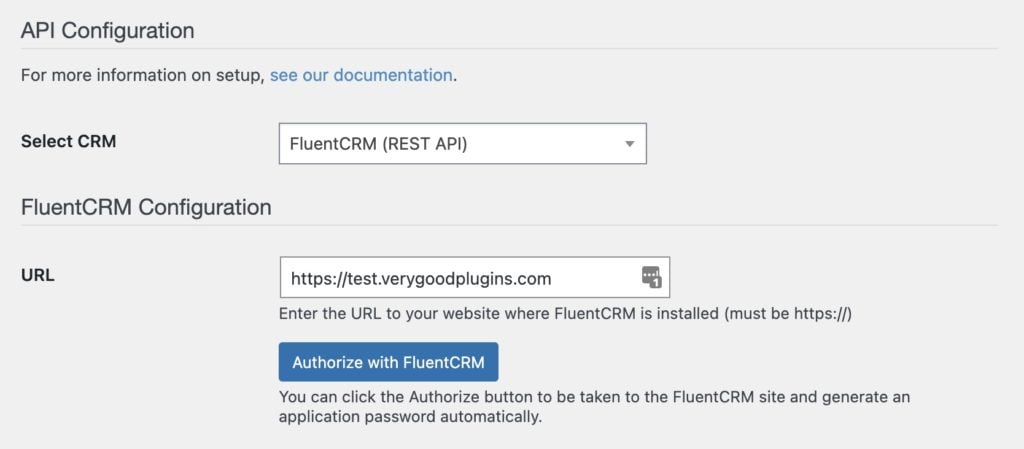
Click ‘Authorize with FluentCRM’ to initialize the connection.
Note: If you are having trouble connecting to the REST API, first make sure there is no snippet, plugin, or firewall rule that has turned off application passwords or blocked the REST API.
You can also manually generate an application password for any user via their admin user profile.
Once the connection is completed, click Save Changes below to save the changes.
That’s it! Your site is connected, and new WordPress users and customers will automatically be synced with FluentCRM in real time.
- For exporting historical data from before you installed WP Fusion, check out the Exporting Data guide.
- For mapping and syncing additional custom fields with FluentCRM, see the Syncing Contact Fields guide.
- For using FluentCRM tags to track activity in WordPress and personalize the user experience, check out the Working with Tags and Restricting Access to Content guides.
#Tag format
There is an option when setting up WP Fusion with FluentCRM over the REST API to choose the Tag Format, either “IDs” or “Slugs”.
This is due to a quirk in the early versions of the FluentCRM API. When we initially developed the integration, it was not possible to use tag IDs over the API, and so WP Fusion used the tag slugs (a slug is an internal text value for a tag, like my-tag-name).
For all new installs of WP Fusion, we recommend using Tag IDs for the best compatibility, as well as to allow easily migrating FluentCRM from the same site to a subdomain.
However, for existing installs, it’s recommended to keep the tags stored as slugs, otherwise you will need to set up your access rules, products, and other tag-based settings again from scratch.
There is no difference between IDs and slugs in terms of features or performance, but we are encouraging IDs for new sites to ensure consistency with our other CRM integrations.
#Webhooks
Using webhooks in FluentCRM automations, you can automatically sync tag changes and contact updates from FluentCRM back to WordPress. You can even import new users based on FluentCRM contacts.
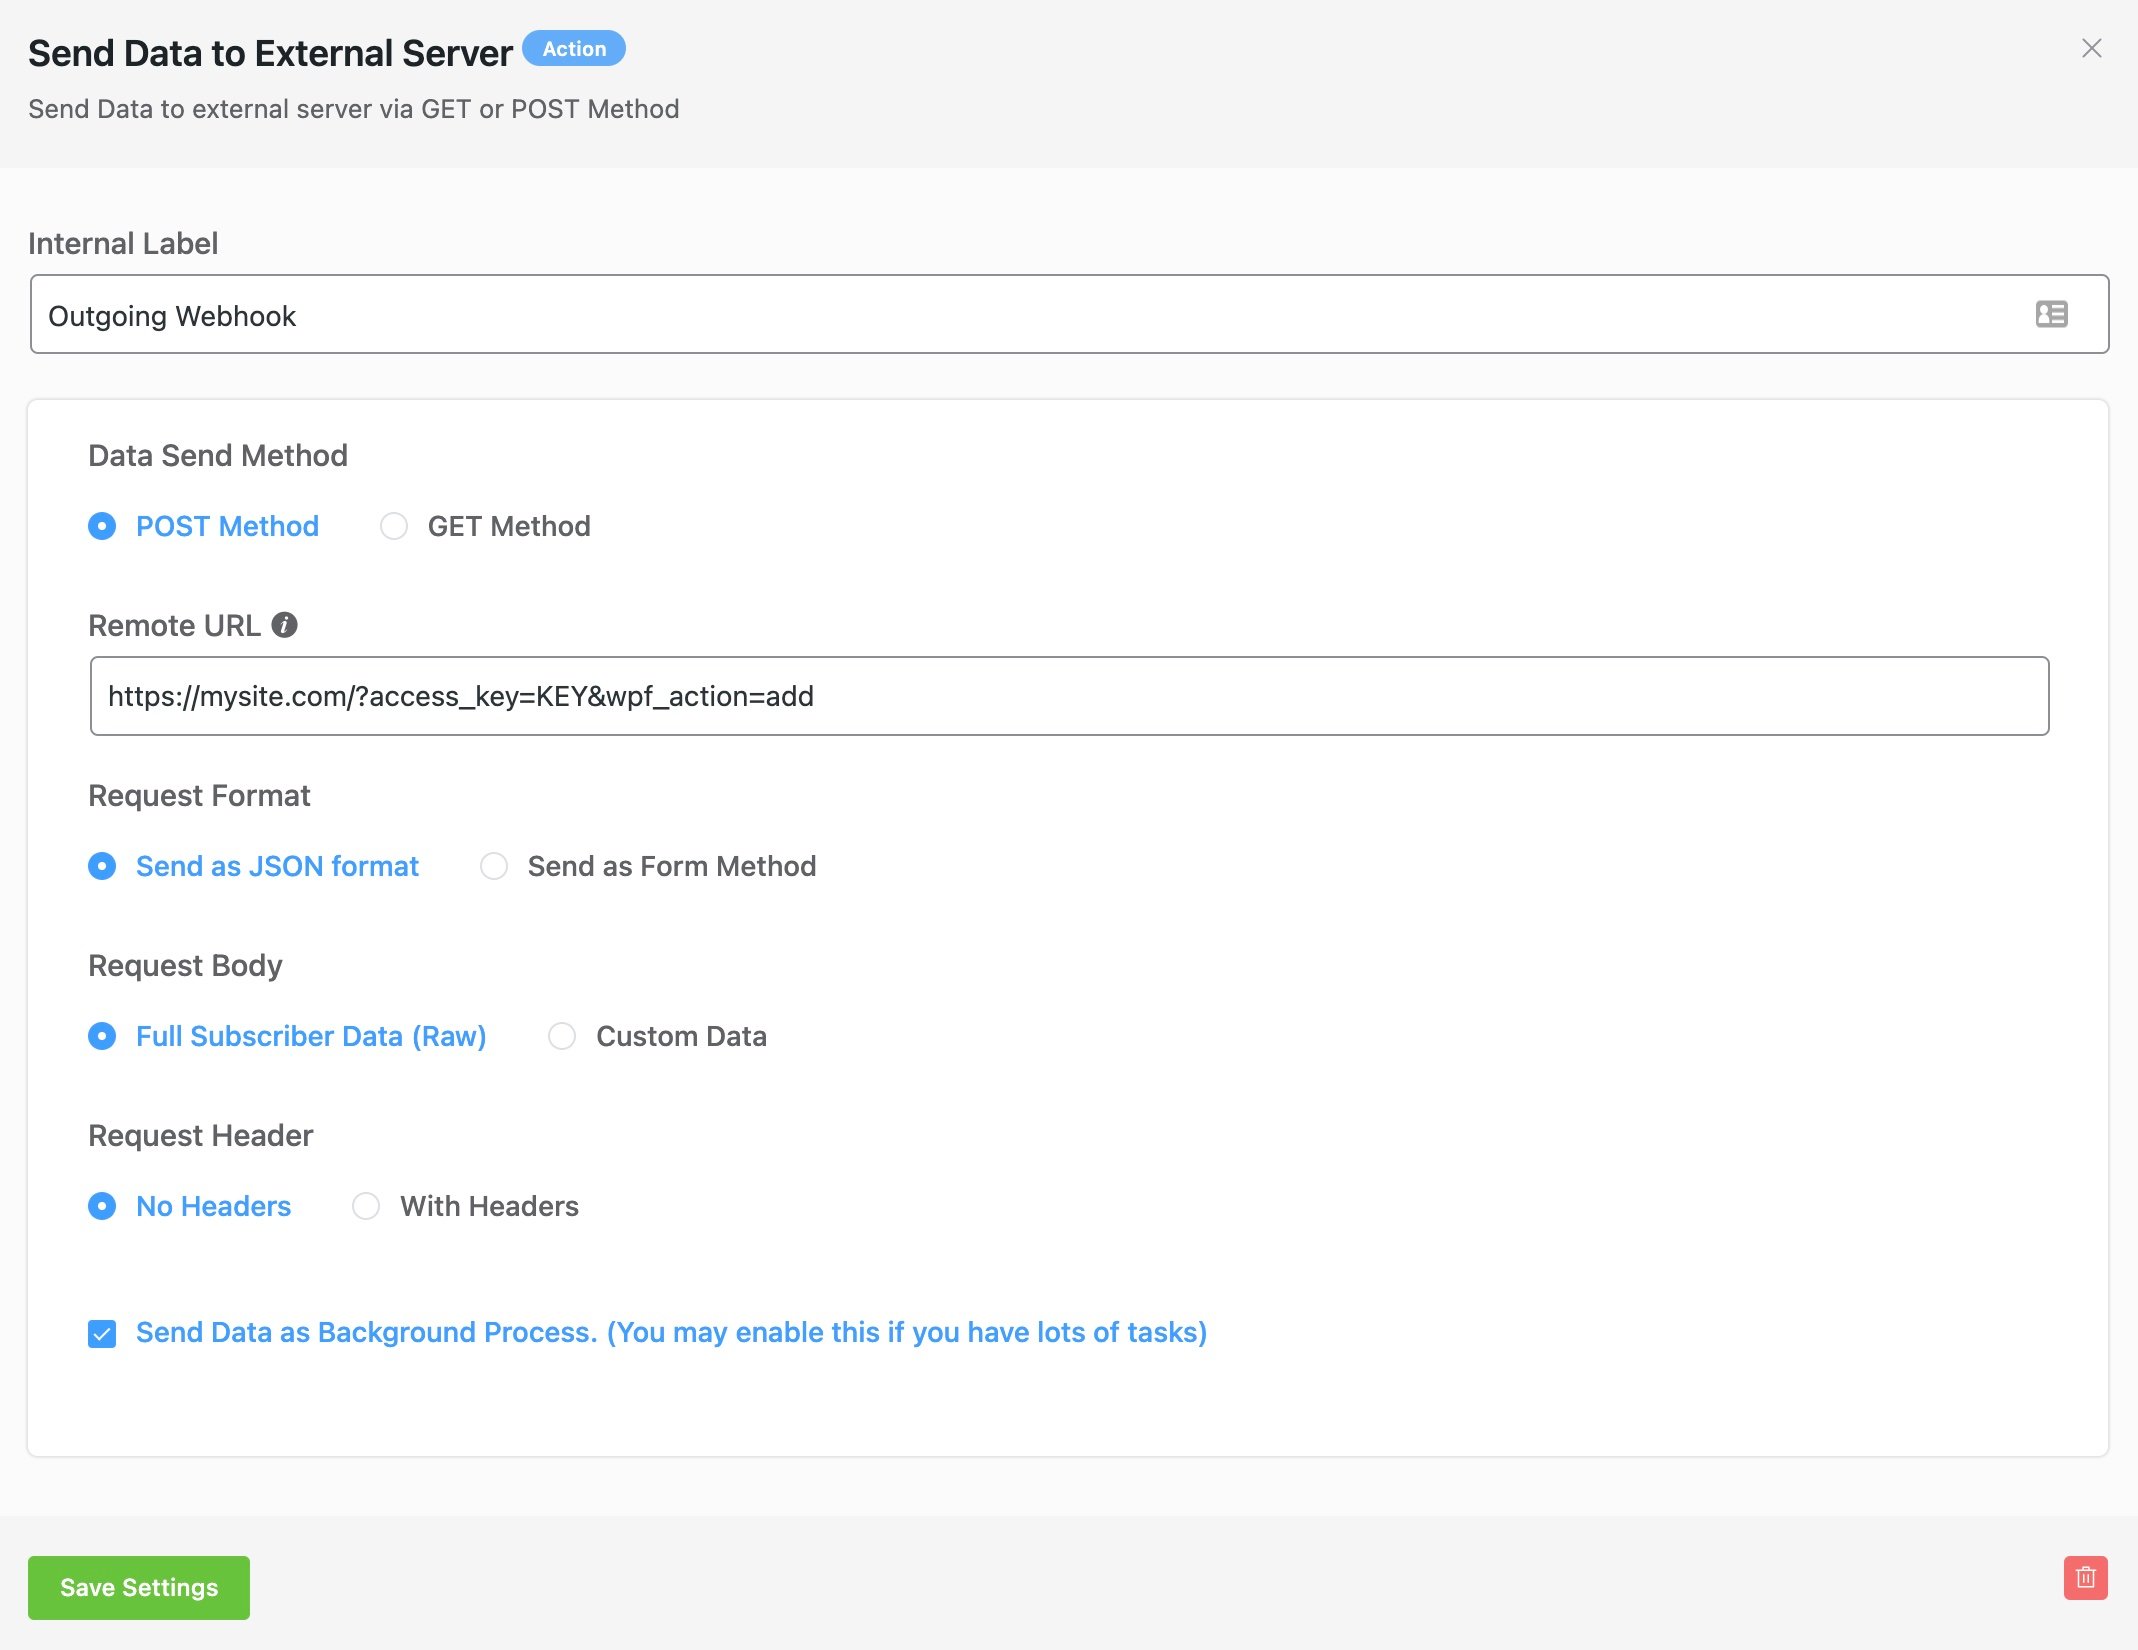
For more information, see the documentation on FluentCRM Webhooks.
#Event Tracking
WP Fusion’s Event Tracking Addon can send events in real time from supported plugins to Encharge. For more information, see the documentation.