#Overview
In this video, you will learn how to install WP Fusion and set up a direct connection to your Customer.io account.
To get started install and activate the WP Fusion plugin, then navigate to Settings » WP Fusion.
From the ‘Select Your CRM’ list choose ‘Customer.io’.
Next, we will need to locate three pieces of information to initiate the connection. The ‘API Key’, ‘Tracking Site ID’, and the ‘Tracking API Key’.
To find these pieces of information, log in to your Customer.io account.
Navigate to Settings » Account Settings » API Credentials.
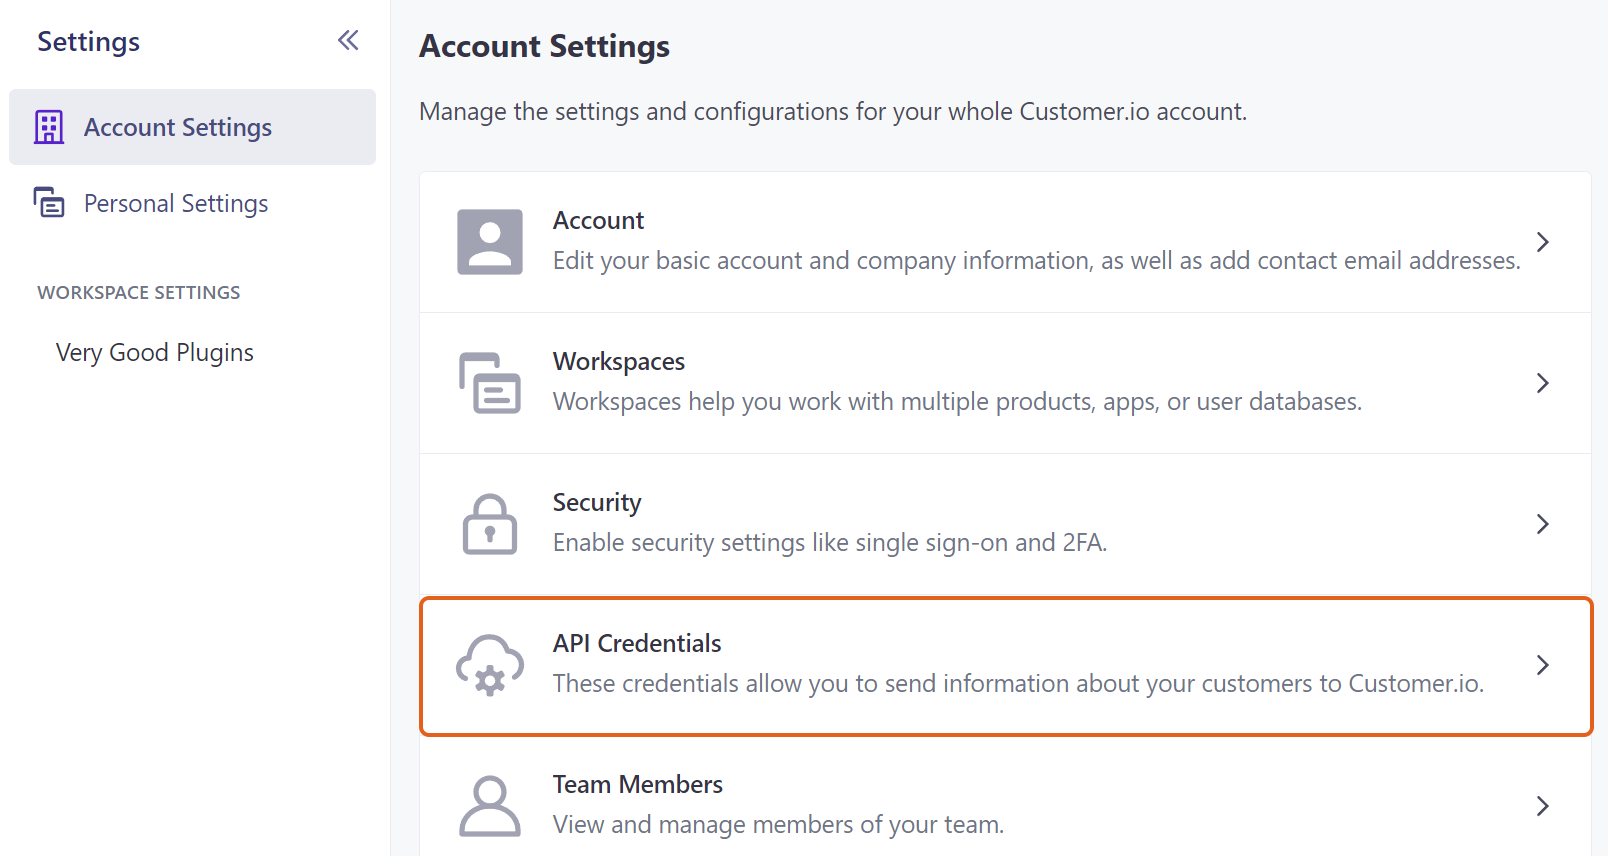
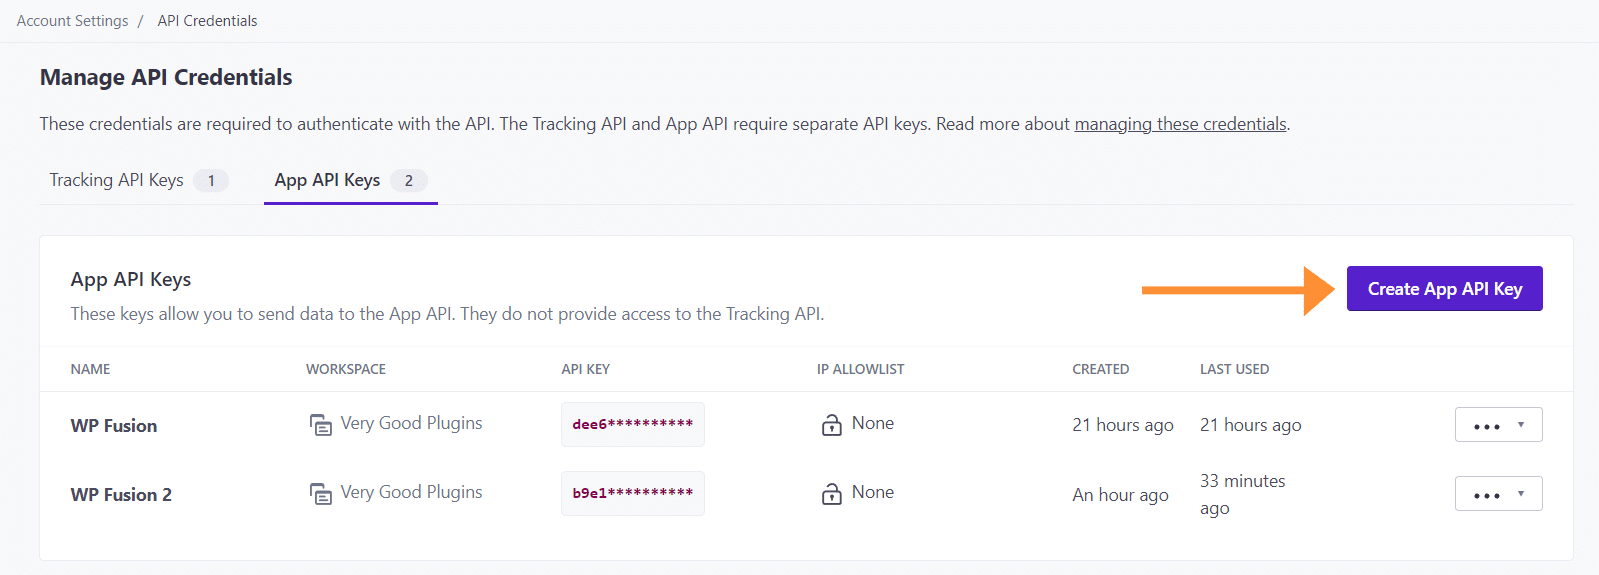
For the ‘API Key’, go to the ‘App API Keys‘ tab. Click ‘Create App API Key’, copy the ‘API Key’, and paste it into the appropriate field in WP Fusion.
And for the ‘Tracking Site ID’, and ‘Tracking API Key’, go to the ‘Tracking API Keys‘ tab. Click ‘Create Tracking API Key’, copy the ‘Site ID’ and ‘API Key, and paste it into the appropriate fields in WP Fusion.
![]()
Finally, click on ‘Connect’.
WP Fusion will now establish a direct connection to your Customer.io account and import your tags and custom fields.
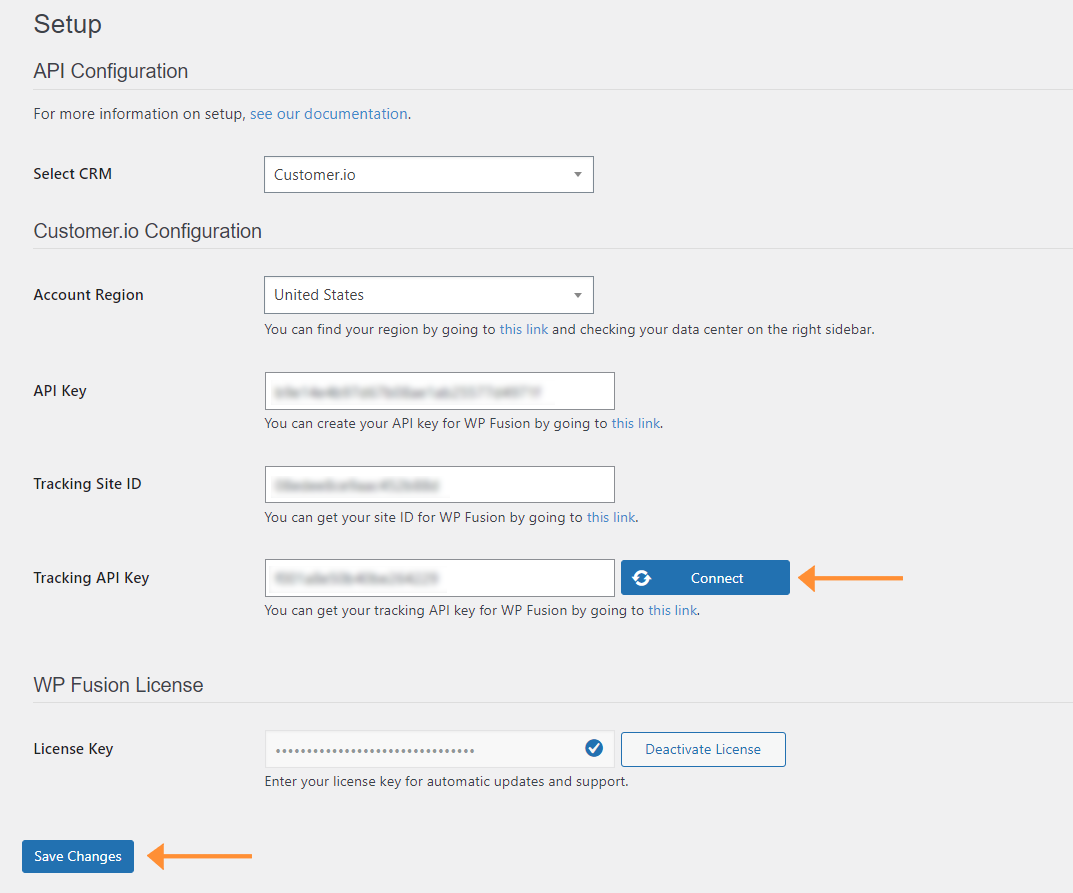
To finalize the process click on ‘Save Changes’.
#Custom fields
Custom properties in Customer.io can be managed directly in WP Fusion.
When configuring your field mappings via the Contact Fields settings, simply type in the desired property name, and click the prompt to (add new).
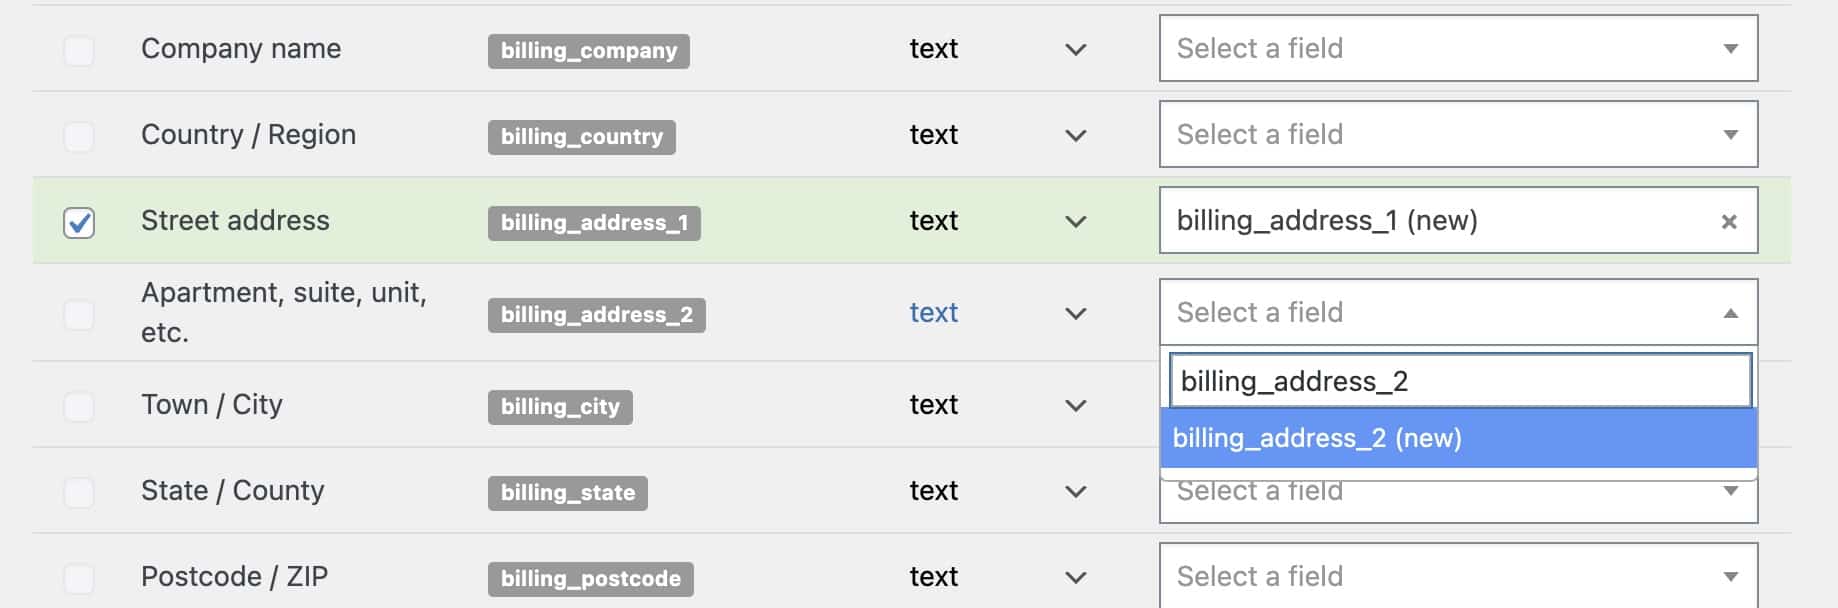
The data will be synced automatically to the custom property.